
The Posts section monitors posts and captures everyone who reacts or comments, adding each one to your People view. This article covers what Pulse tracks automatically, how the different tabs are organised, and how to add and manage the posts you track.
What gets tracked automatically
From the moment you sign up, Pulse tracks posts from three sources without any setup:
- Your own posts.
- Your team's posts, from every connected teammate.
- Your company page posts, if you are monitoring your company page.
New posts from these sources start tracking on their own, so the section fills up as your team publishes.
The tabs: what each view shows
The tabs at the top of the Posts section let you focus on posts from one source at a time.
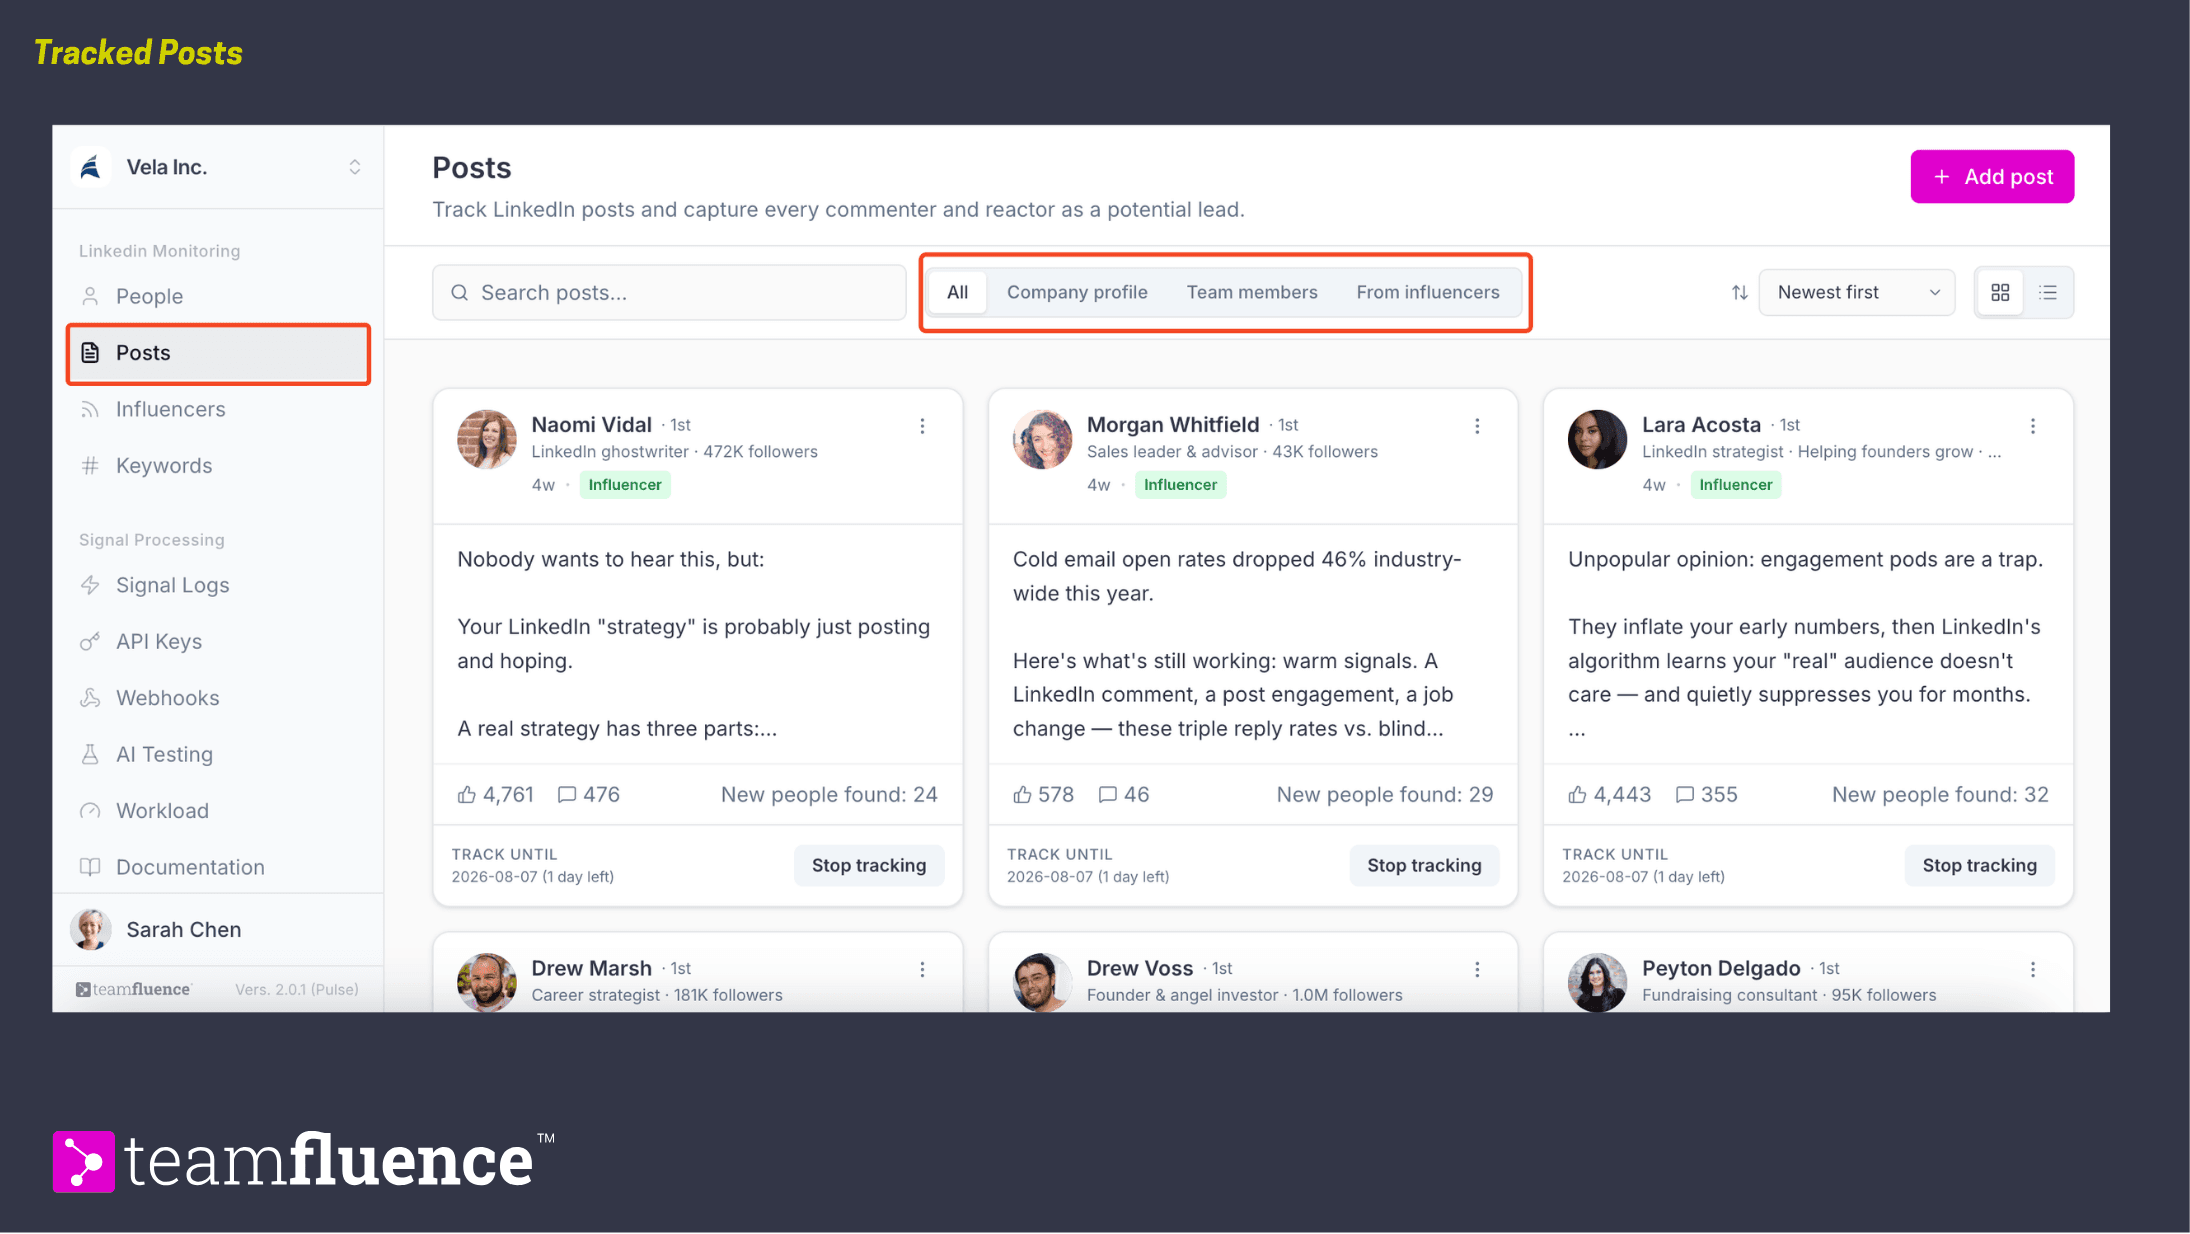
- All. Every post you are tracking, both the ones being monitored right now and ones you have tracked in the past. This is your complete history.
- Company profile. Only the posts published on your company page. Paid ads will also be added here.
- Team members. Only the posts from you and your connected teammates.
- From influencers. Only the posts from the influencers and keywords you follow. You manage which influencers posts you track in the Influencers section. The same aplies to Keywords.
Sort and view options
Two controls change how the list is presented, without changing which posts are tracked.
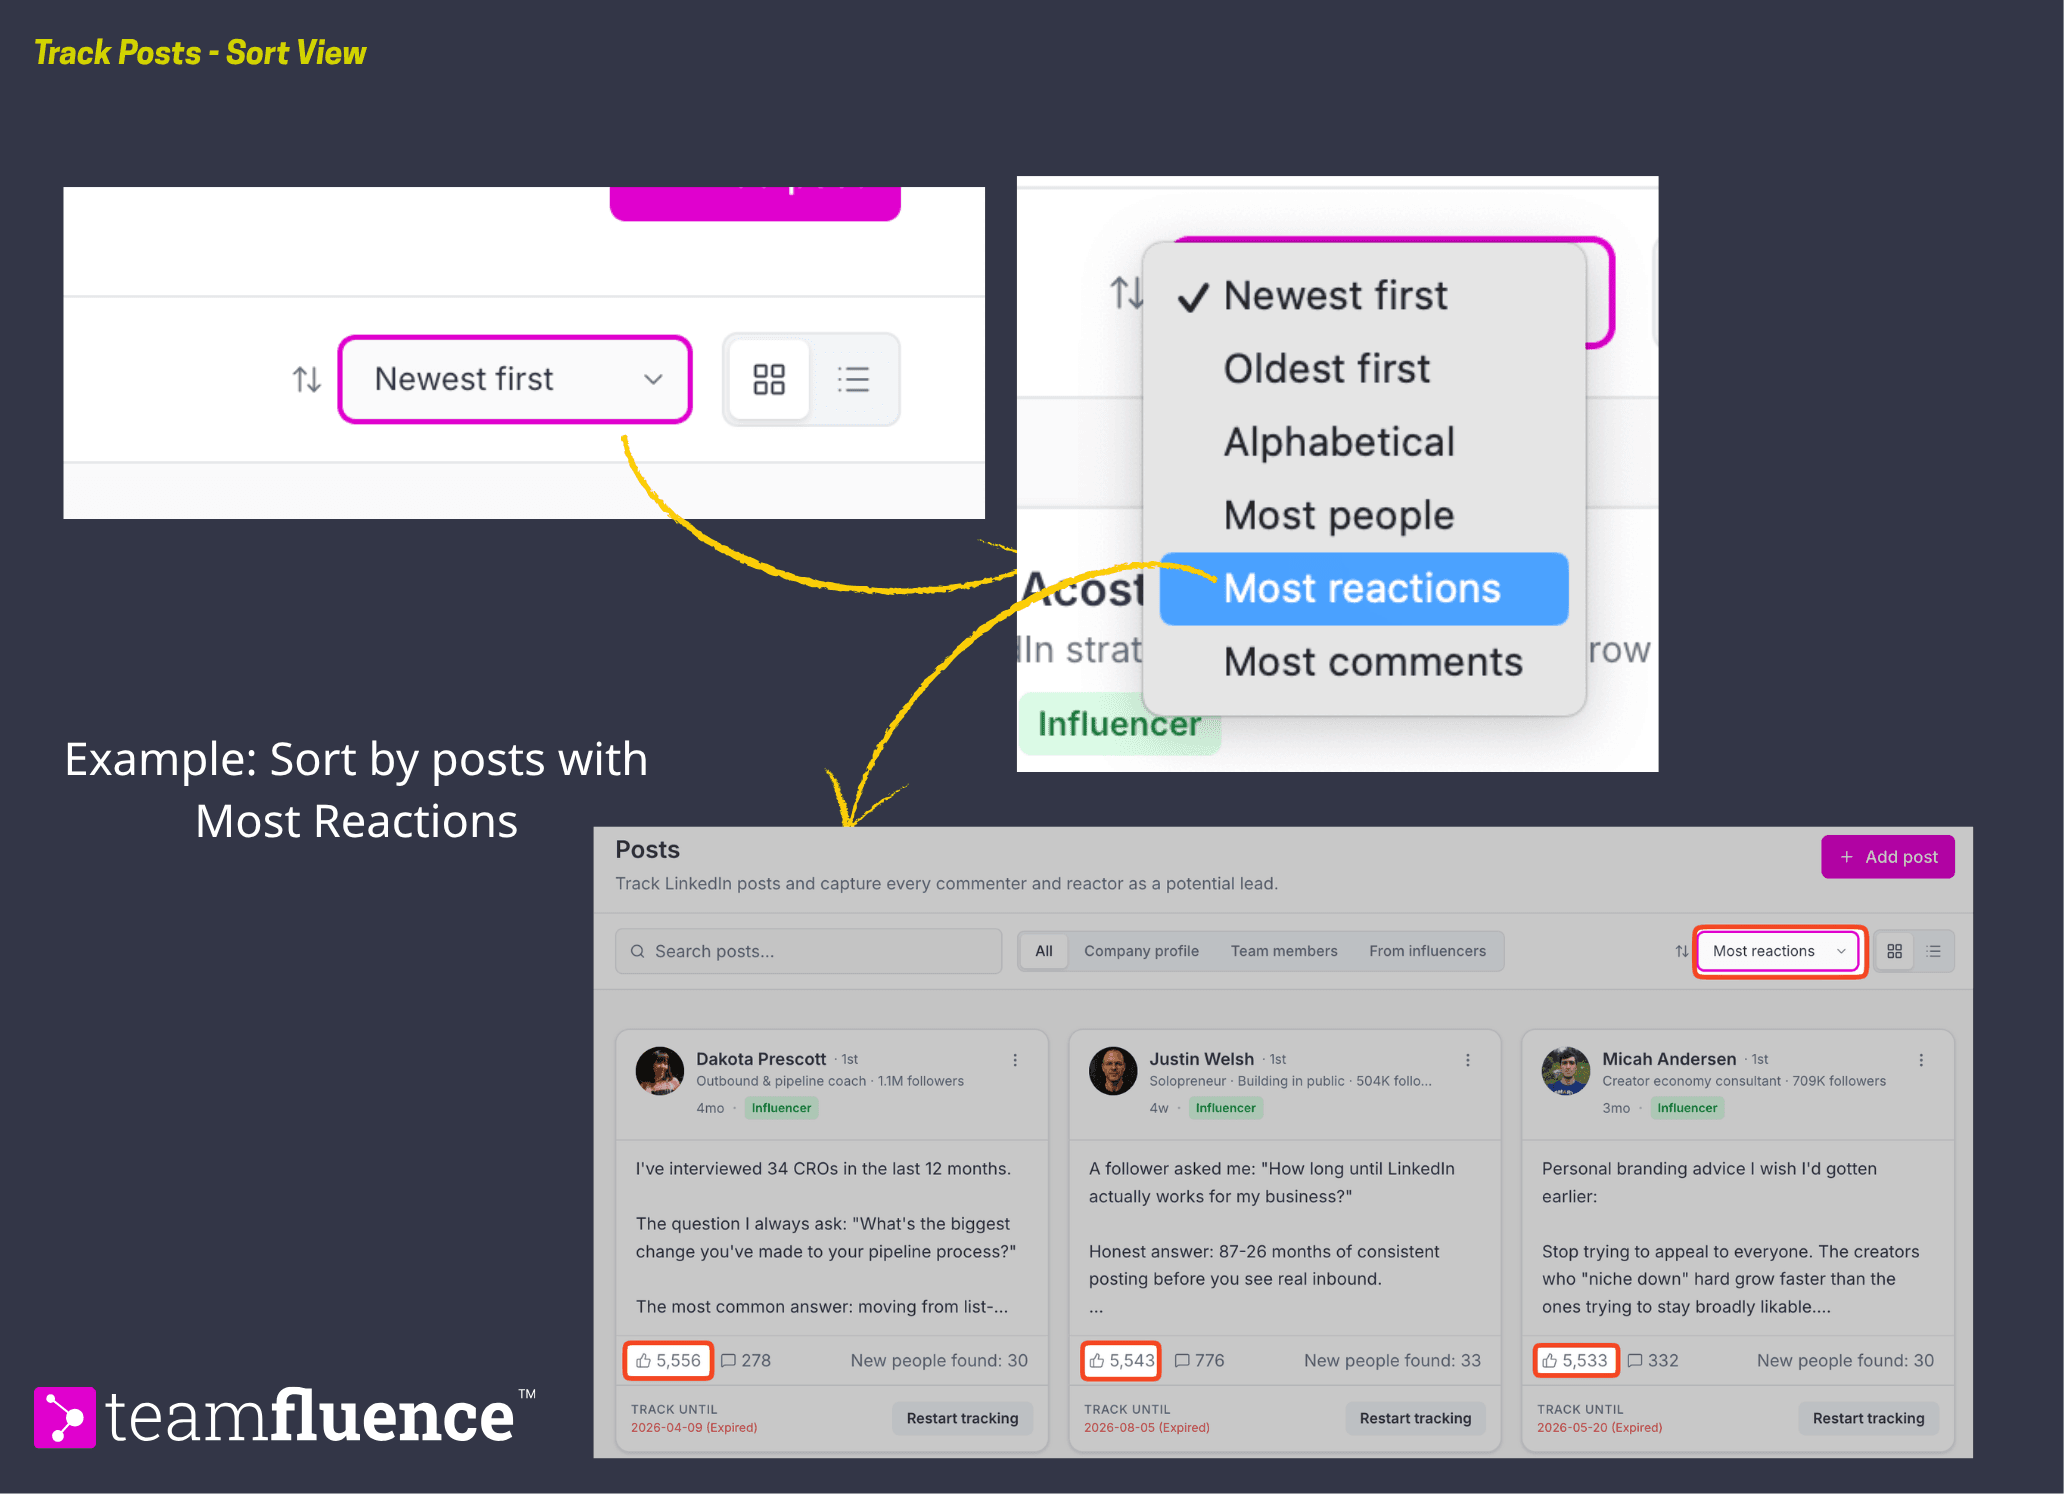
Sort. Use the sort dropdown to reorder the list. Newest first is the default.
- Newest first and Oldest first order posts by when tracking started.
- Alphabetical orders posts by author name.
- Most people puts the posts that surfaced the most new people at the top.
- Most reactions and Most comments put the posts with the highest engagement at the top.
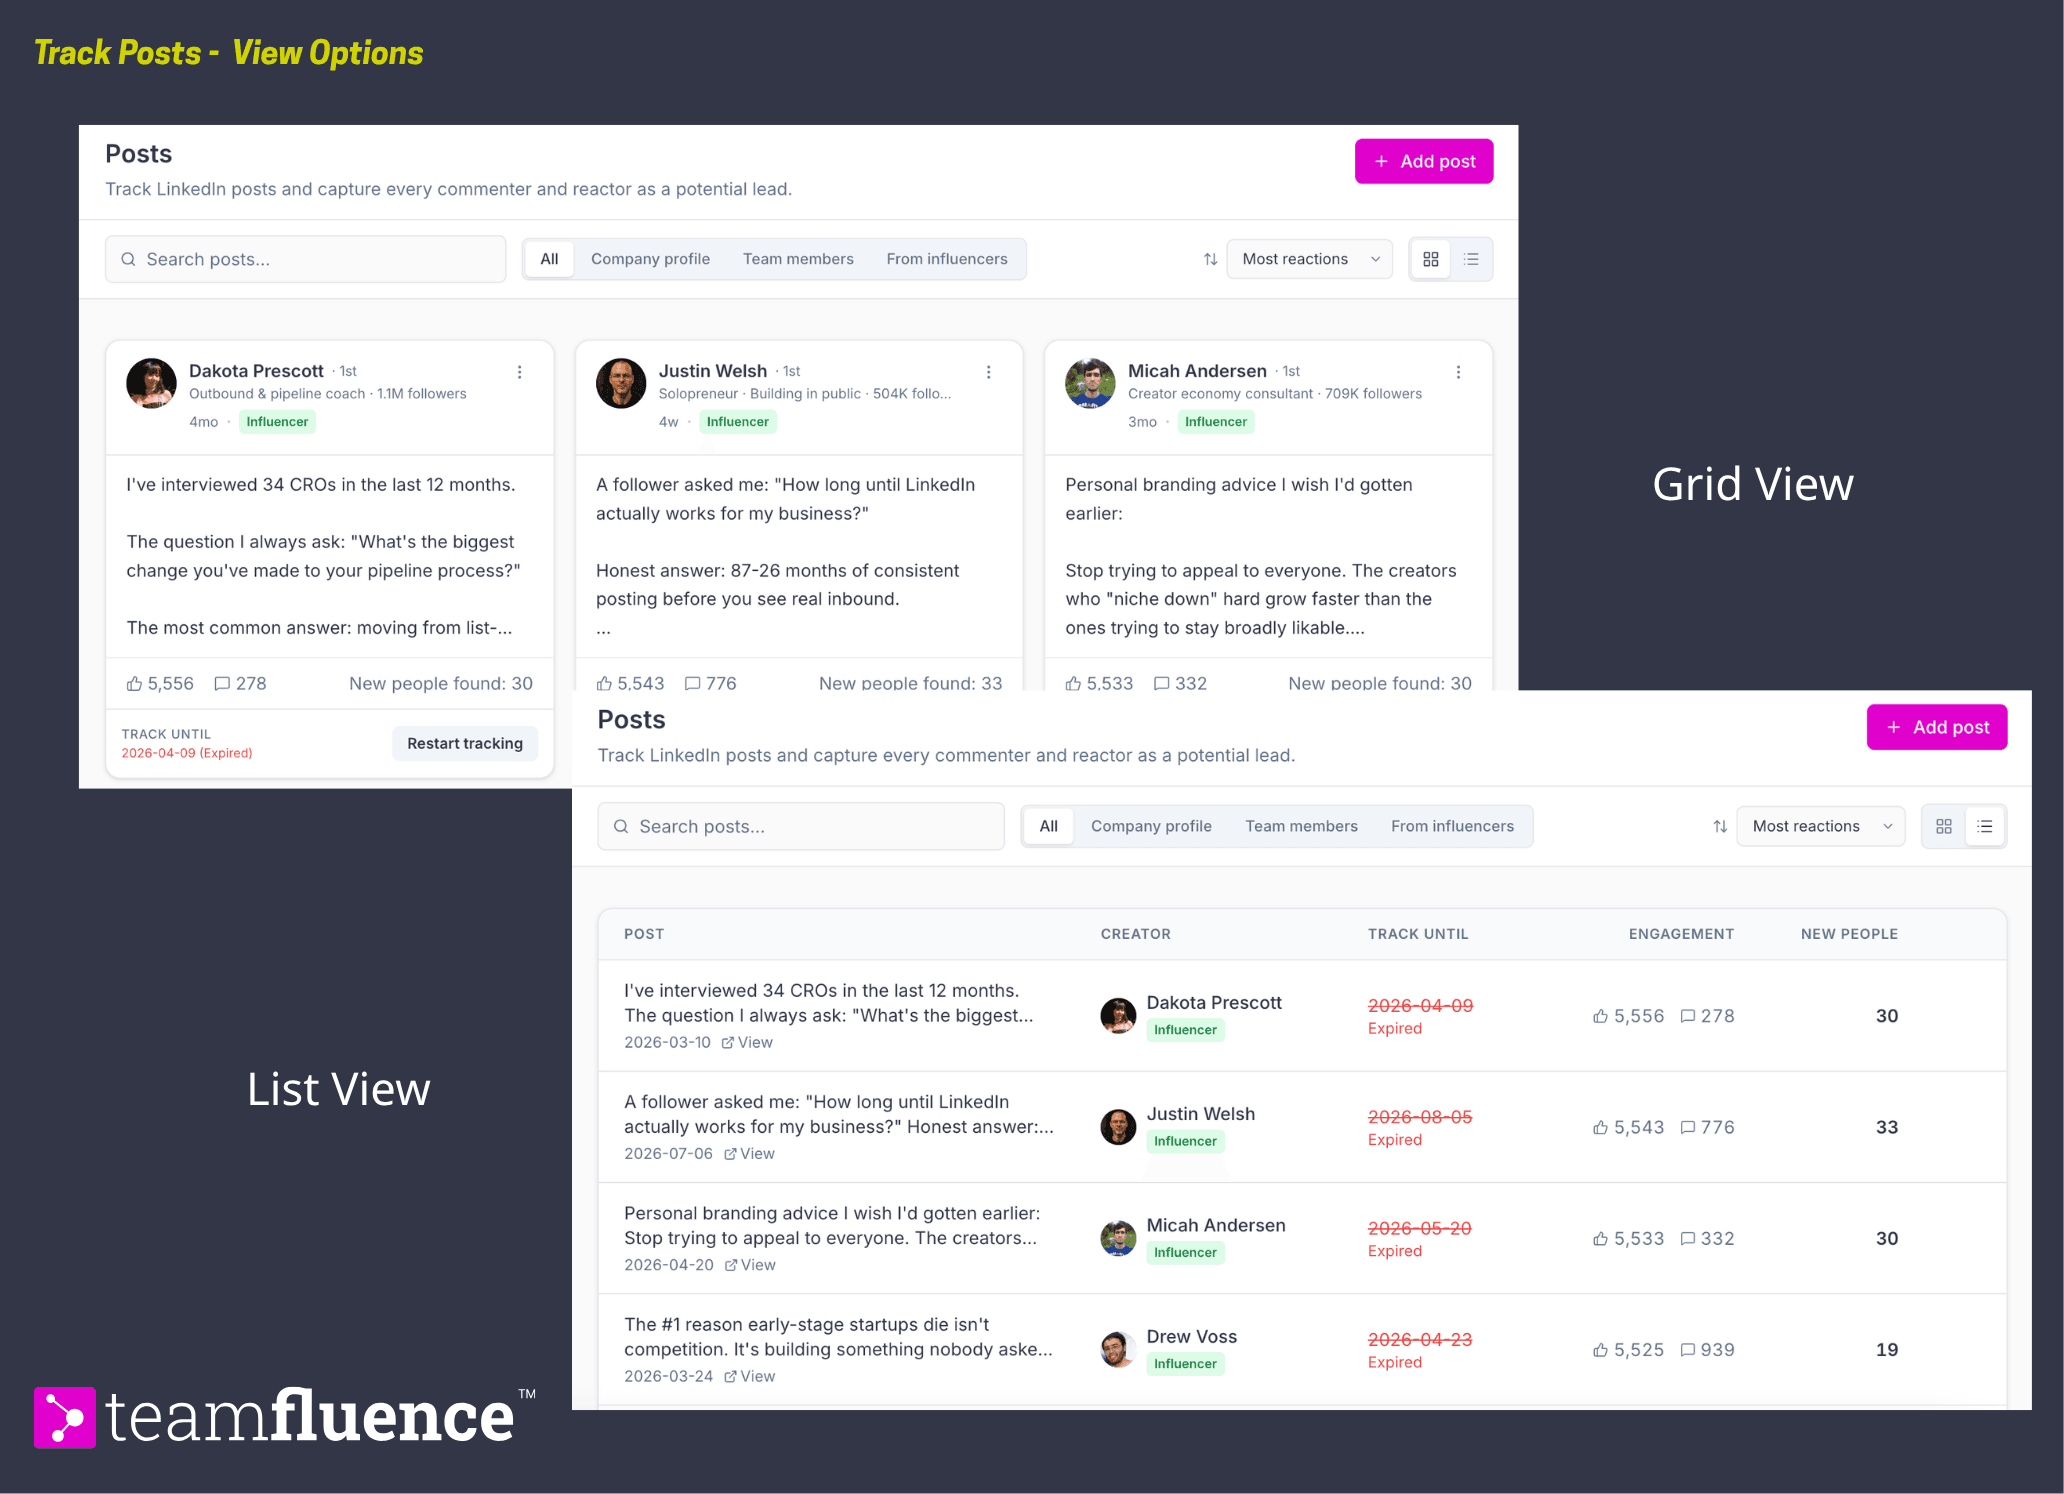
Layout. Switch between two views using the layout buttons:
- Grid view shows each post as a card, side by side. This is the default view.
- List view arranges posts into columns for a board-style overview.
Add a post to track
The Add post button lets you track any public post, including posts that do not belong to you or your team. This is useful for:
Monitoring a competitor's posts.
Capturing engagement on a paid or sponsored post.
Following any industry post where your future customers are gathering.
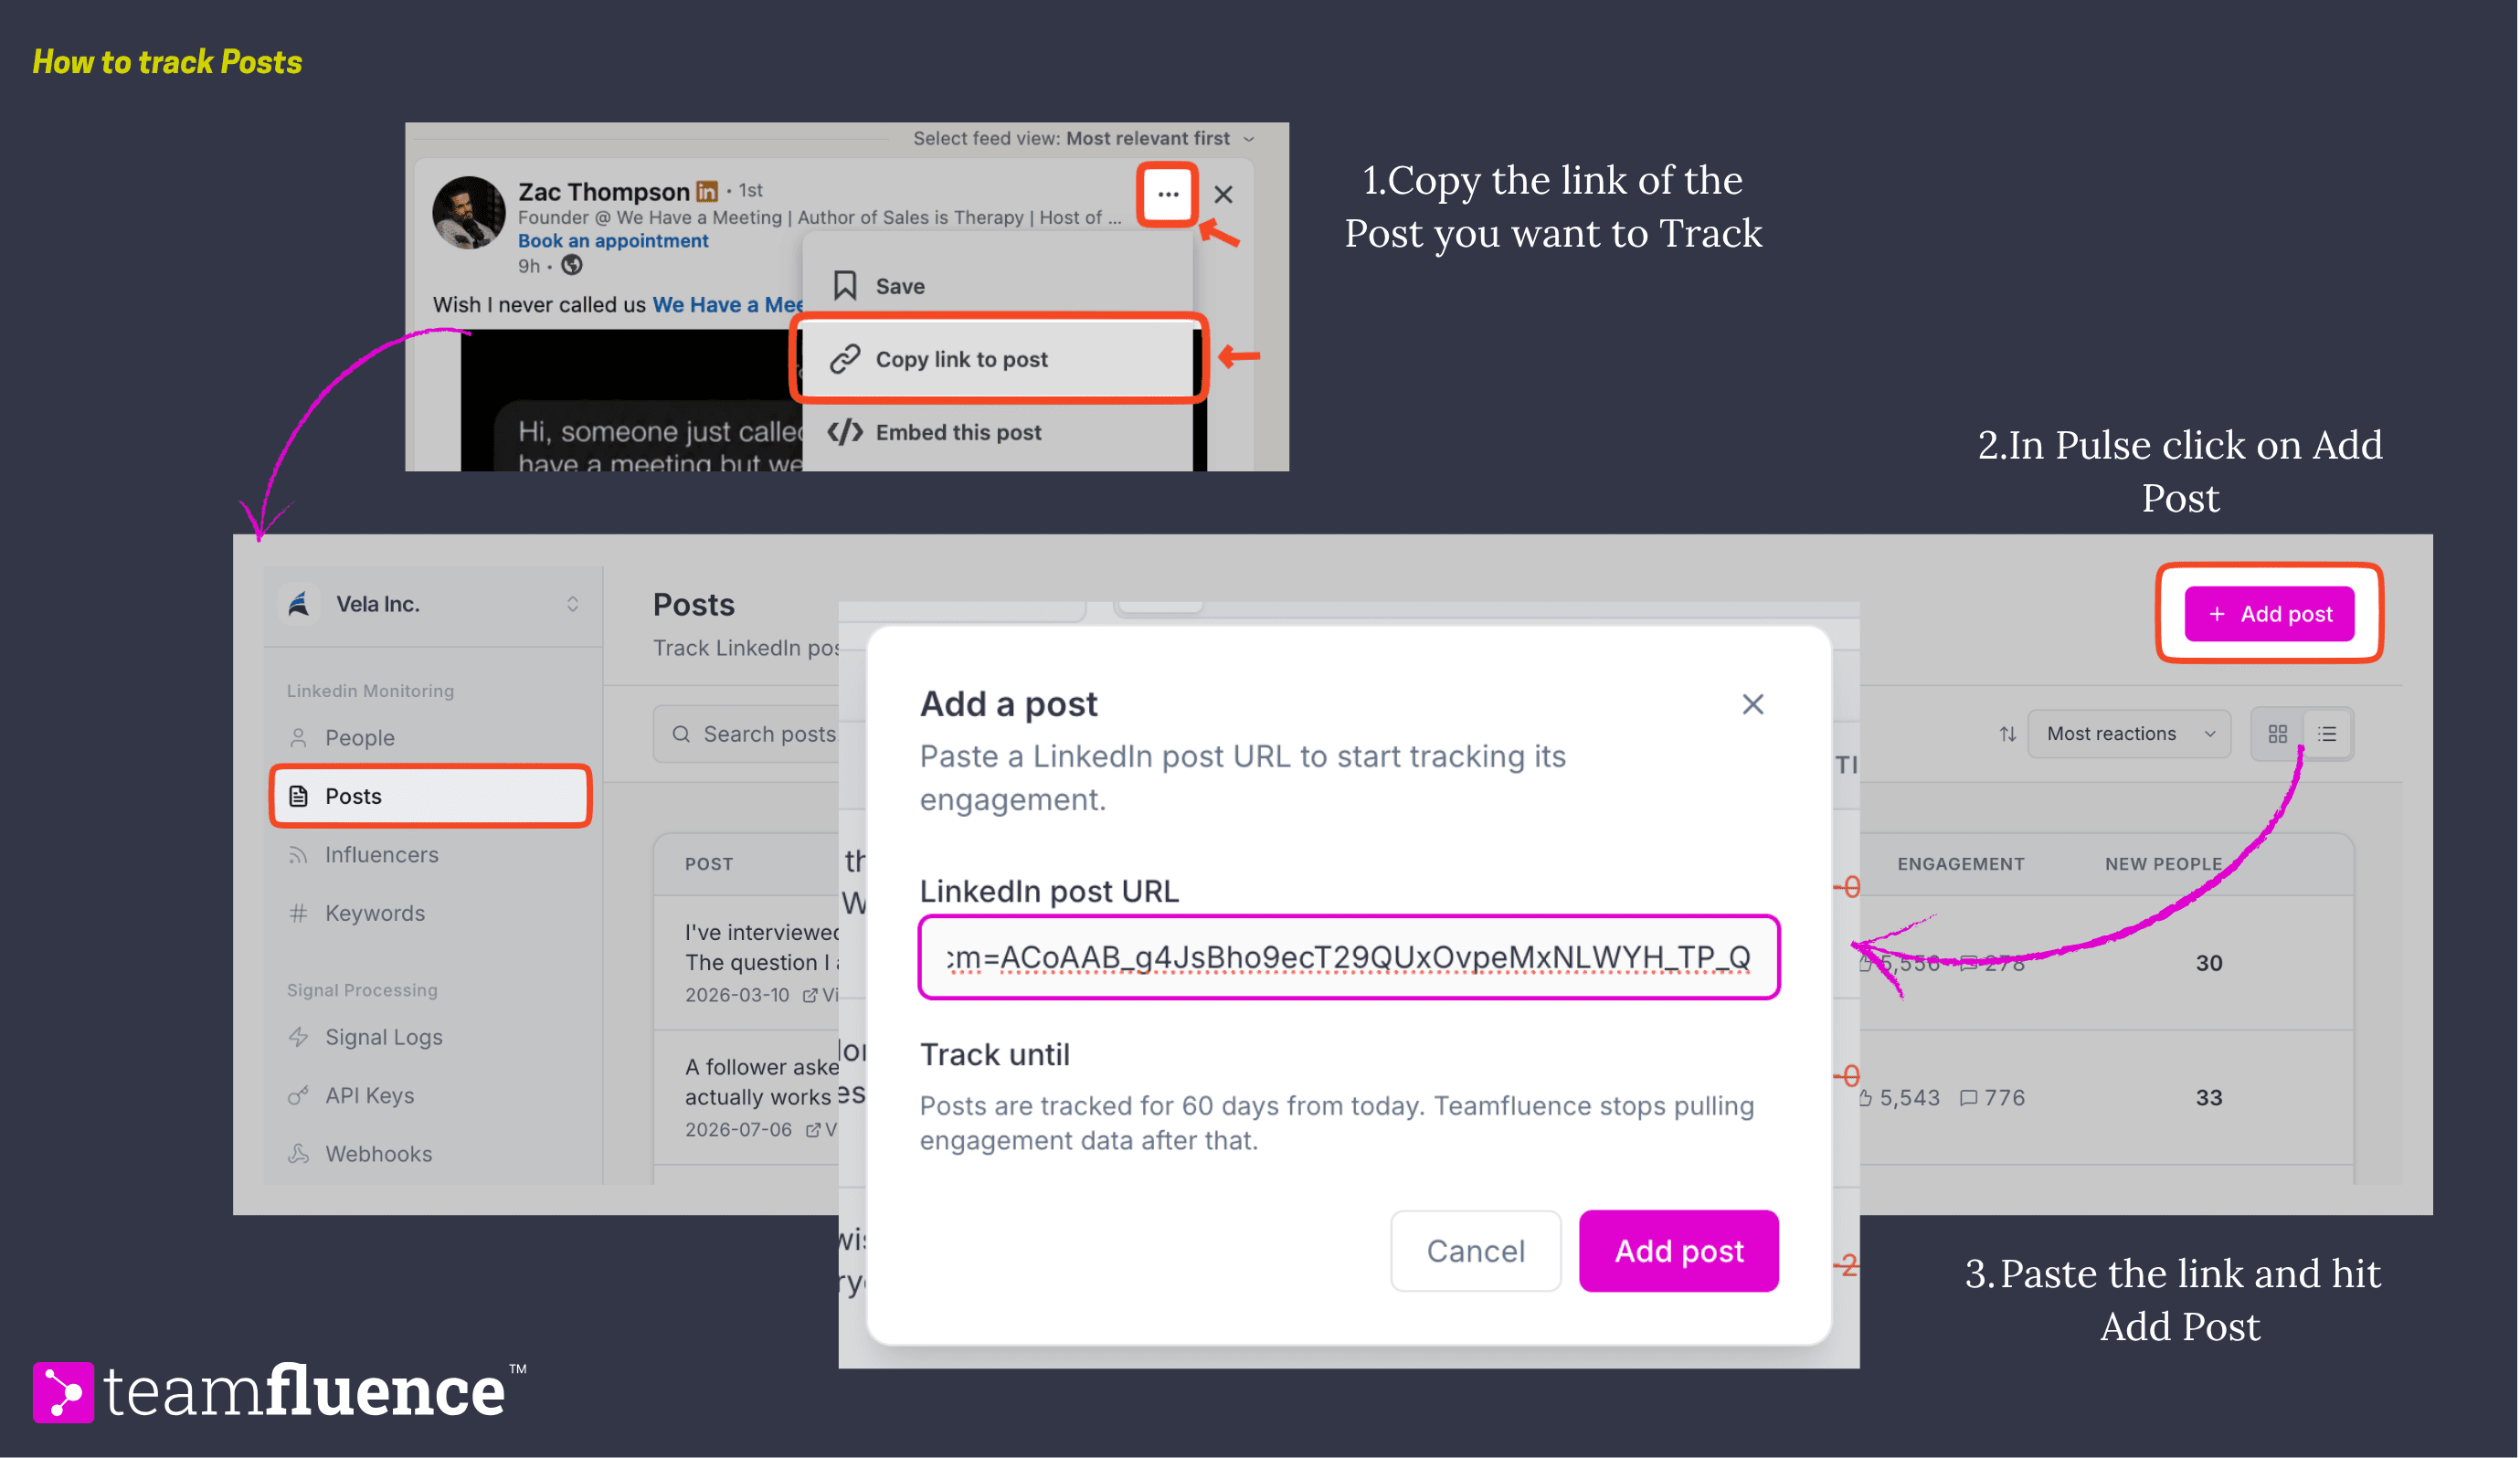
First, copy the post link. Open the post, click the three-dot menu in the top right of the post, and select Copy link to post.
Then, in Pulse:
- Click Add post.
- Paste the post URL.
- Add Post.
Pulse loads the post and begins collecting engagement. Processing is not instant, so allow a little time for each person to be enriched with their profile, company, and team connection details. Everyone who reacts or comments then appears in your People view as a Post Reaction or Post Comment.
Start, restart, or stop tracking
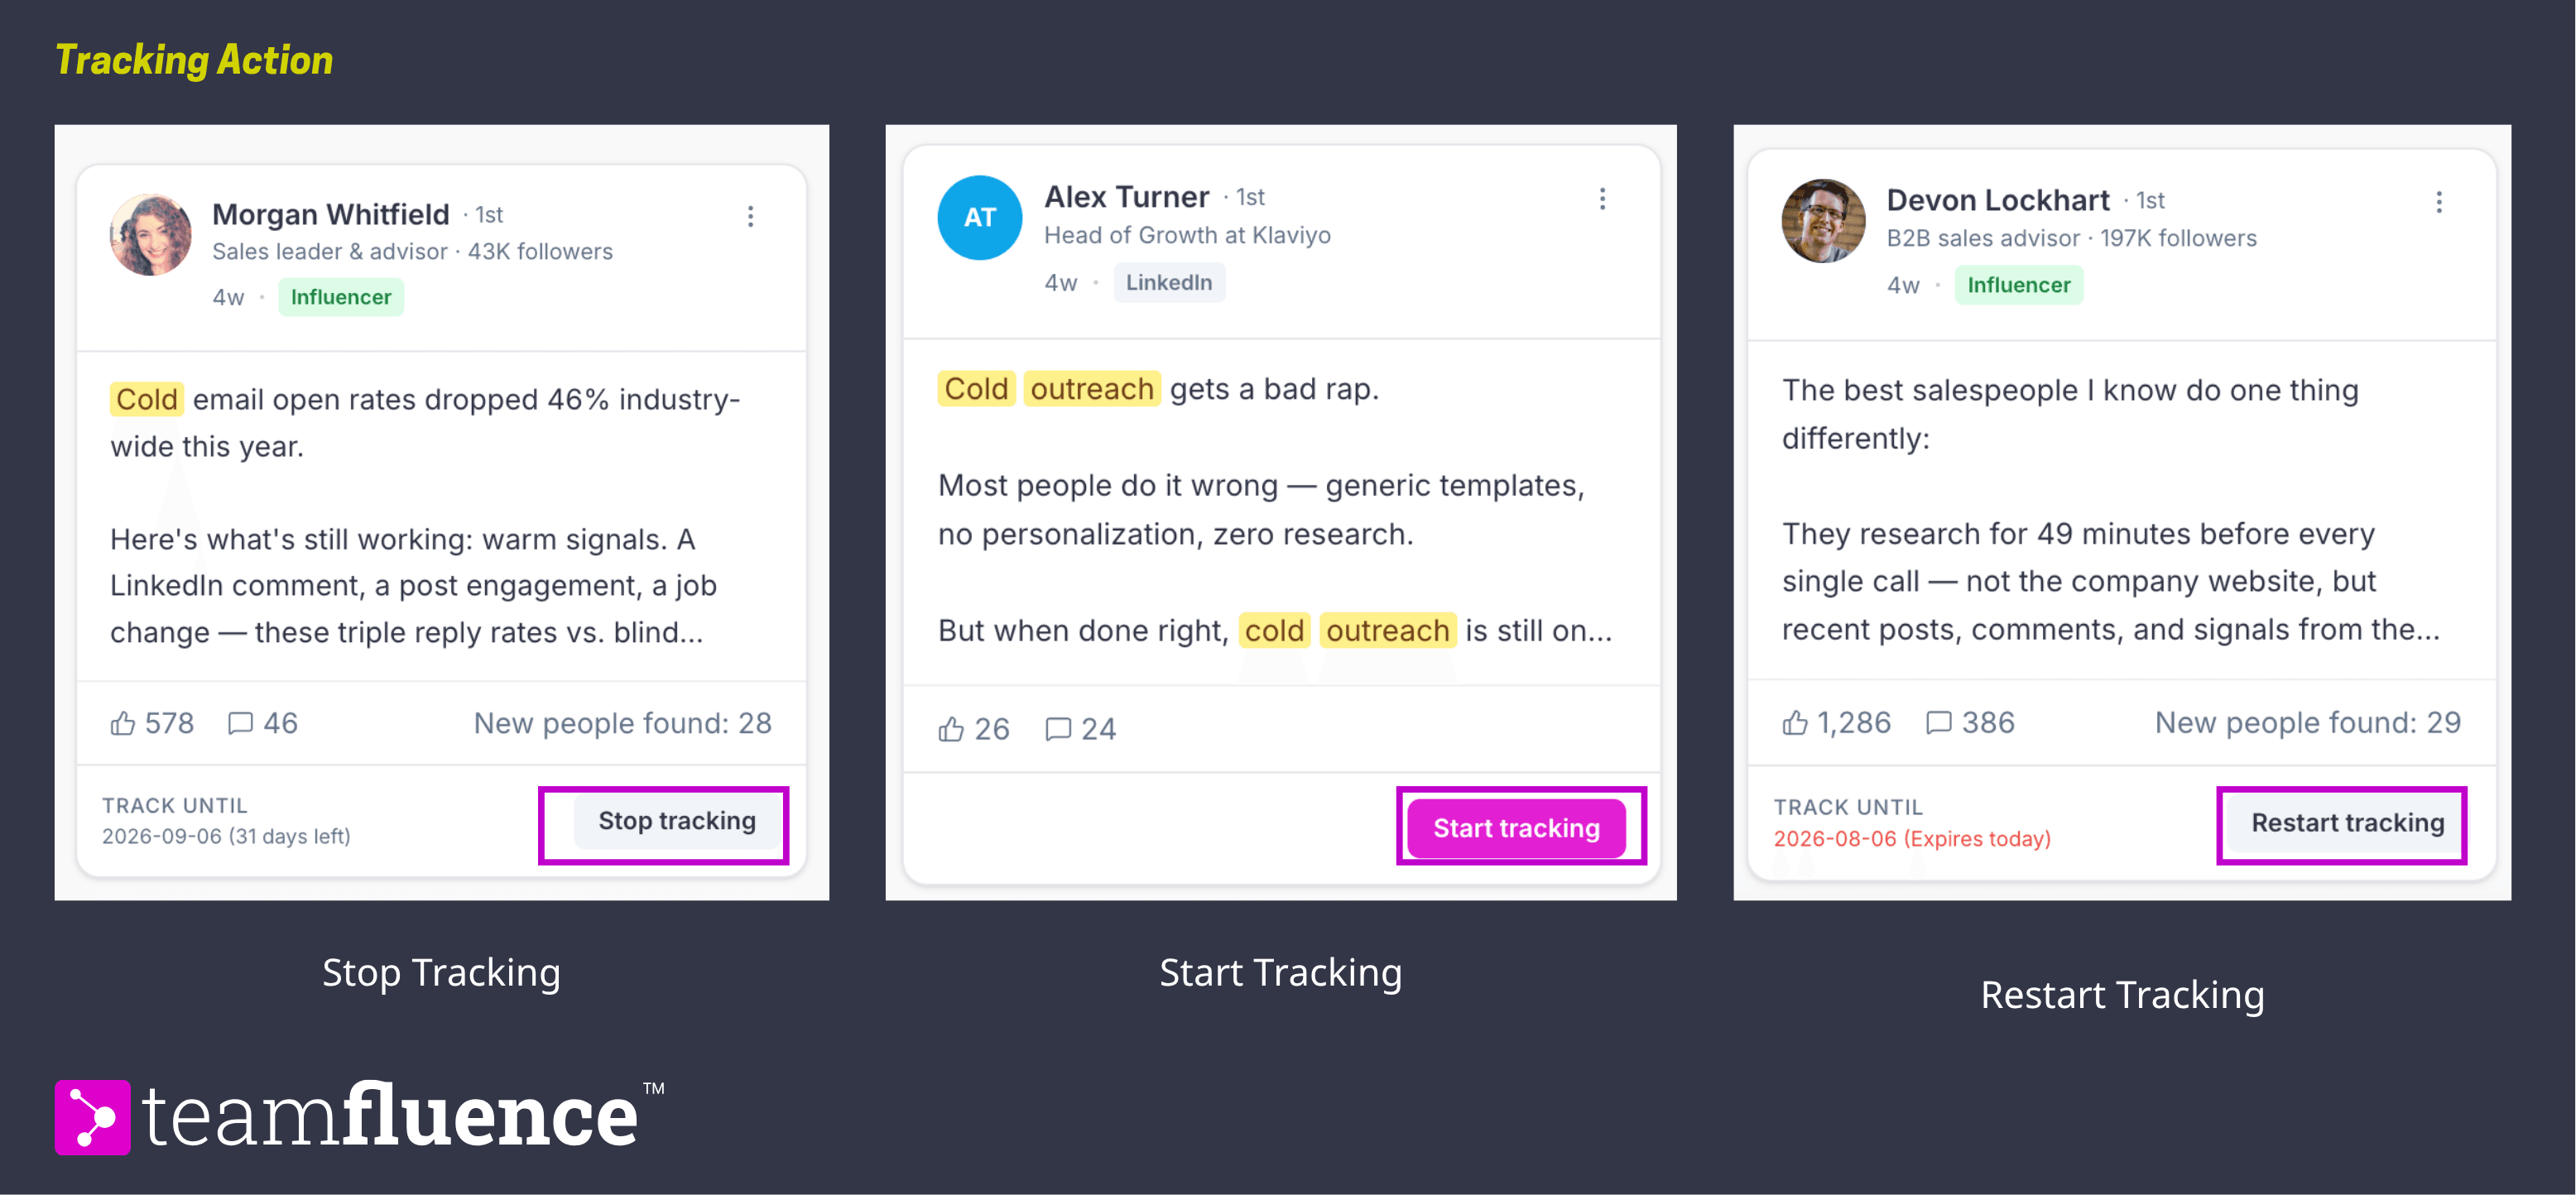
Every post tracks for a set period (2 months), shown as Track until with the days remaining. When a post reaches that date, tracking stops.
To stop tracking a post early, use the Stop tracking button on its card. To restart tracking on a post that has run out, open it from the Posts section and set a new track until date.
This works for your posts, your team's posts, your company posts, and posts you have added manually.
Tips
- Do not track too many posts at once. Spread tracking across your team to keep processing manageable.
- Give a post a few days before you act on the data, especially if it already had engagement when you started tracking.
- Track a mix of your own posts and competitor posts to get a balanced view of who is active in your market.