Filtering your signals helps you cut through the noise and focus on the most relevant leads. Whether you’re working in the Monitoring tab or the Prospect Tracker tab, filters give you precise control over which signals you see - so you can quickly decide which contacts to move into prospects or begin outreach with.
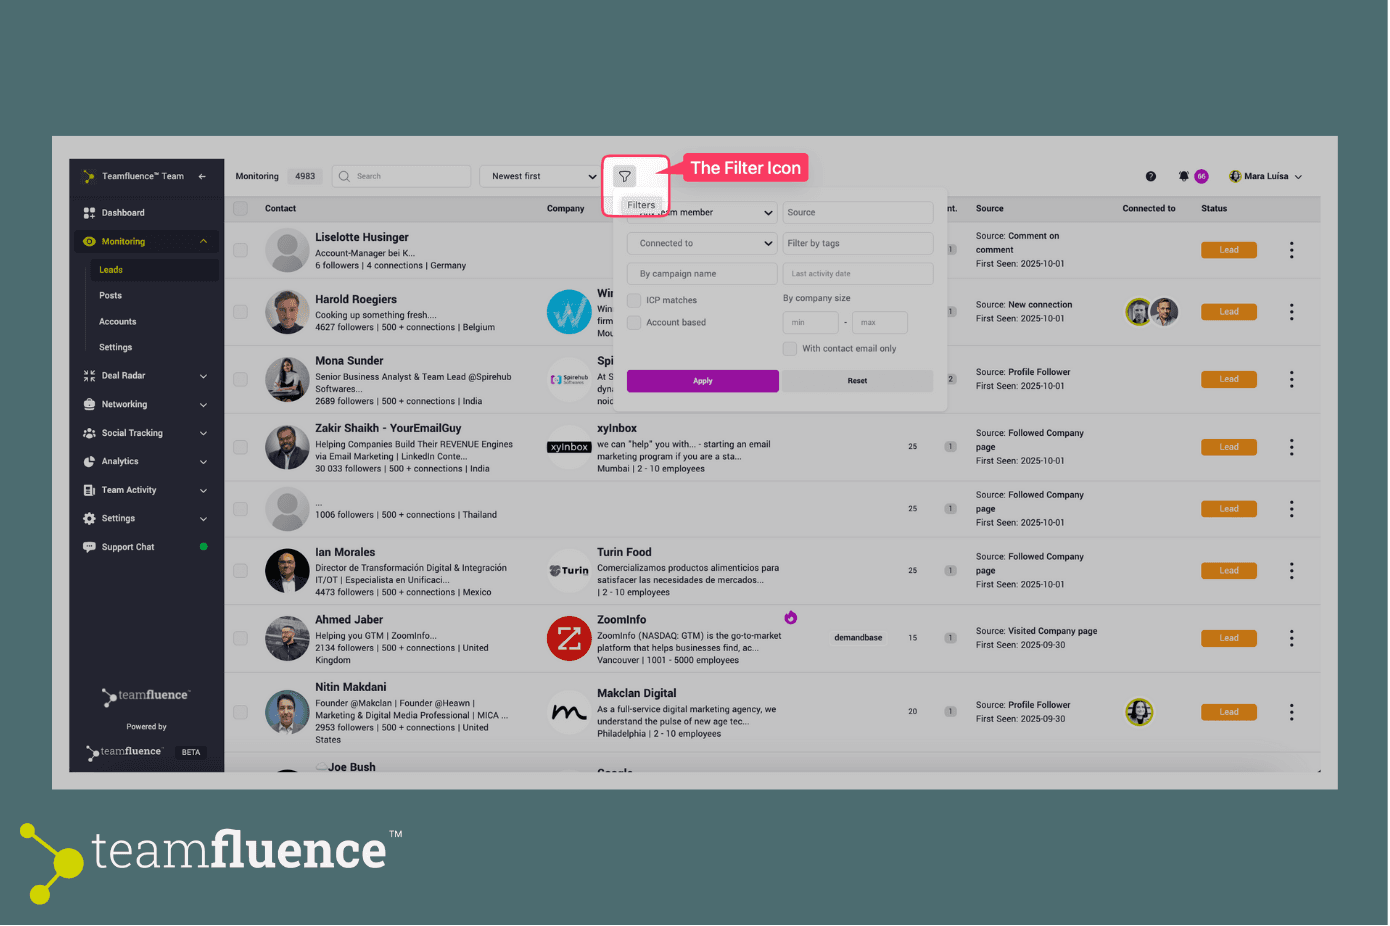
Open the Filters
- Go to either the Lead Monitor tab or the Prospect Tracker tab.
- Locate the filter icon at the top of your page.
- Click on the filter options to begin narrowing your view.
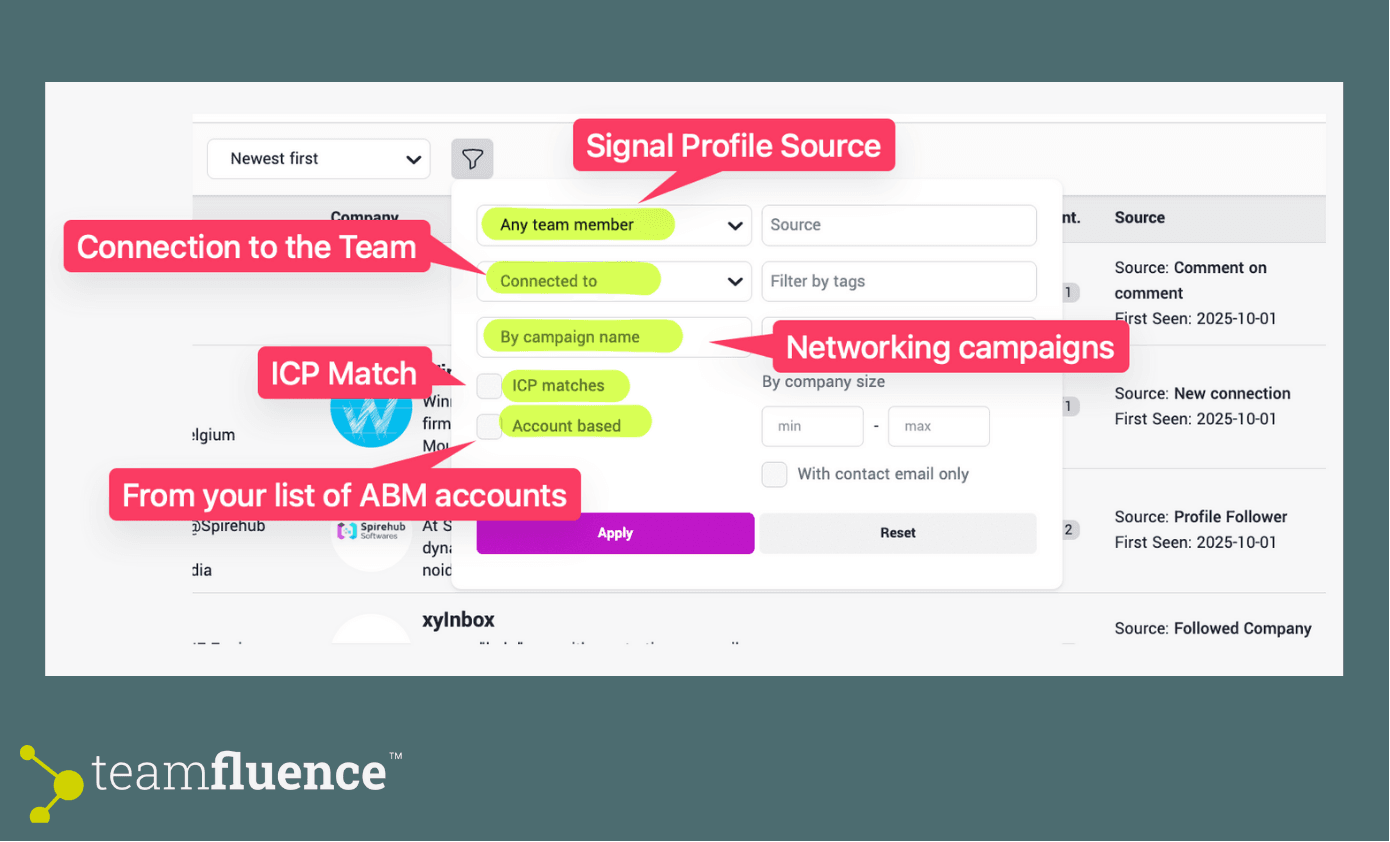
Choose How to Organize Signals
You can filter signals based on multiple dimensions:
1- Signal source
User LinkedIn profile
Company LinkedIn page
2- Connection type
Who the lead is connected to in your team
3- Networking campaigns
Leads generated through a Teamfluence Networking Campaign
4- ICP Match
You can configure our AI Agent to signal ICP matches.
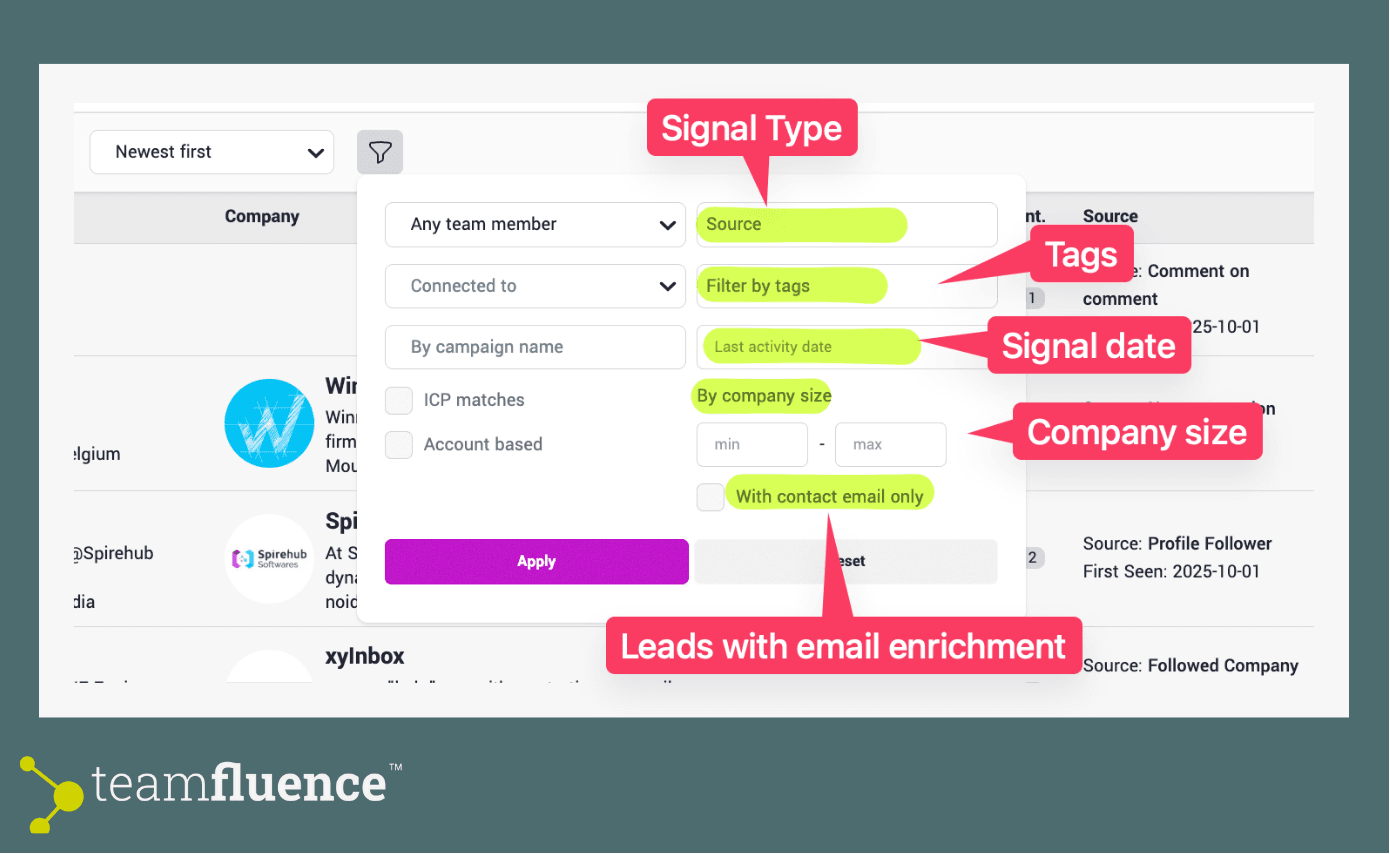
- Signal type (multi-select)
Profile visitors
Profile followers
Other engagement signals. Learn more here
- Tags
You can apply your custom tags to group signals. And then filter the view by them.
- Company attributes
Company size
- Target list
Signals from companies you’ve marked as targets. Learn more here.
- Lead enrichment
Identify leads enriched with an email address
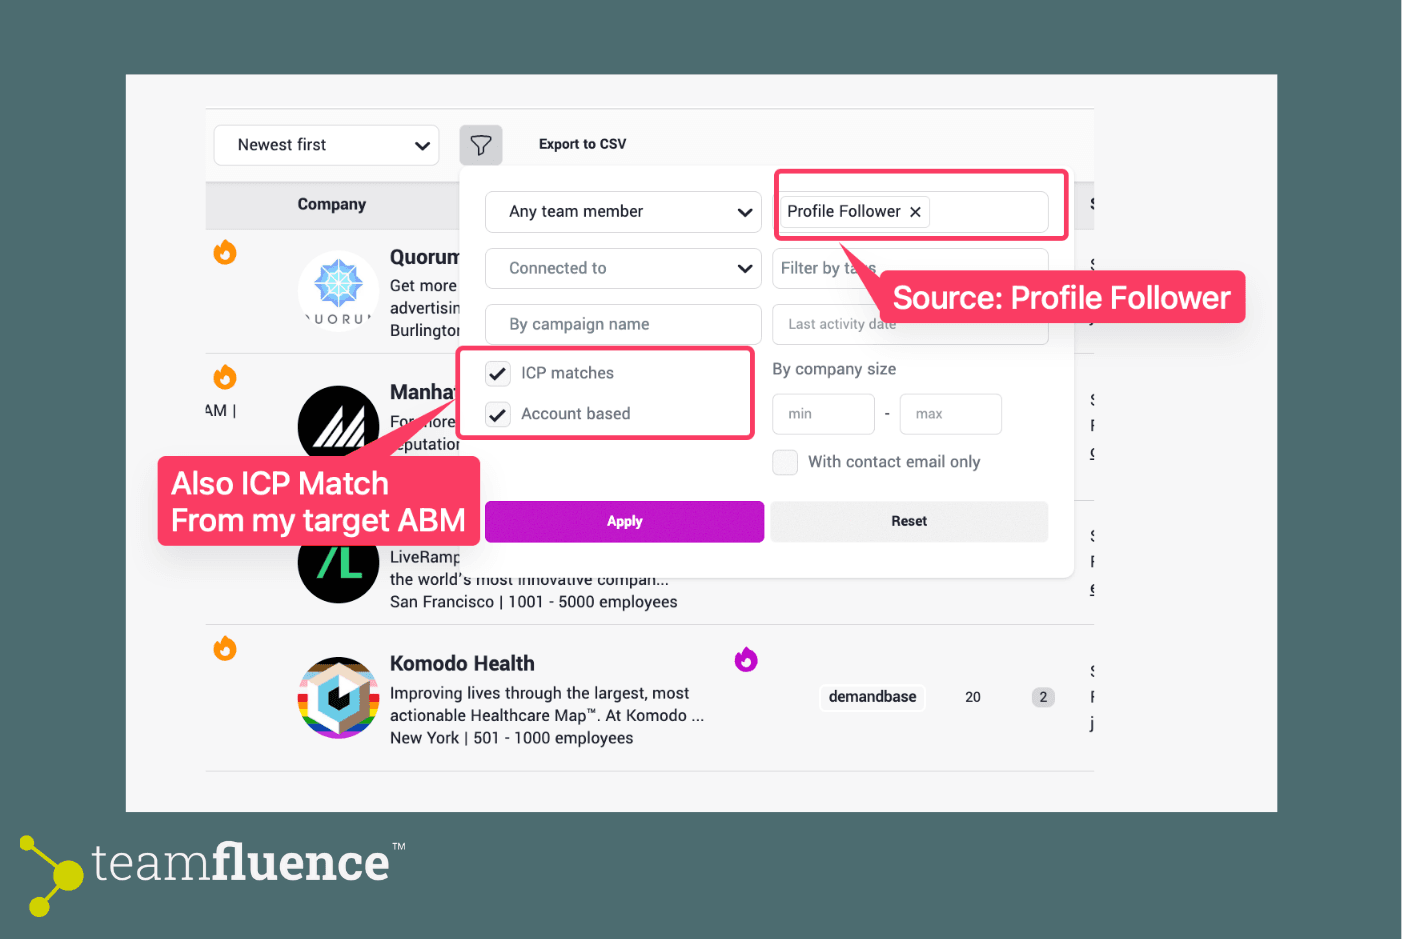
Combine Filters for More Precision
Filters can be applied together. For example:
See only profile visitors from your target companies who also match your ICP.
Focus on leads enriched with email where the source is your LinkedIn Profile to prepare for immediate outreach.
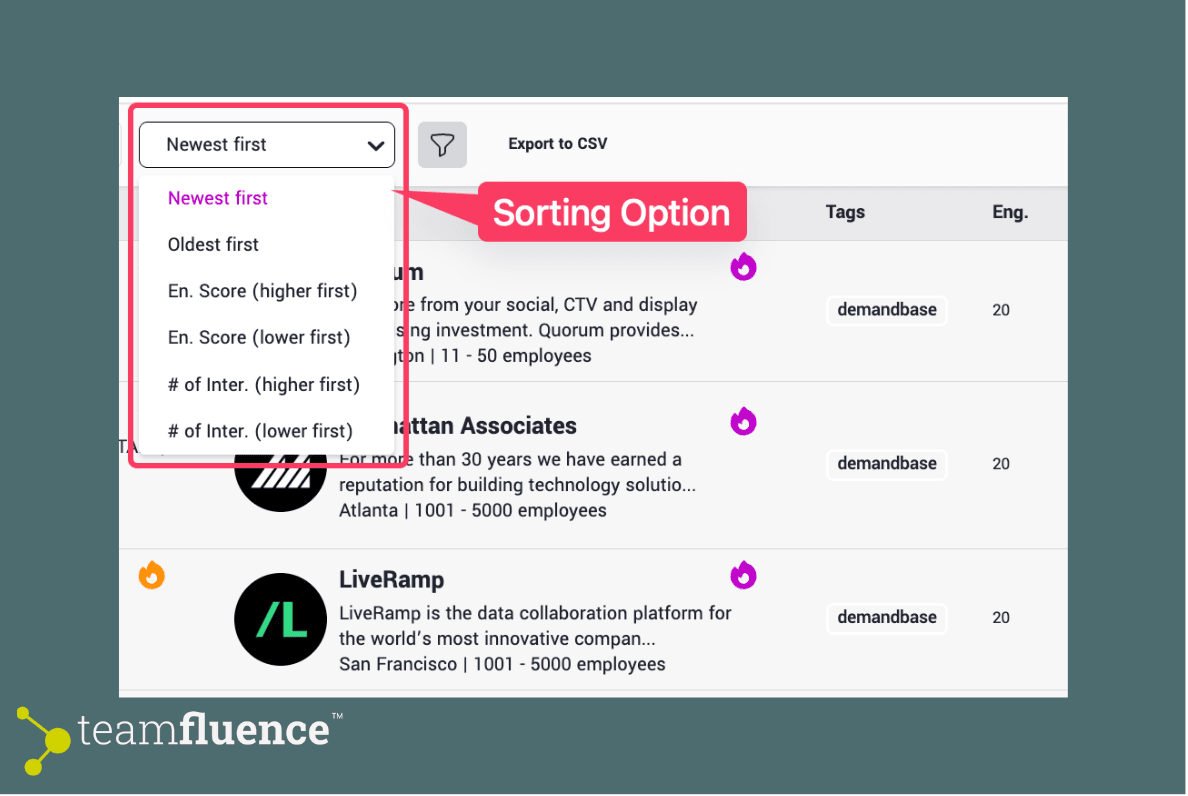
Sort Your Signals
Once filtered, sort your signals to prioritize them:
- Latest interaction first (by default)
- Newest or Oldest
- By Engagement Score
- By Number of Interactions
Next Steps
After filtering and sorting, you can:
In bulk select the result leads from your filtering
Move the contacts into Prospects
Assign tags