The Prospect Tracker is a focused view of your qualified leads. It sits alongside Lead Monitoring but serves a different purpose - Lead Monitor is where all signals arrive, the Prospect Tracker is where leads land once they have been confirmed as worth pursuing. It is a view, not an automation layer. Nothing happens automatically when a lead becomes a prospect. What you do next - enrich, sync to CRM, export - is defined by you, either manually or through a workflow.
How leads move into the Prospect Tracker
There are two ways a lead can become a prospect.
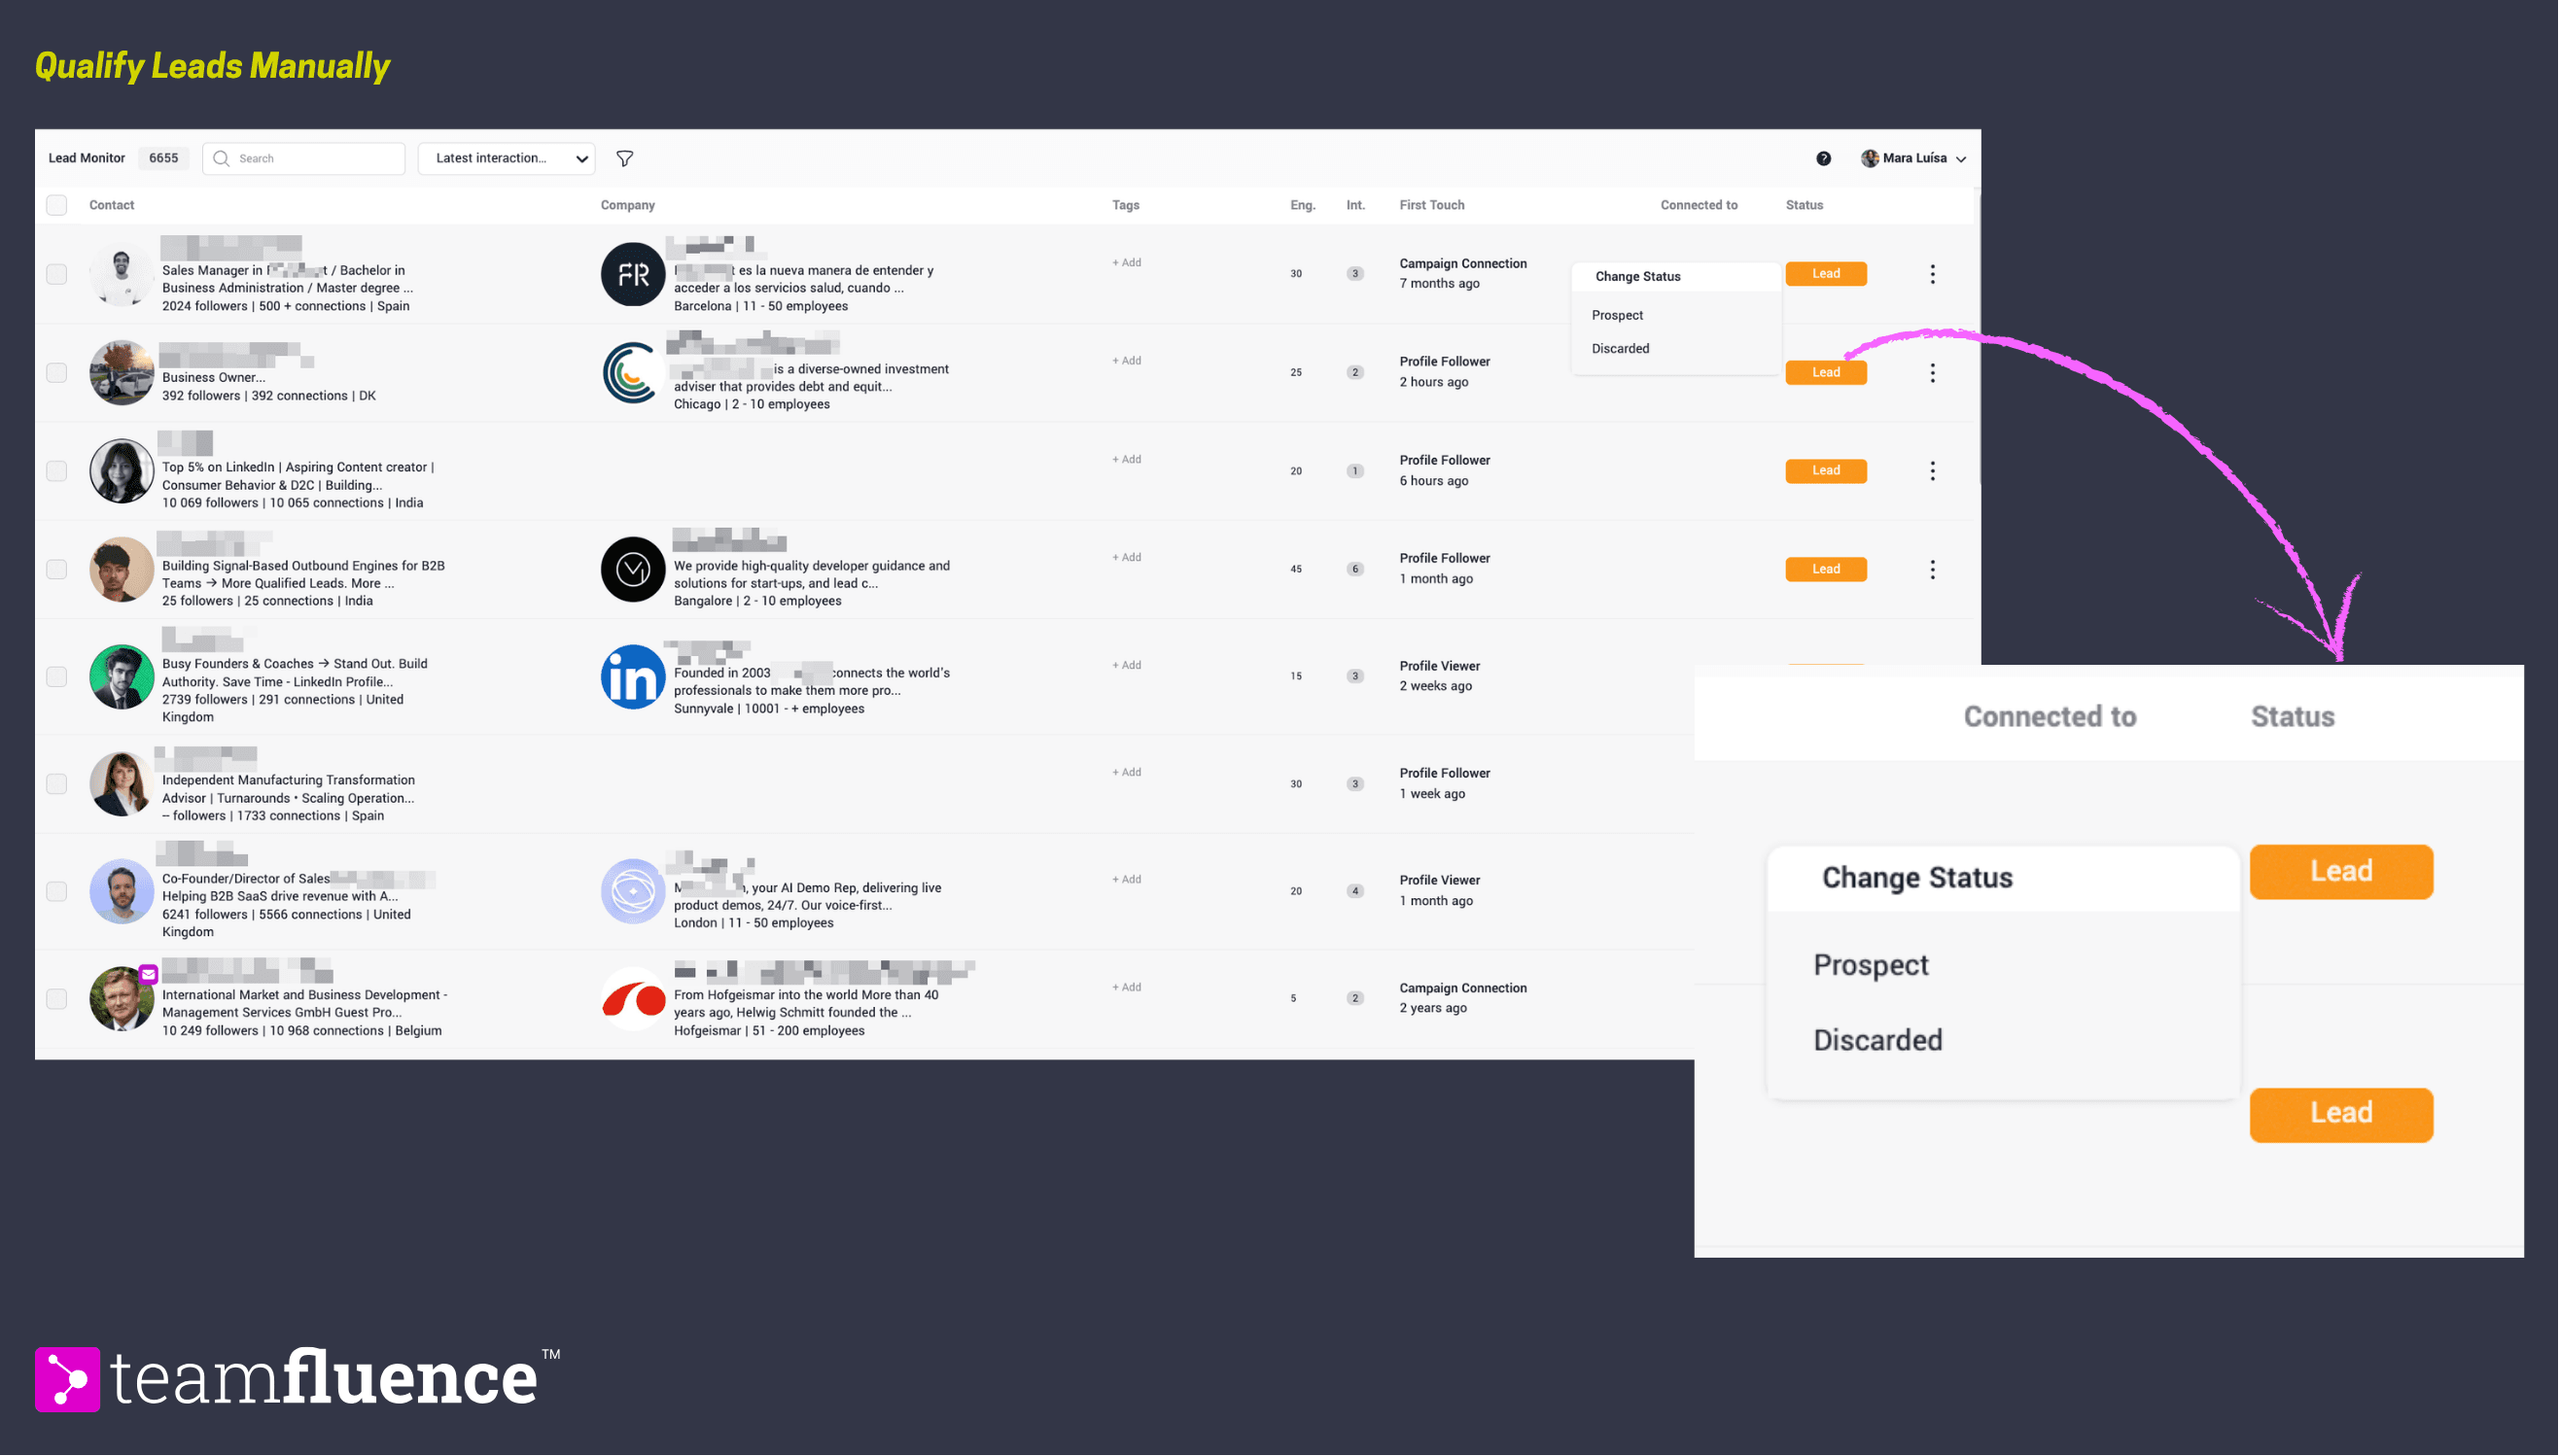
Manually from Lead Monitoring
Open any lead record in Lead Monitoring and change their status to Prospect. Use this when you are reviewing leads yourself and want to qualify selectively.
Via a workflow
Use the Move to Prospects action in any workflow to qualify leads automatically based on your own criteria. This is the recommended approach for teams handling volume. A common starting workflow: New Lead → Match ICP with AI Agent → if true → Move to Prospects → Enrich with Email → if email found → Sync to CRM
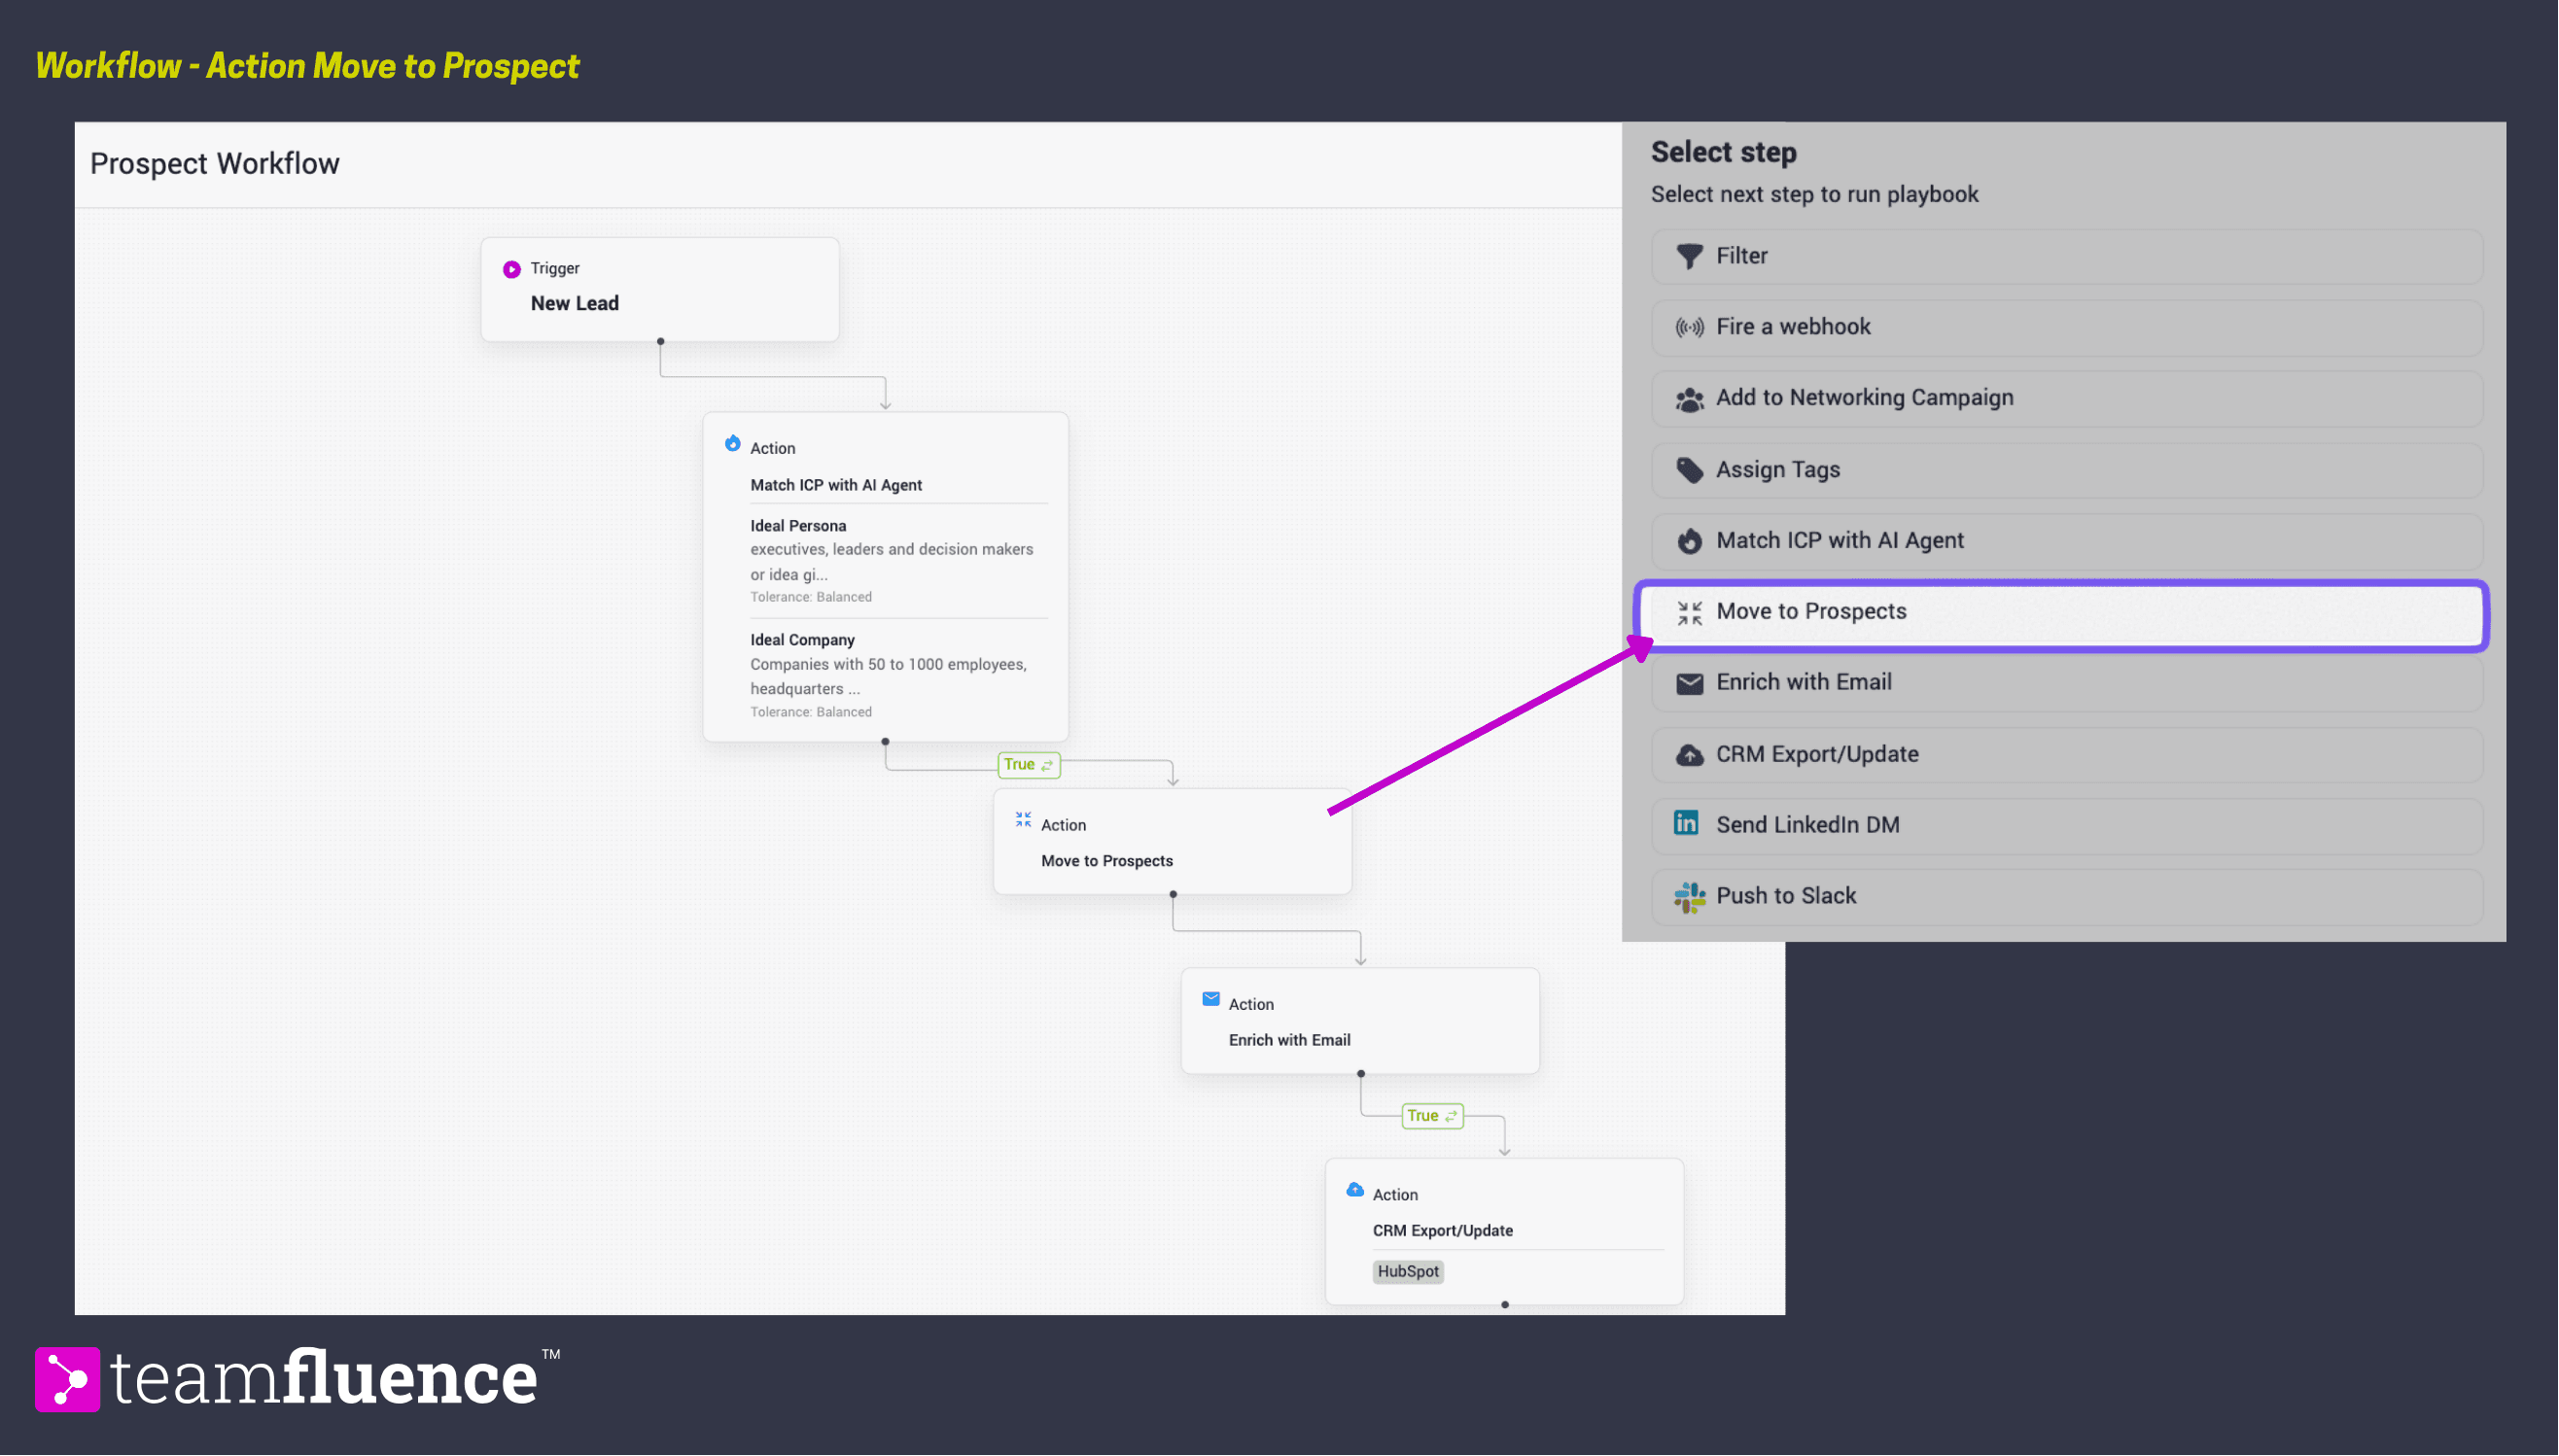
This means only ICP-matched leads reach the Prospect Tracker, email enrichment runs on those leads, and confirmed emails are synced to your CRM, all without manual intervention.
|At the end of this article you'll find a .json file with this template you can import to your workflows.
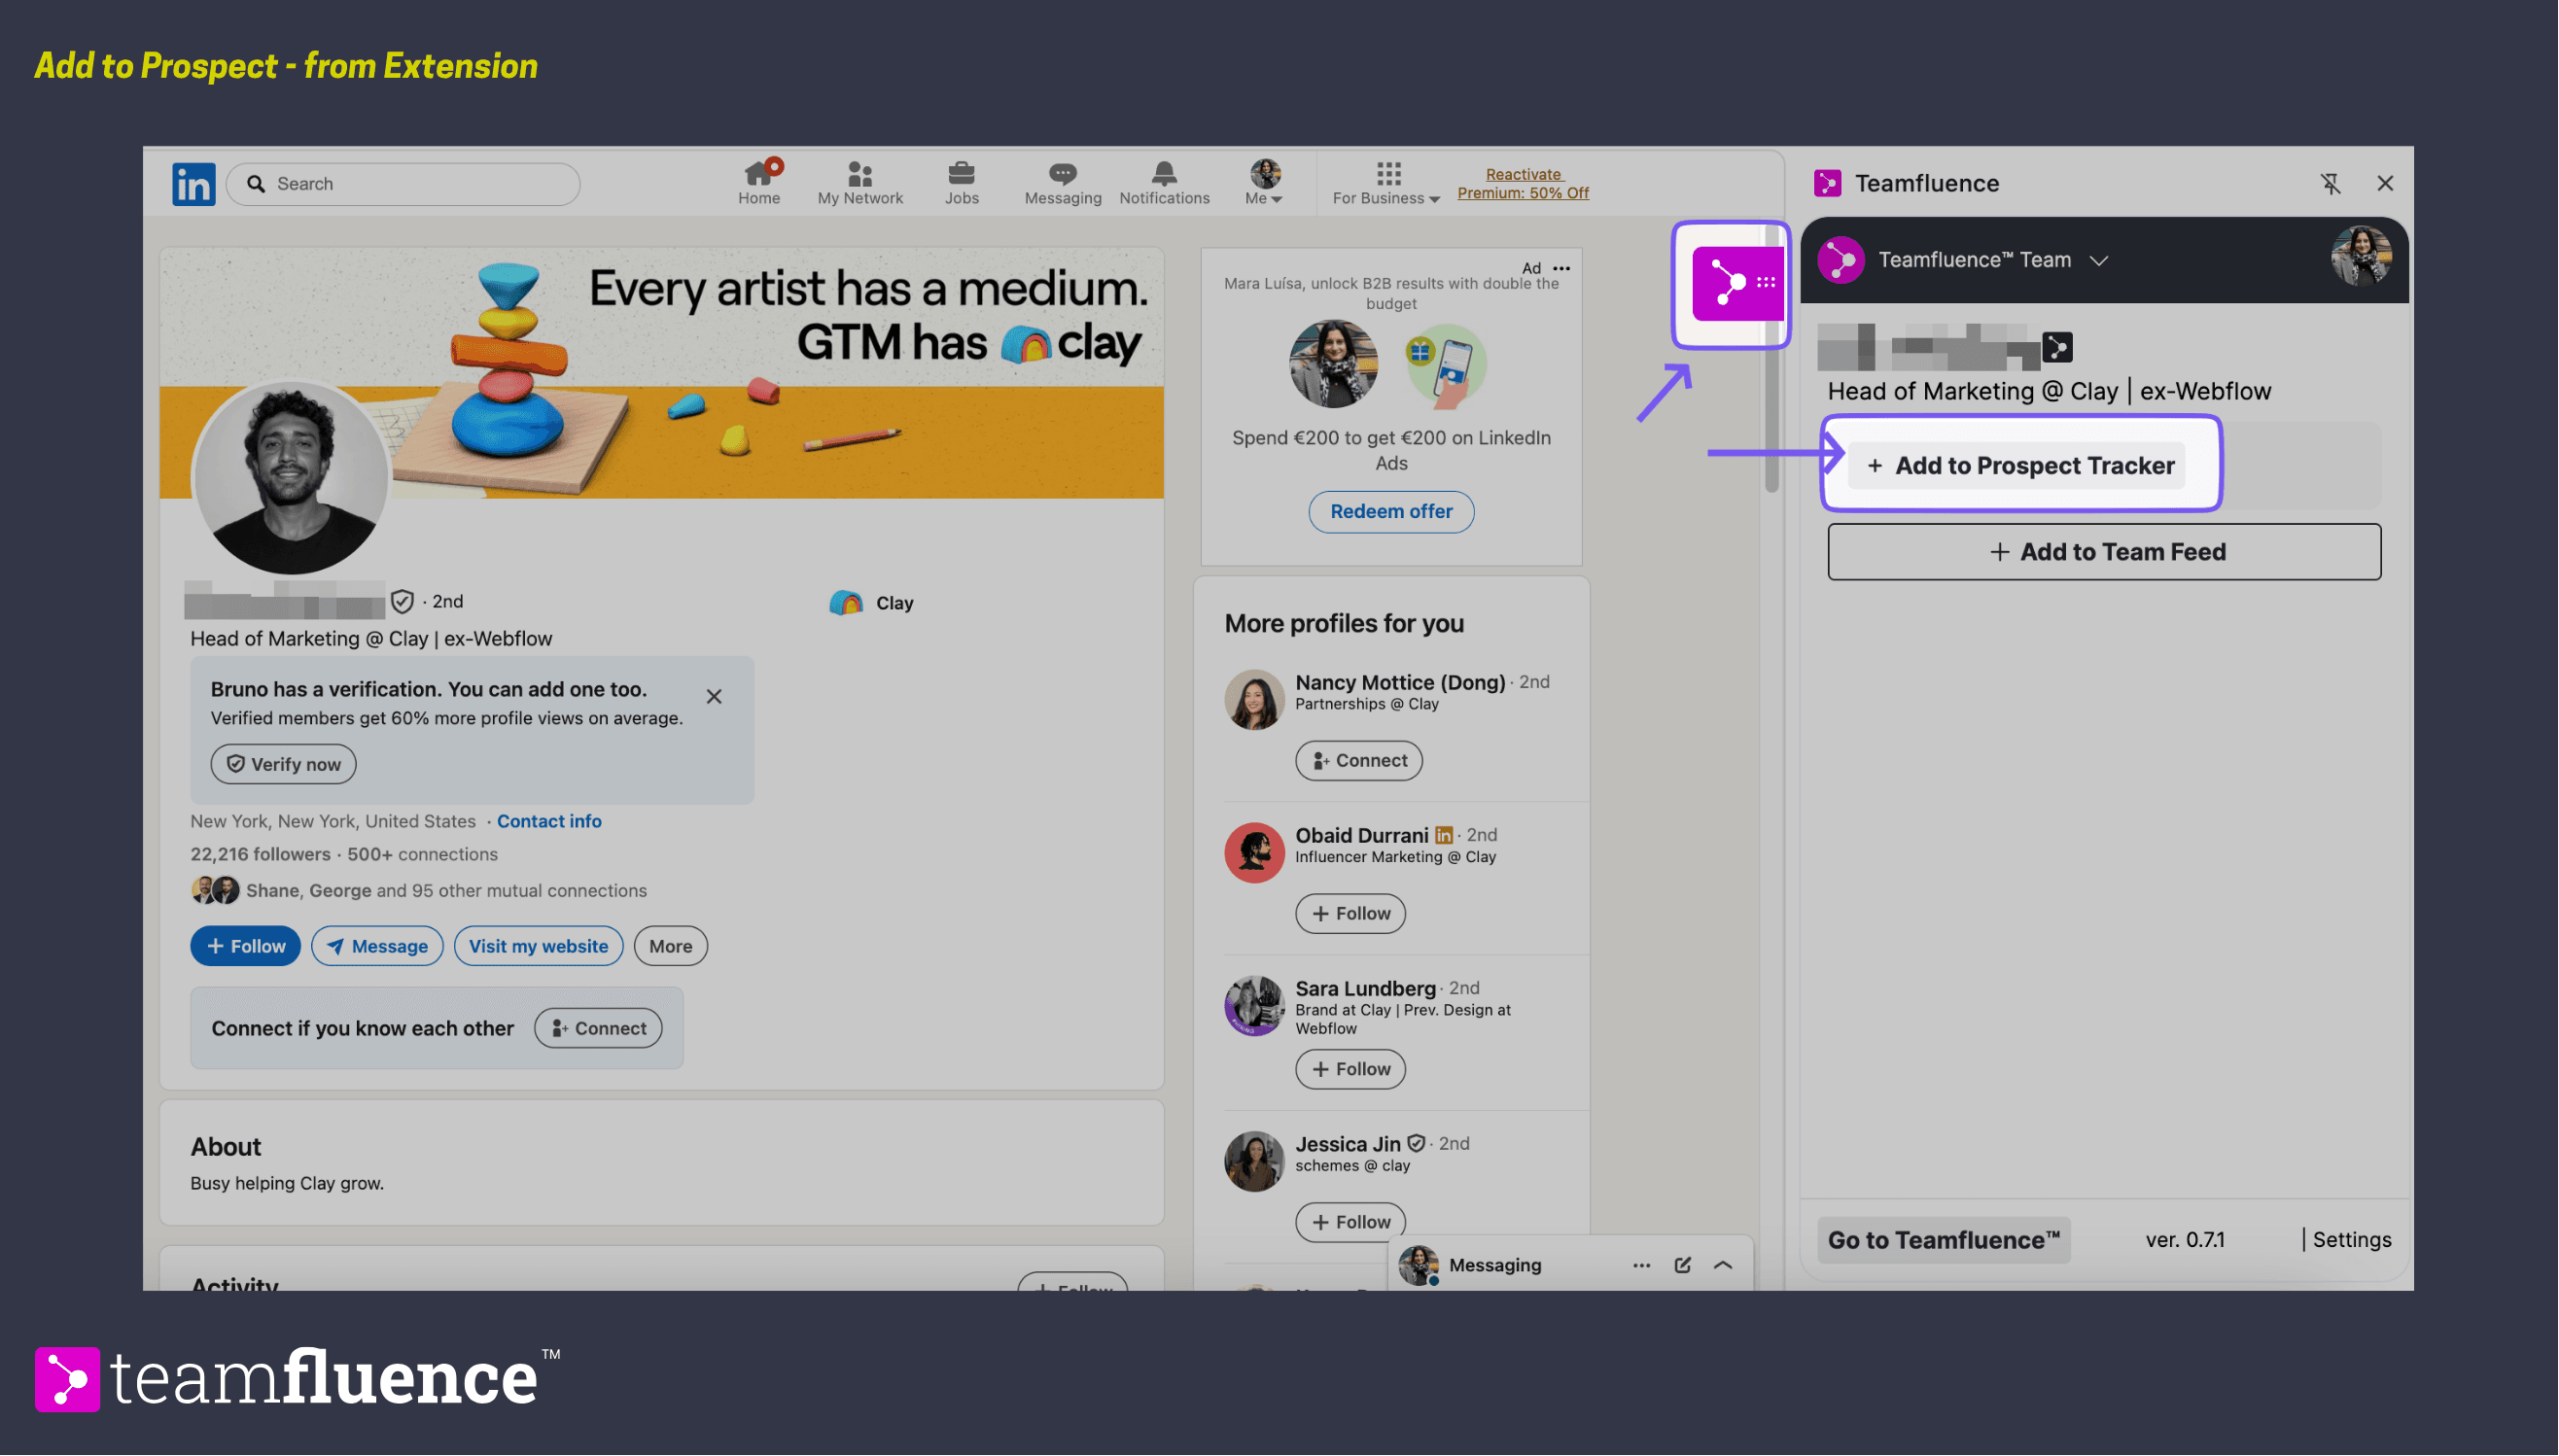
Directly from LinkedIn via the extension
If you visit someone's LinkedIn profile and want to add them to the Prospect Tracker directly - even if they have not yet interacted with you - open the Teamfluence extension on their profile and click Add to Prospect Tracker. This is useful for proactive prospecting outside of inbound signals.
Managing prospects
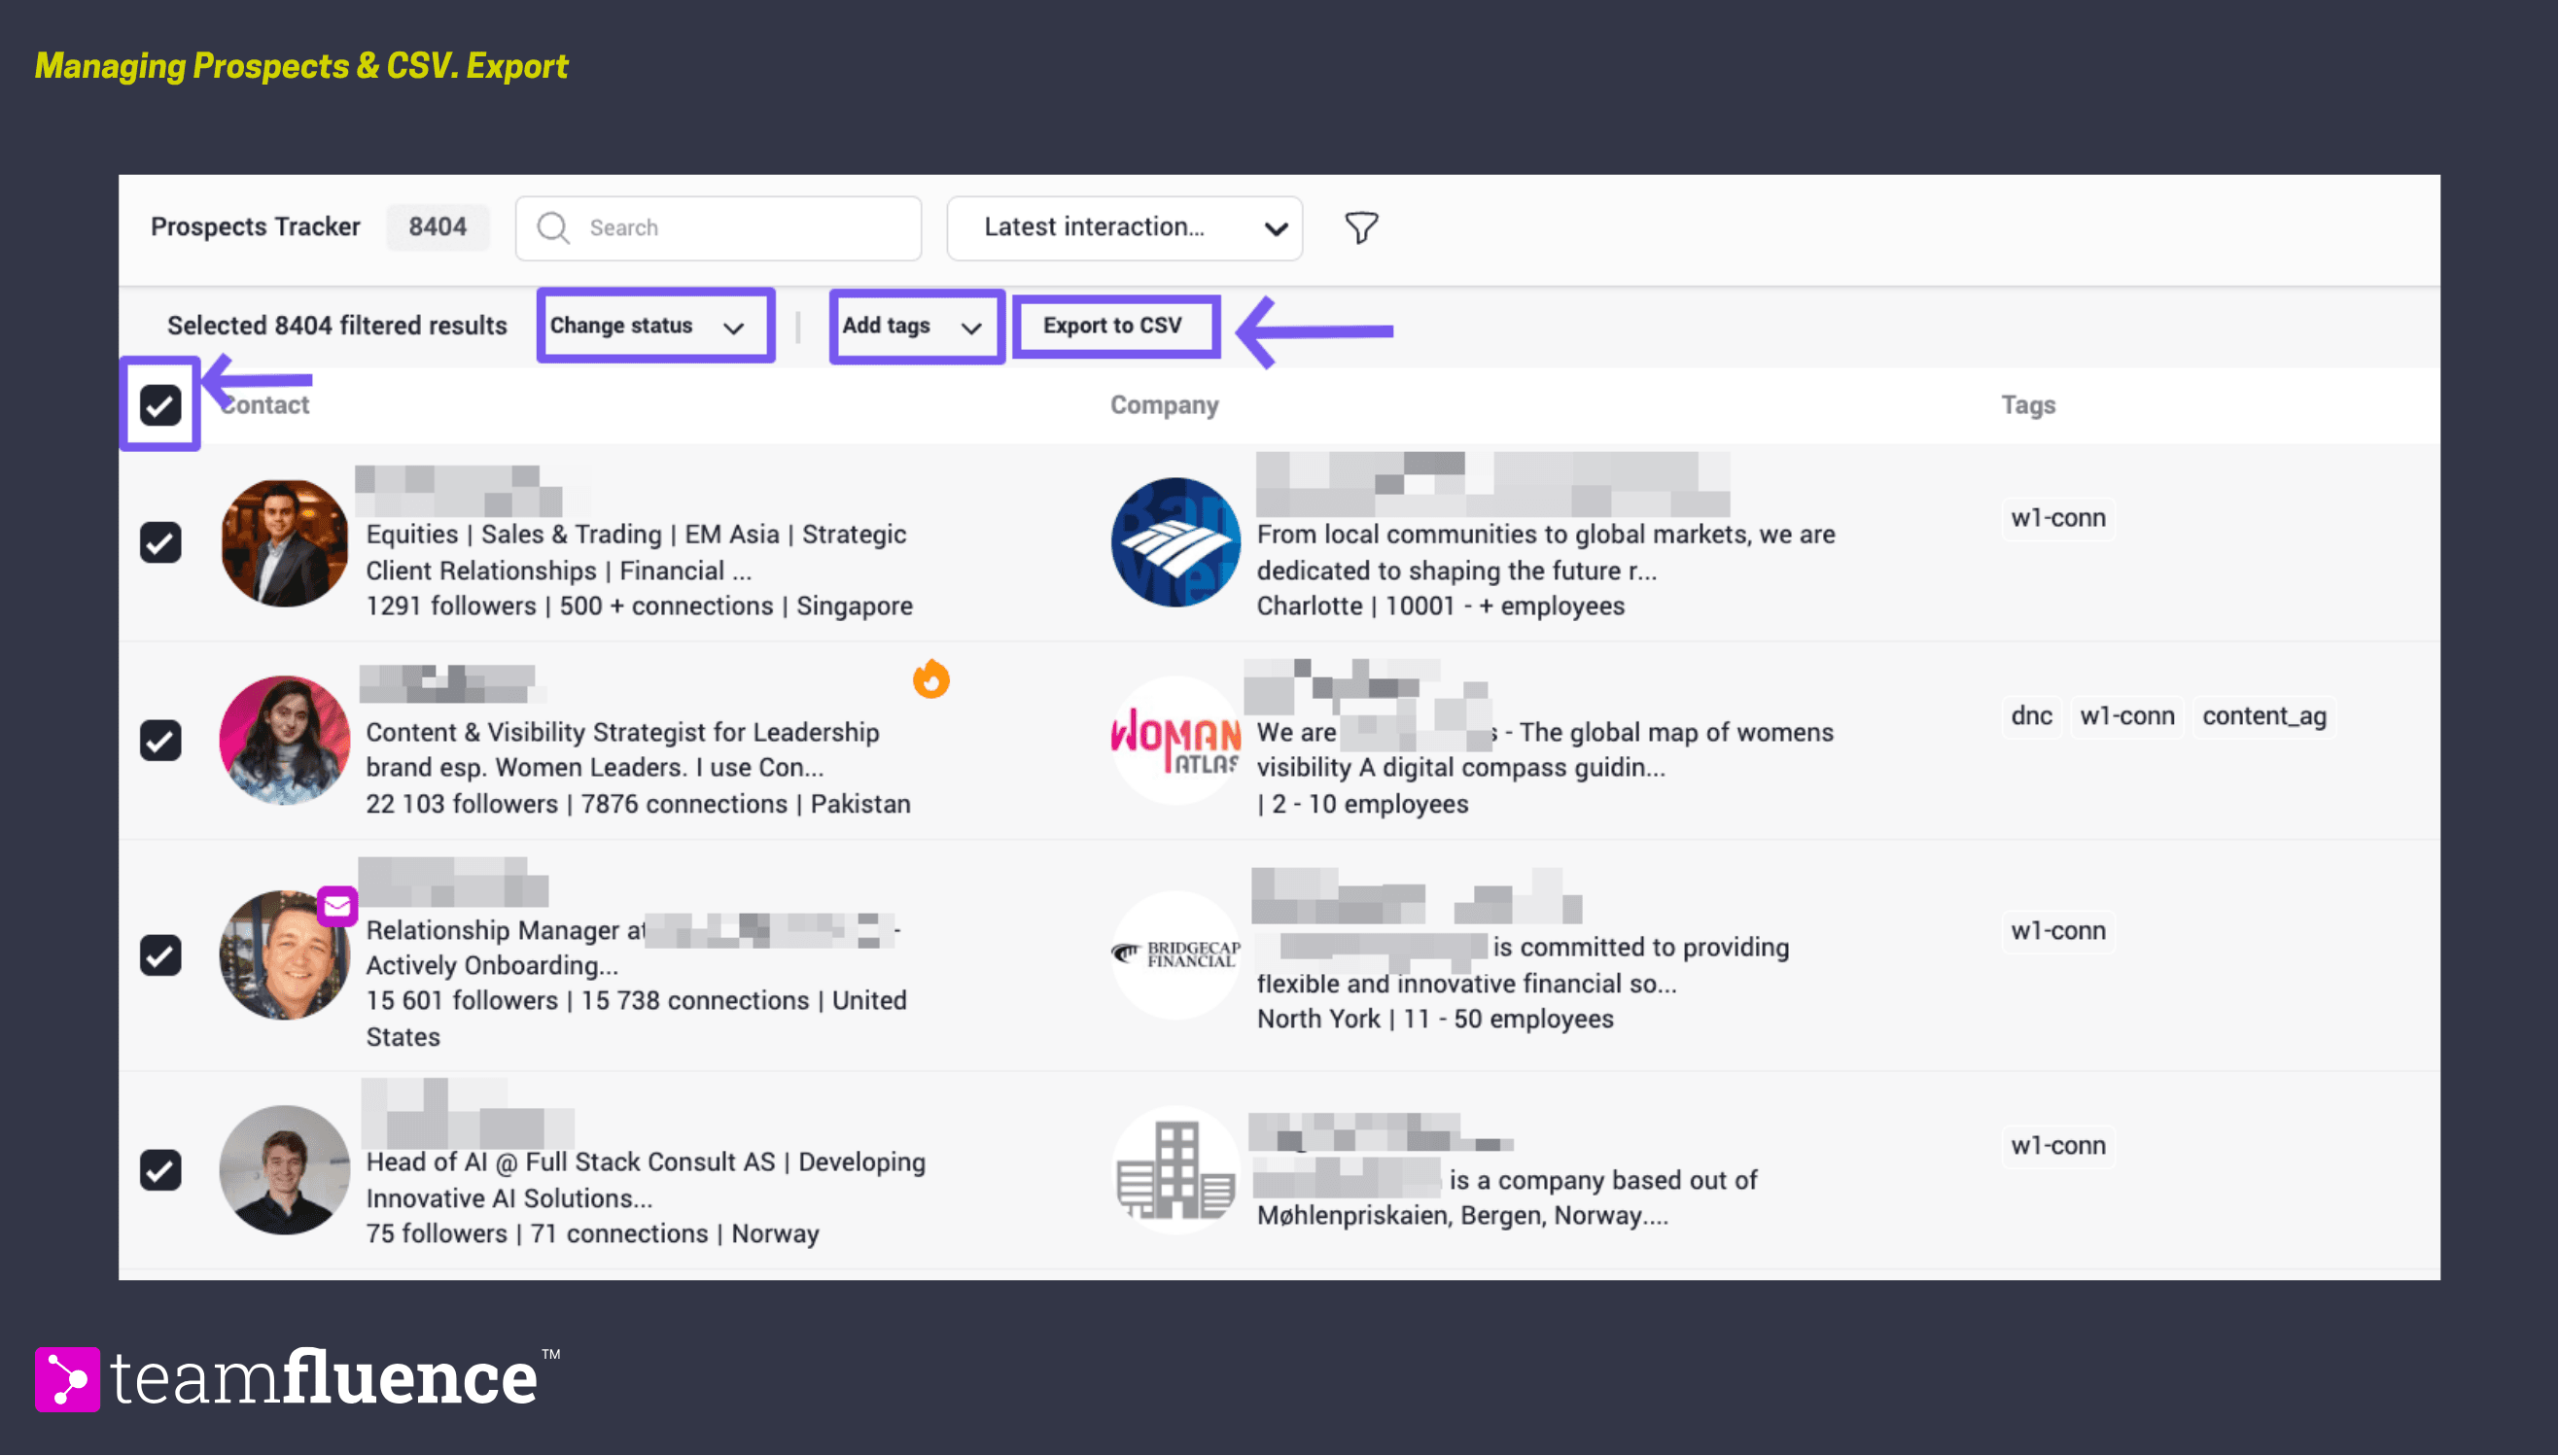
Changing status or assigning tags in bulk
Select one or more prospects using the checkboxes in the Prospect Tracker. Or apply as many filters needed and bulk select the matching criteria prospects. From the bulk action menu you can change their status - back to Lead or mark as Discarded - or assign tags to segment them. Discarded prospects are removed from the active view but their signal history is retained.
Exporting to CSV
Select the prospects you want to export, or select all, and use the bulk action menu to export to a CSV file. This is useful for teams working with the data in external tools.