The AI Agent qualifies incoming leads automatically by comparing them against your Ideal Customer Profile (ICP). You define the criteria once, and the agent scores every new lead against it — no manual filtering required.
All ICP qualification in Teamfluence runs through Workflows. This gives you full control over when qualification happens, which signals trigger it, and what actions follow a match.
Step 1: Create your first ICP profile
ICP profiles are created inside workflows. The first time you set one up, create a general profile that works across your whole team - you can reuse it in any workflow you build later.
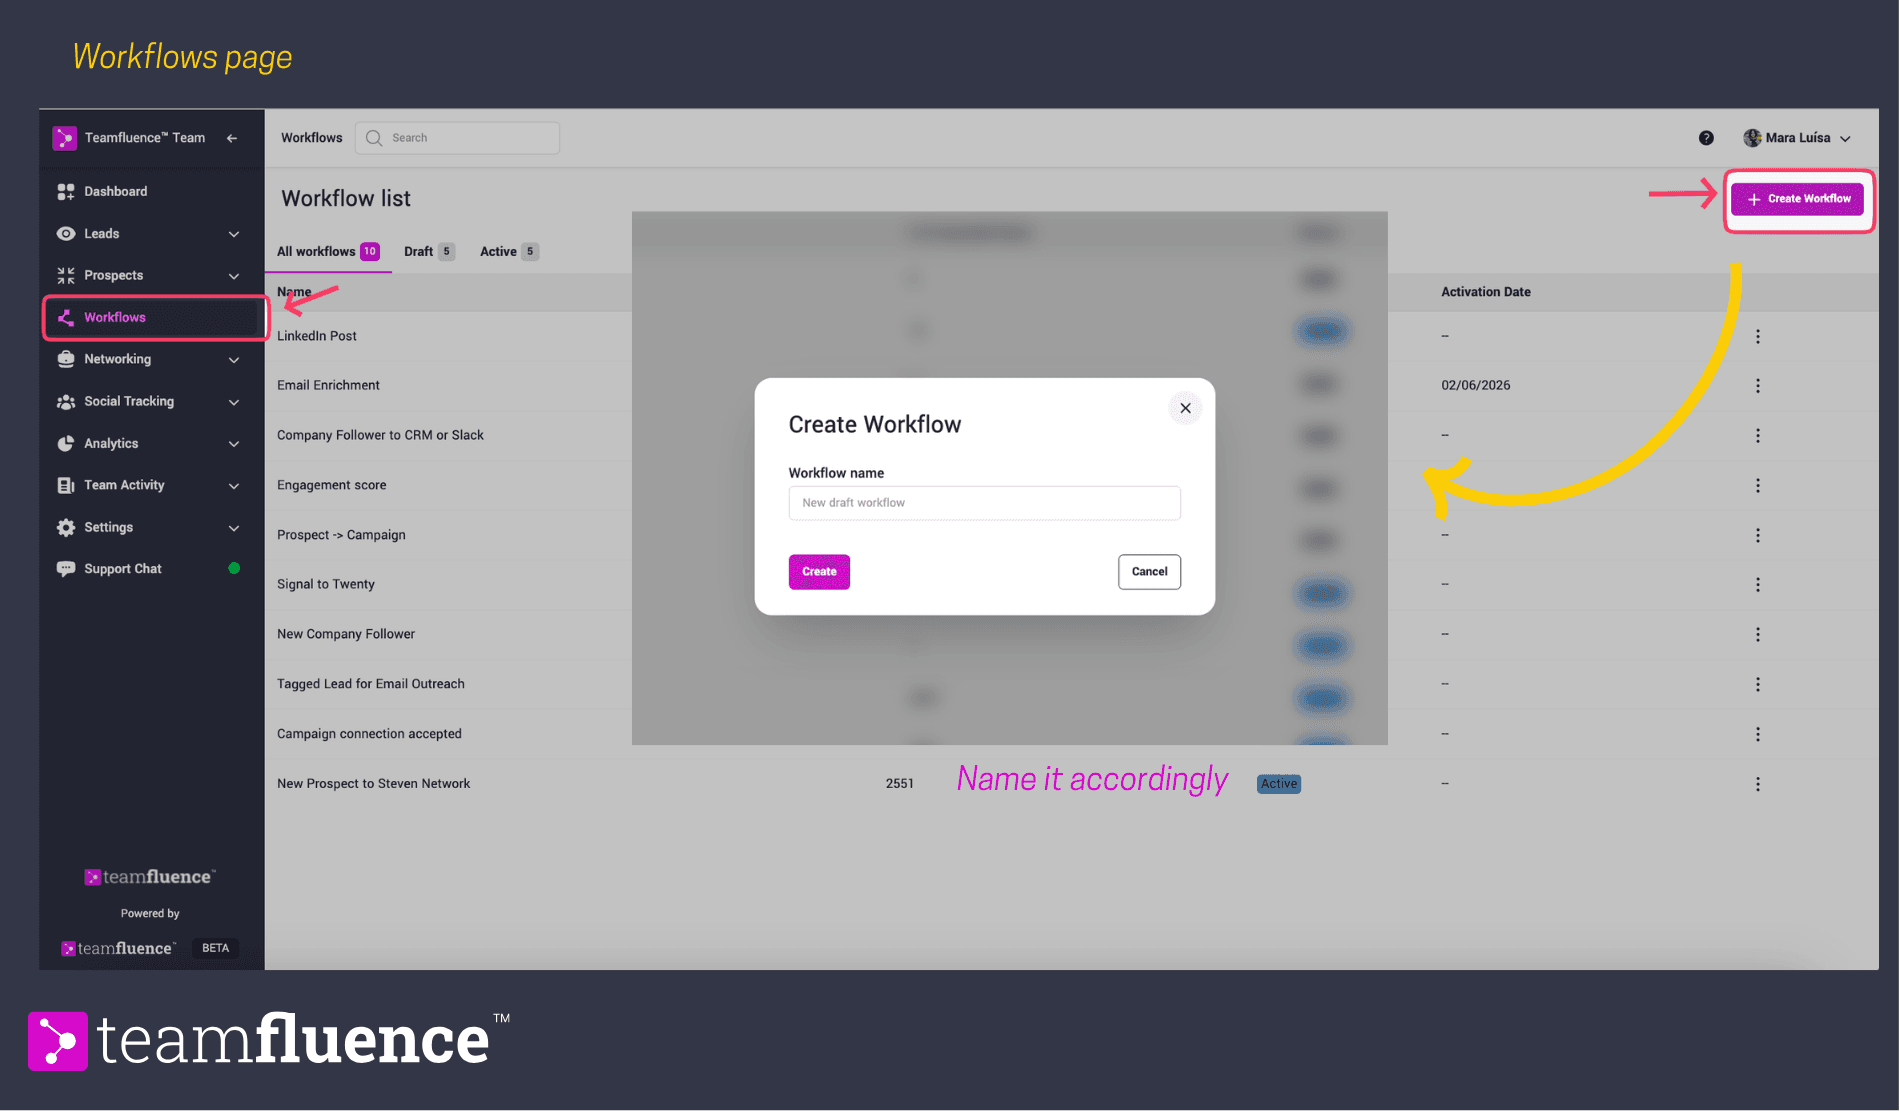
Go to Workflows in the sidebar and click Create Workflow.
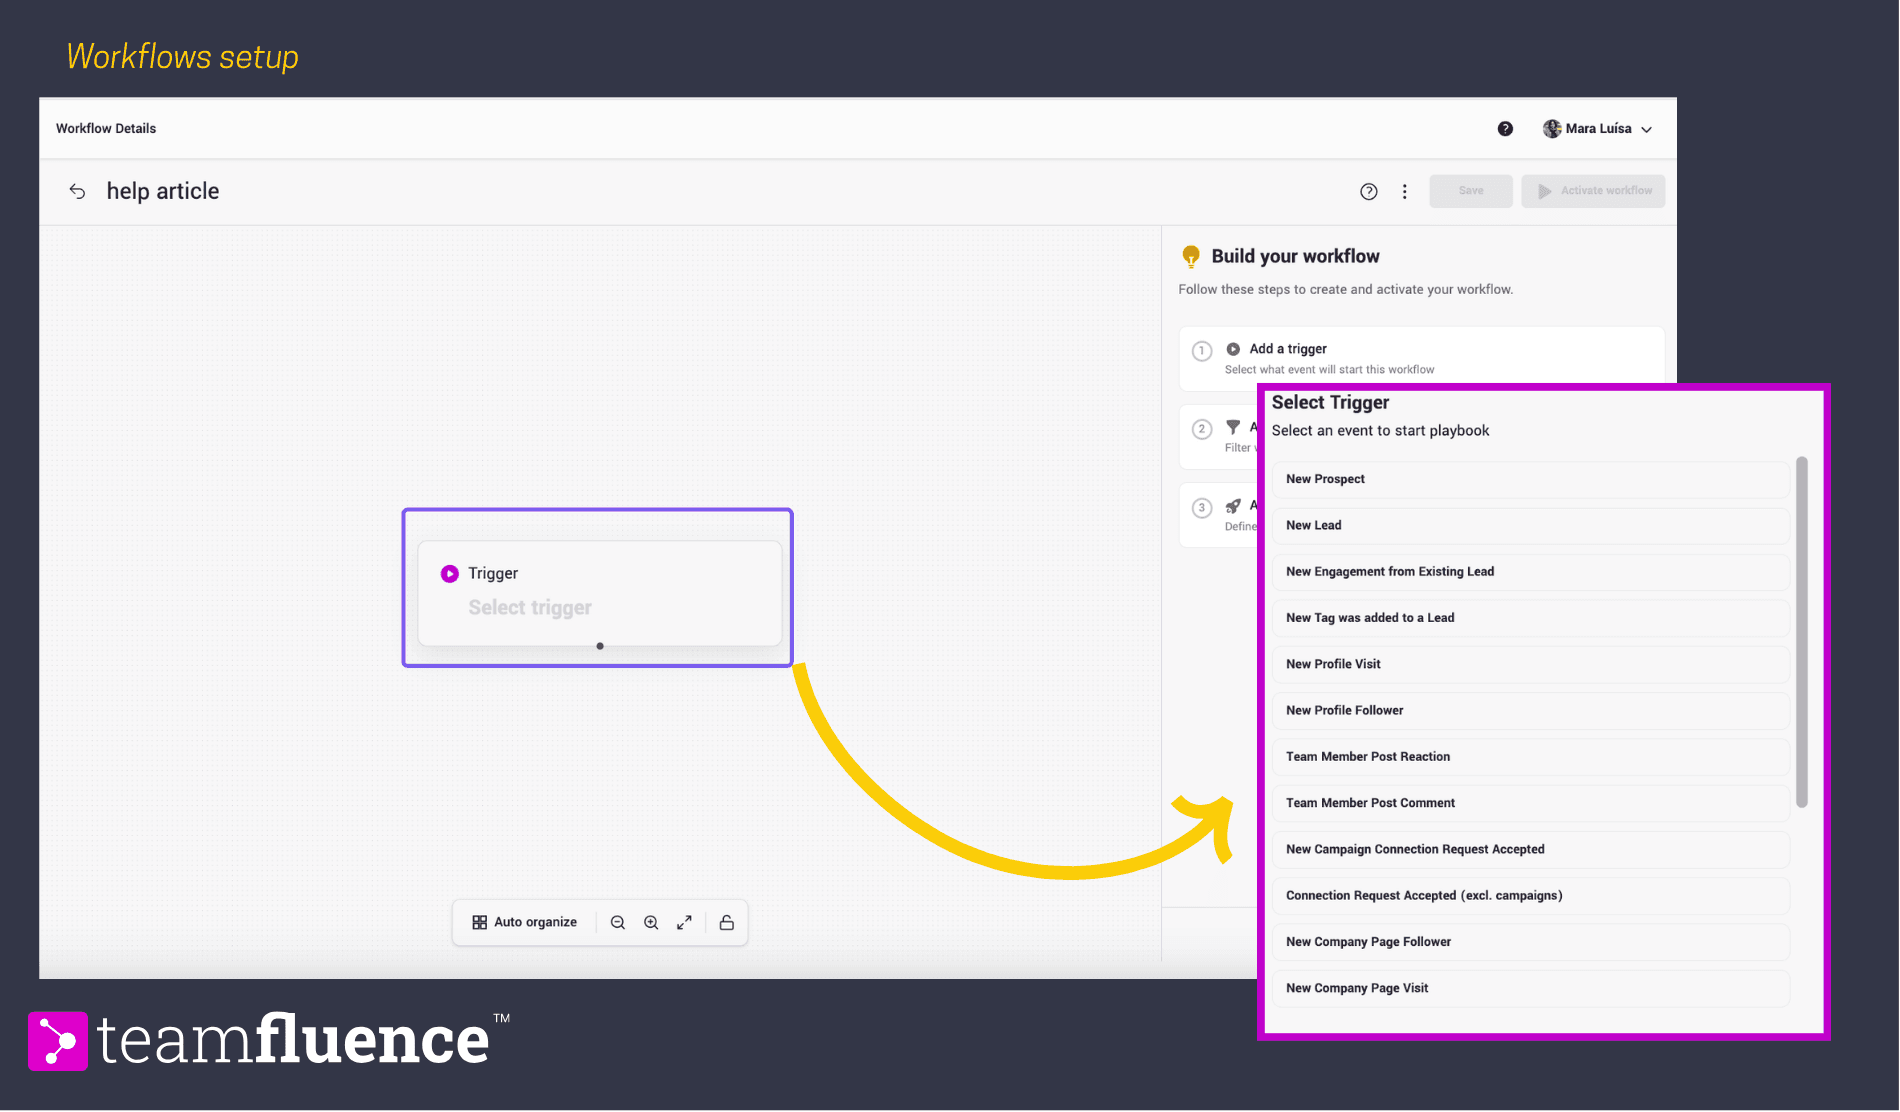
Choose a trigger - for your first profile, New Lead works well as it covers all incoming signals.
Click Add Next Step → Actions → Match ICP with AI Agent. In the Side bar create your ICP profiles - one for Persona and Another one for Company. Name the profile accorsingly, for example "General ICP", so it is easy to identify when reusing it later.

Define your company criteria:
- Hard criteria (must-haves):
Headcount (e.g. 50–500 employees)
Location (e.g. North America, Europe)
Industry (e.g. SaaS, Healthcare, Manufacturing)
- Soft criteria (nice-to-haves):
Annual Recurring Revenue (ARR)
Specific Department headcount
Other characteristics you’d like to prioritize, but aren’t mandatory
- Exclusion criteria (These companies will be excluded from your ICP match, even if they meet other criteria. Examples include:):
Industry (e.g. Gambling, Cryptocurrencies)
Location (e.g. specific regions or countries you do not target)
Headcount (e.g. too small or too large for your solution)
Define your persona criteria:
Specify the types of people you want to connect with inside those companies:
Persona characteristics (e.g., responsibilities, expertise, tenure in role, location)
Job titles (e.g. VP of Sales, Marketing Manager)
Departments ( e.g. Sales, Marketing, Operations)
Hierarchy (seniority level - e.g. Director-level and above)
Save the profile and continue building the workflow.
Once saved, this profile is available to select in any future workflow under Use existing profile. You can view and edit all saved profiles at Settings → ICP Profiles at my.teamfluence.app/settings/icp-profiles.
For both set the rating tolerance:
Flexible → matches rated 3–5 Balanced (recommended) → matches rated 4–5 Strict → matches rated 5 only
Step 2: Complete the workflow
Finish configuring the workflow around your new profile.
Add an action for leads that match. Common starting points:
Move to Prospects — sends matched leads to the Prospect Tracker for email enrichment and CRM sync Push to Slack — notifies your team in real time Fire Webhook — routes leads to an external tool like Clay or HubSpot
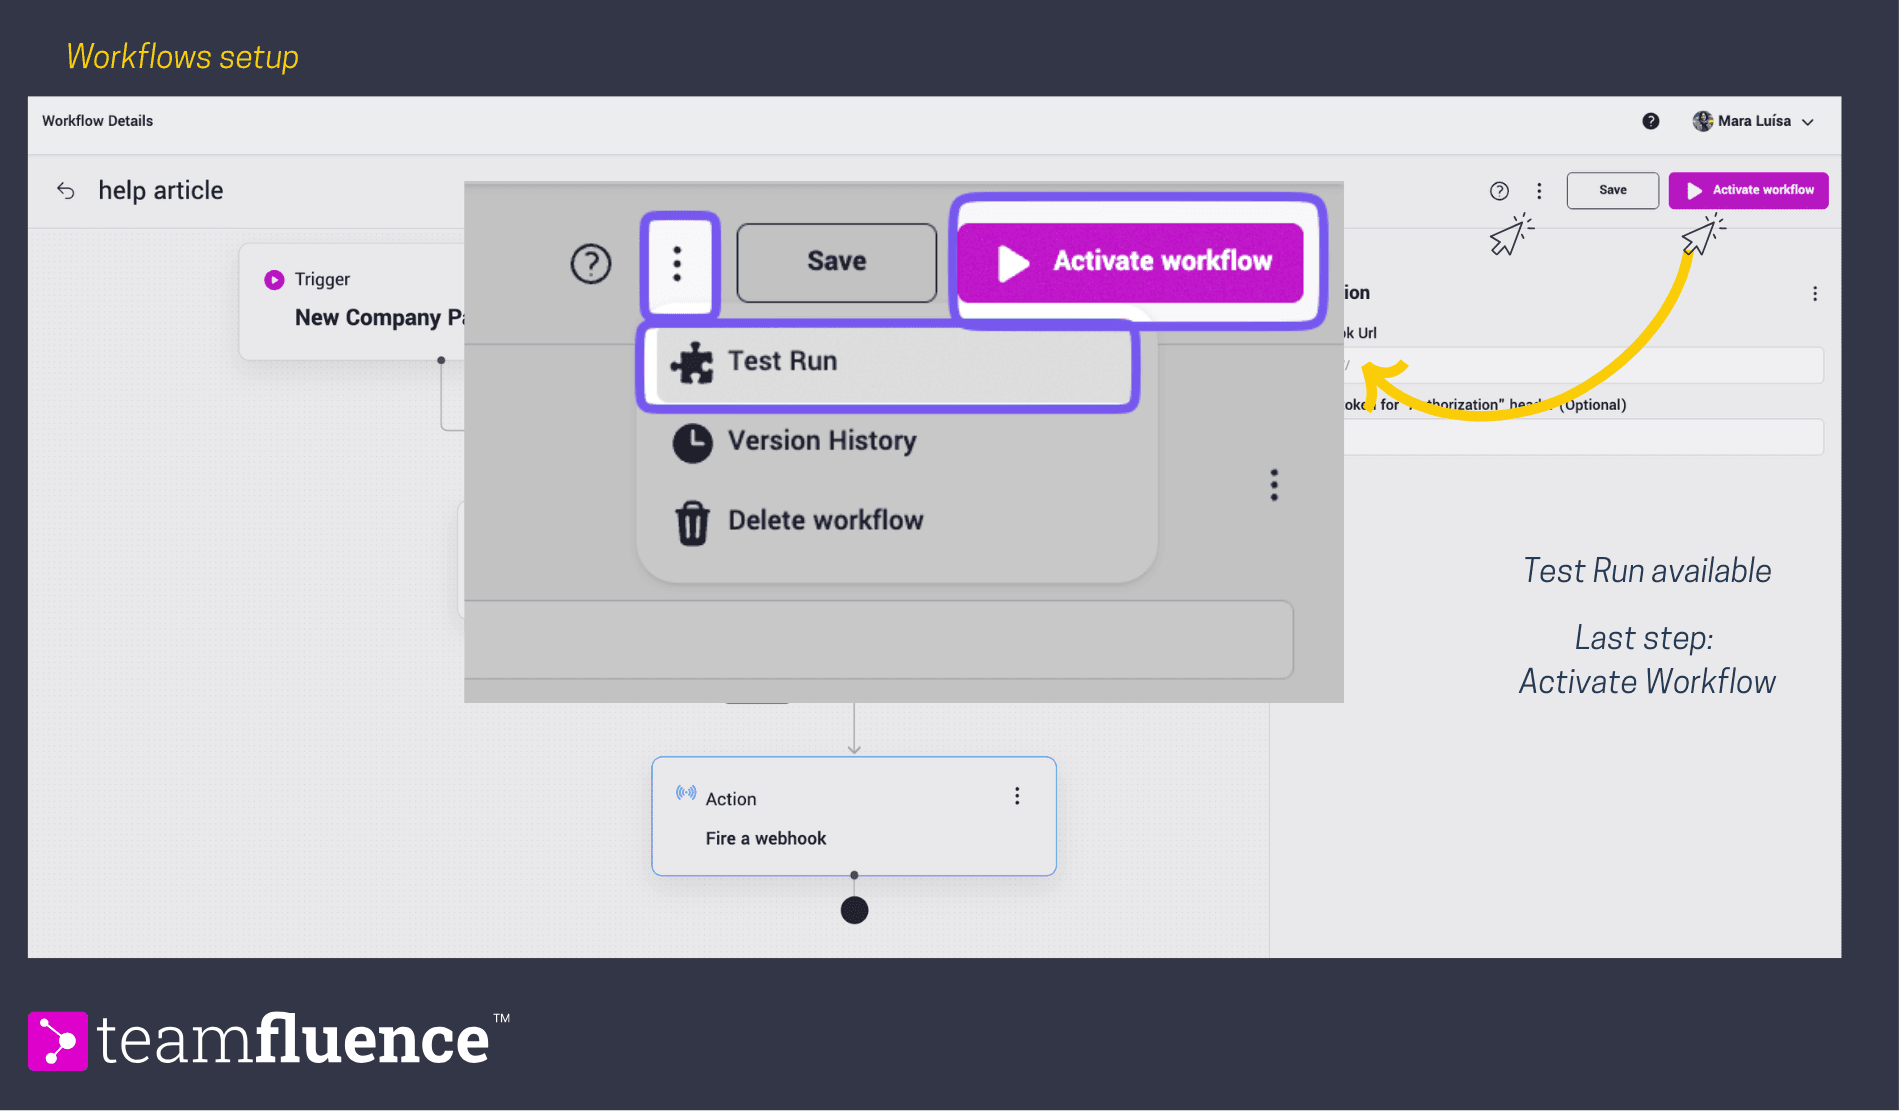
Click Activate.
Step 3: Review and refine
During the first few days, check the reasoning behind each AI decision inside Lead Monitoring. Each matched or unmatched lead shows an explanation - use this to spot gaps in your criteria and adjust the profile in Settings → ICP Profiles. Revisit weekly in the first month. Small adjustments early on improve precision over time.
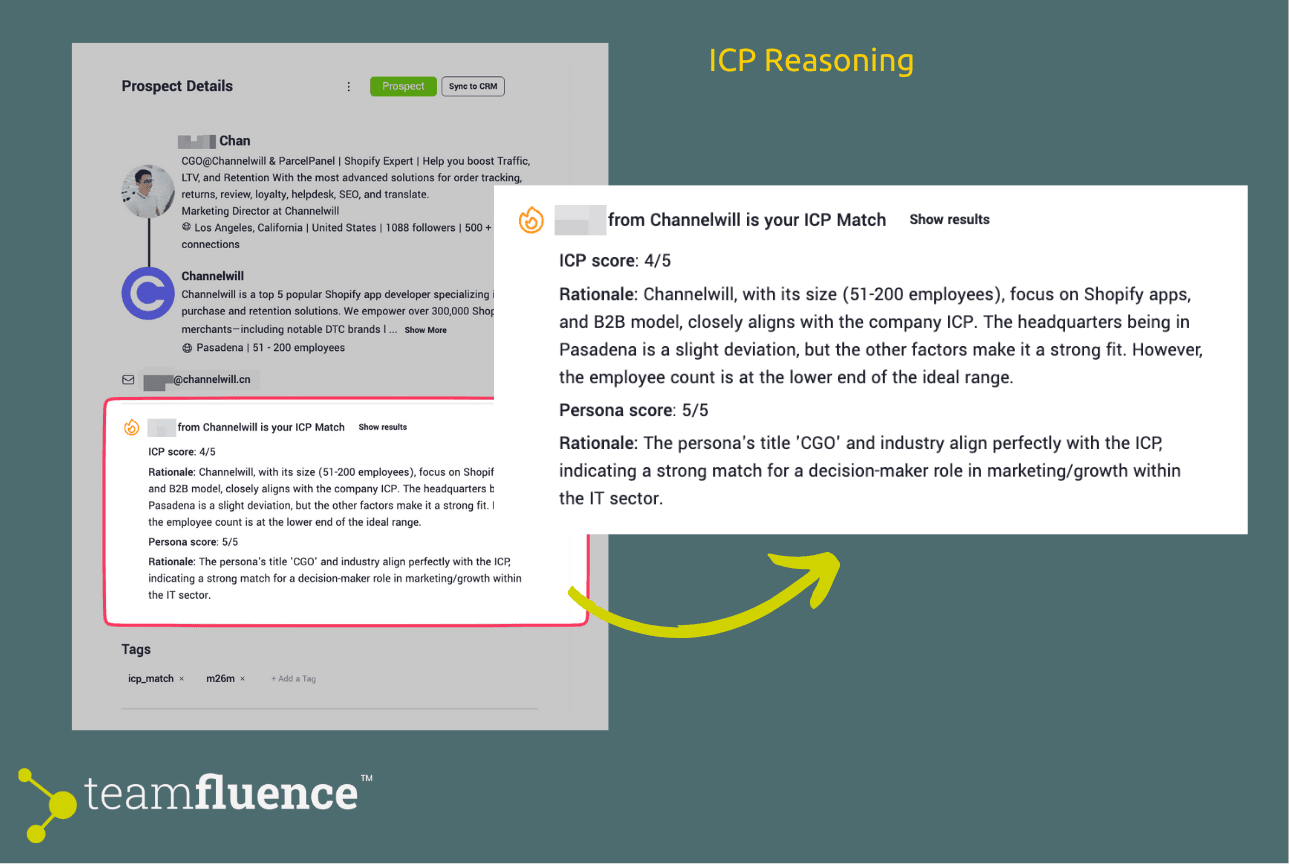 Match Reasoning
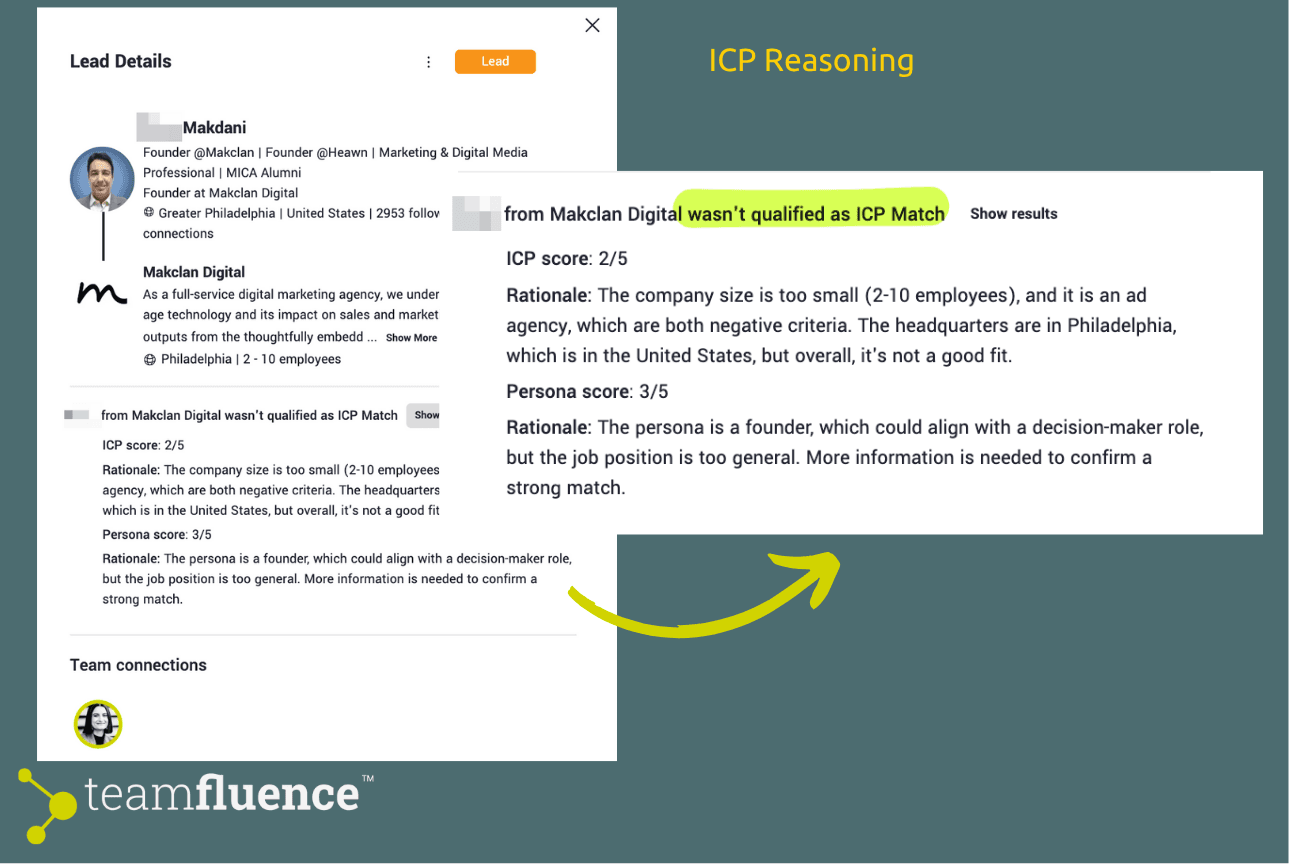 No Match Reasoning
Running multiple ICP profiles
One workflow, one profile is the starting point. As your setup matures, you can create additional profiles for different segments and build separate workflows for each. Common examples:
Enterprise vs. SMB — different headcount thresholds and seniority requirements EU vs. US — location-based qualification with different persona criteria Post engagers vs. profile visitors — same ICP but different triggers and actions
To create a new profile, return to Settings → ICP Profiles and repeat Step 1 with segment-specific criteria. Then build a new workflow and select that profile in the AI Agent action.
Monitoring and adjusting ICP profiles All your saved profiles are available at Settings → ICP Profiles. You can edit criteria, rename profiles, or archive ones no longer in use. Changes apply to any workflow using that profile from the next lead processed onwards.
Complementing ICP qualification with target accounts
If you run account-based outreach, uploading your ABM account list adds a second qualification layer on top of ICP matching. Leads from target accounts are highlighted separately in Lead Monitoring, giving you an additional filter to prioritize outreach. See How to Upload ABM Accounts for setup instructions.
Benefits You'll See
- Automated lead qualification → No more manual filtering.
- Targeted outreach → Connect only with high-potential prospects.
- Efficiency gains → Sales and marketing teams spend time where it matters most.
- Intelligent routing → With workflows, different lead types automatically go to different systems or team members.
- Reduced noise → Only qualified, high-intent signals reach your sales team.
Need Help?
If you have any questions, feel free to submit a ticket or email us at support@myteamfluence.com.