
How to create campaigns from LinkedIn search and join or add participants to the campaigns.
With Networking Campaigns, you can efficiently organize and track your team’s targeted network growth by assigning a curated list of people to connect with. Any team member can join a campaign and use Teamfluence to send personalized connection invites.
Steps to Create a Campaign
- Open a LinkedIn search and use the filters to target the people or industries you want in your campaign. Keep the People tab selected so the extension can read individual profiles.
- Open the Sidekick extension from your browser sidebar. It opens on the Manage profiles screen and automatically reads the profiles on the current search page.
- Under Workspace, select the teamspace this campaign belongs to.
- Under Networking Campaign, choose an existing campaign or create a new one. This field stays locked until you select a workspace.
- Review the profile list. Every profile Sidekick finds is selected by default, and the Selected counter at the top shows how many are currently included. Uncheck anyone you want to leave out.
- Click Add to send the selected profiles to your campaign.
- Move to the next page of LinkedIn results, let it load, then click Add again to keep building the same campaign. Repeat until your list is complete.
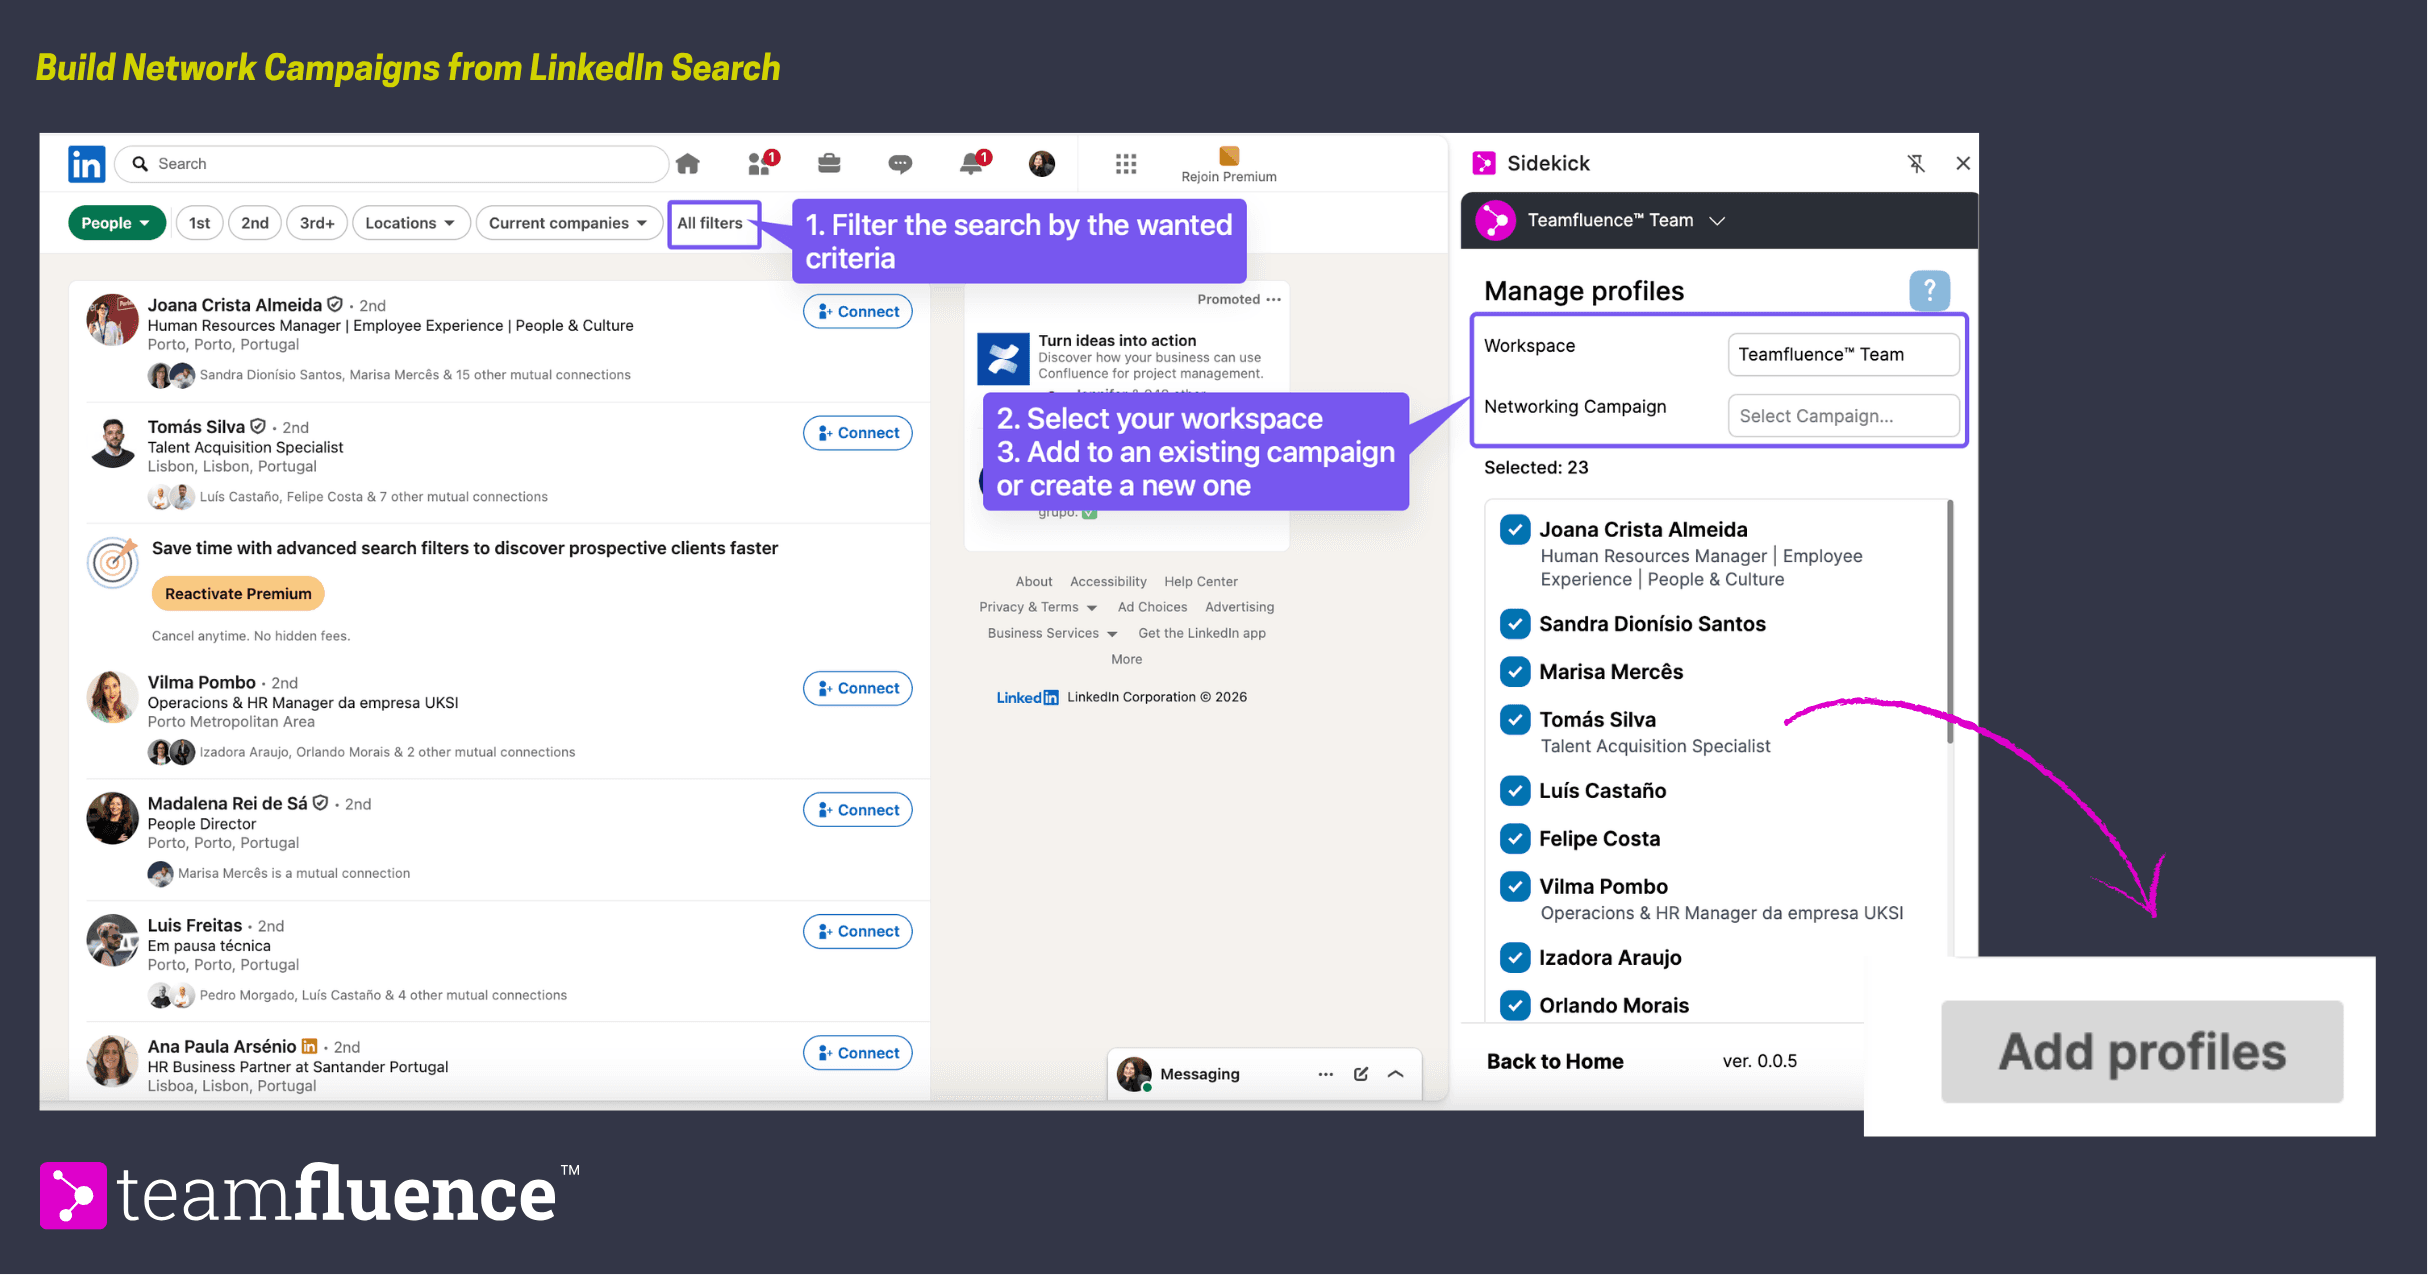
From LinkedIn Search
Note: The new sidebar plugin replaces the old in-page plugin - all campaign creation and contact management now happen directly from the teamfluence Sidekick extension.
Managing Your Campaign
As the campaign creator, you can:
Edit the campaign description.
Use the Recent Activity Threshold to filter LinkedIn profiles based on their recent activity.
- If enabled, profiles that haven’t interacted or posted within the last defined days will be excluded, and connection invites won’t be sent to them.
By default, newly created campaigns are in Draft mode. Once you activate the campaign using the Activate Campaign button, you and your team members can join it.
Joining or Adding Participants to a Campaign
To start sending connection invites, team members need to:
- Open the campaign page.
- Click the Join button. Like on LinkedIn, you can attach a personalized message to be sent with the connection request.
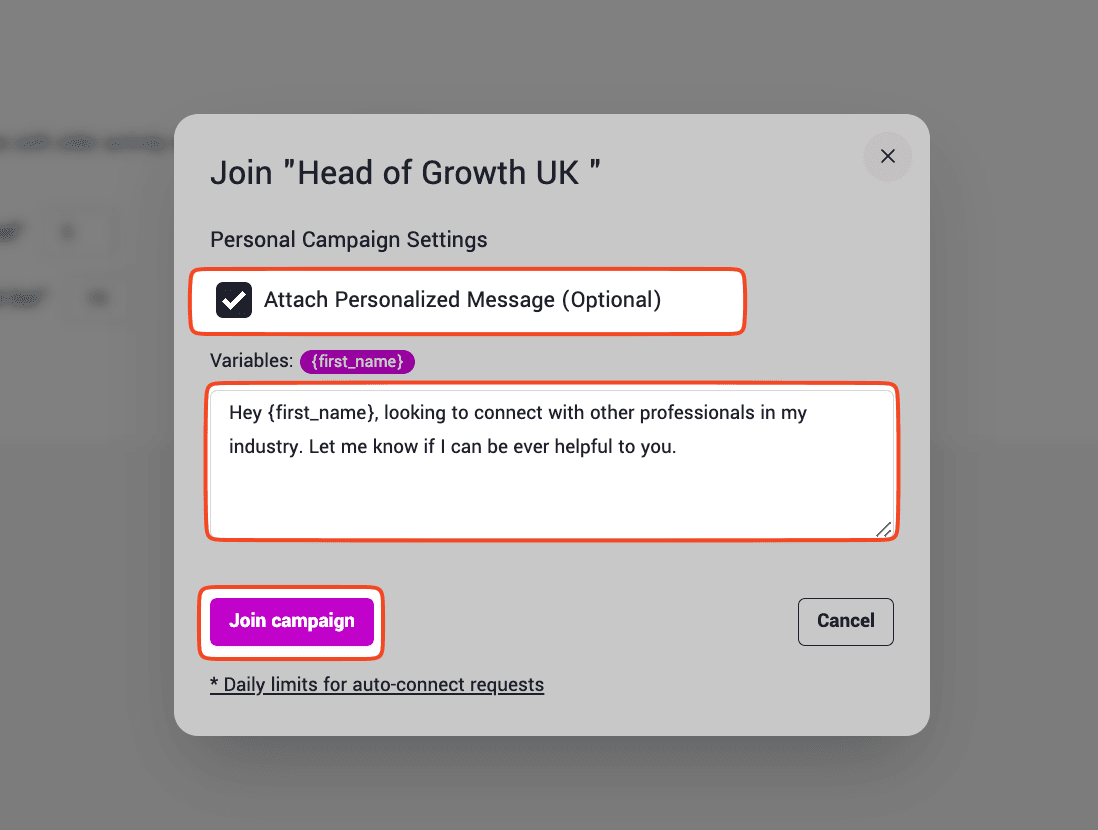
- Optionally, you can also configure a follow-up message to be sent if the connection request is accepted.
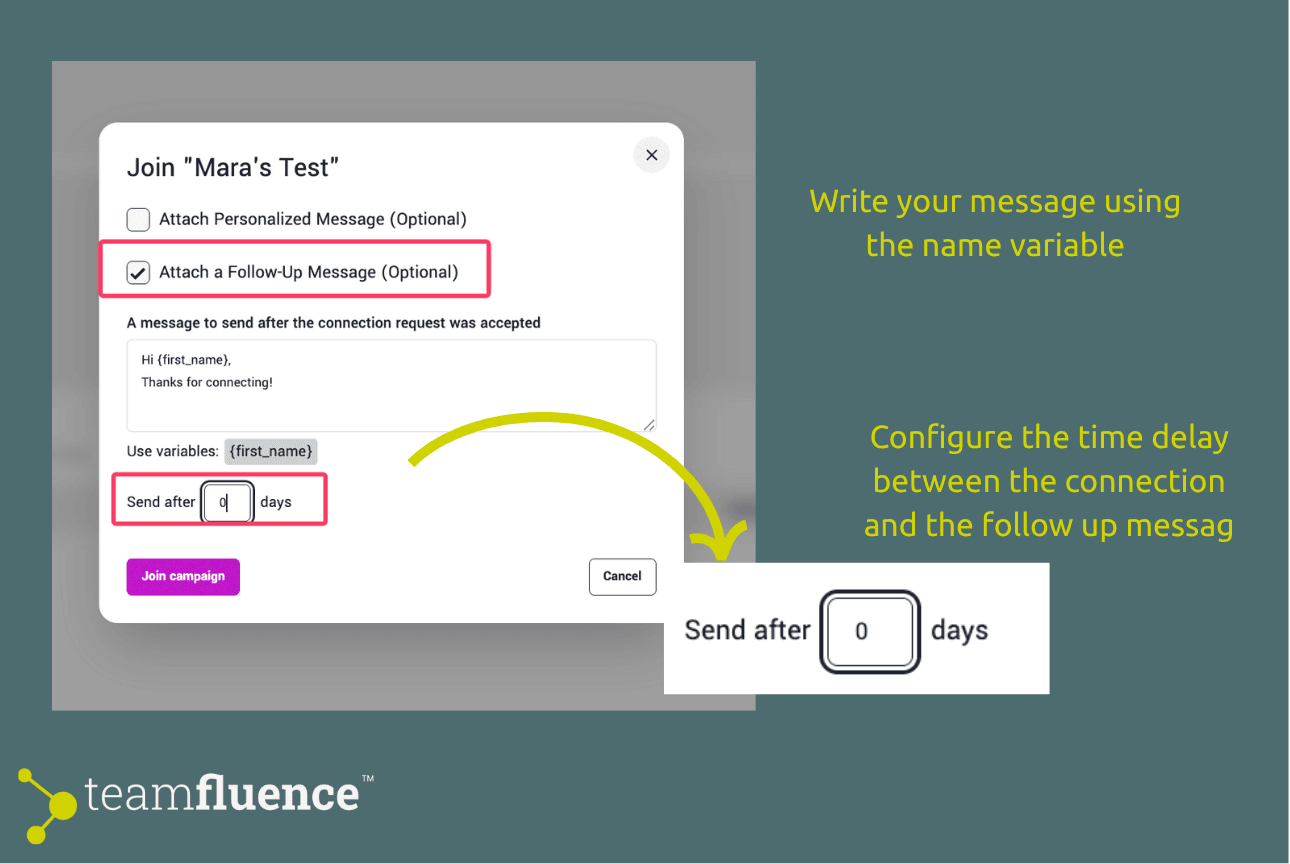
- Alternatively, use the Add Participants button to add other team members to a specific campaign. You can also attach personalized connection notes and/or follow-up messages when adding participants.
Once a team member joins, new connection invites will be sent daily until the campaign list is completed.
Note: Campaign creators are not automatically included in the campaign. If you want to participate in your own campaign, you must join it explicitly.
Configuring Connection Settings
Each team member can customize their connection request preferences:
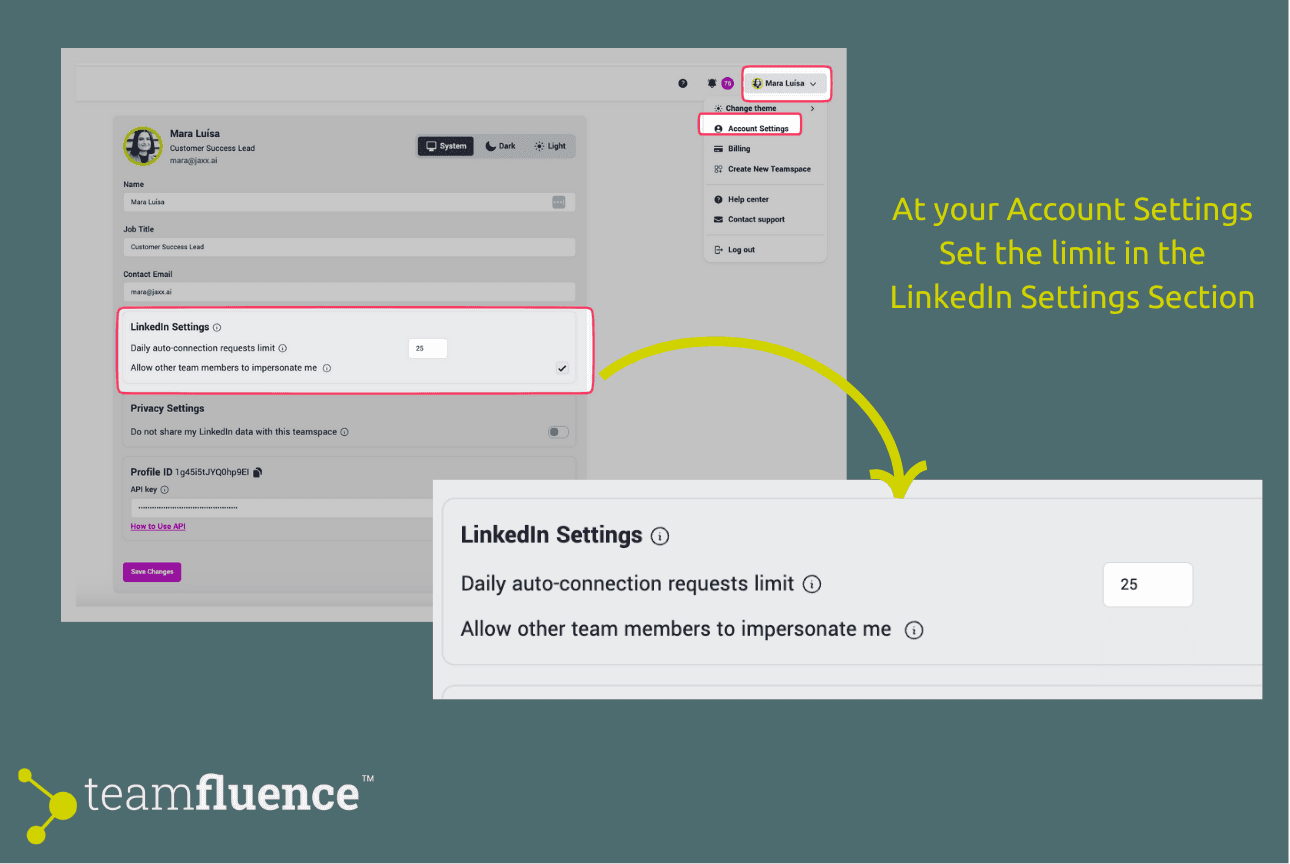
- New connections per day – Set a daily limit on the number of connection requests.
At your Account Settings(https://my.teamfluence.app/profile)
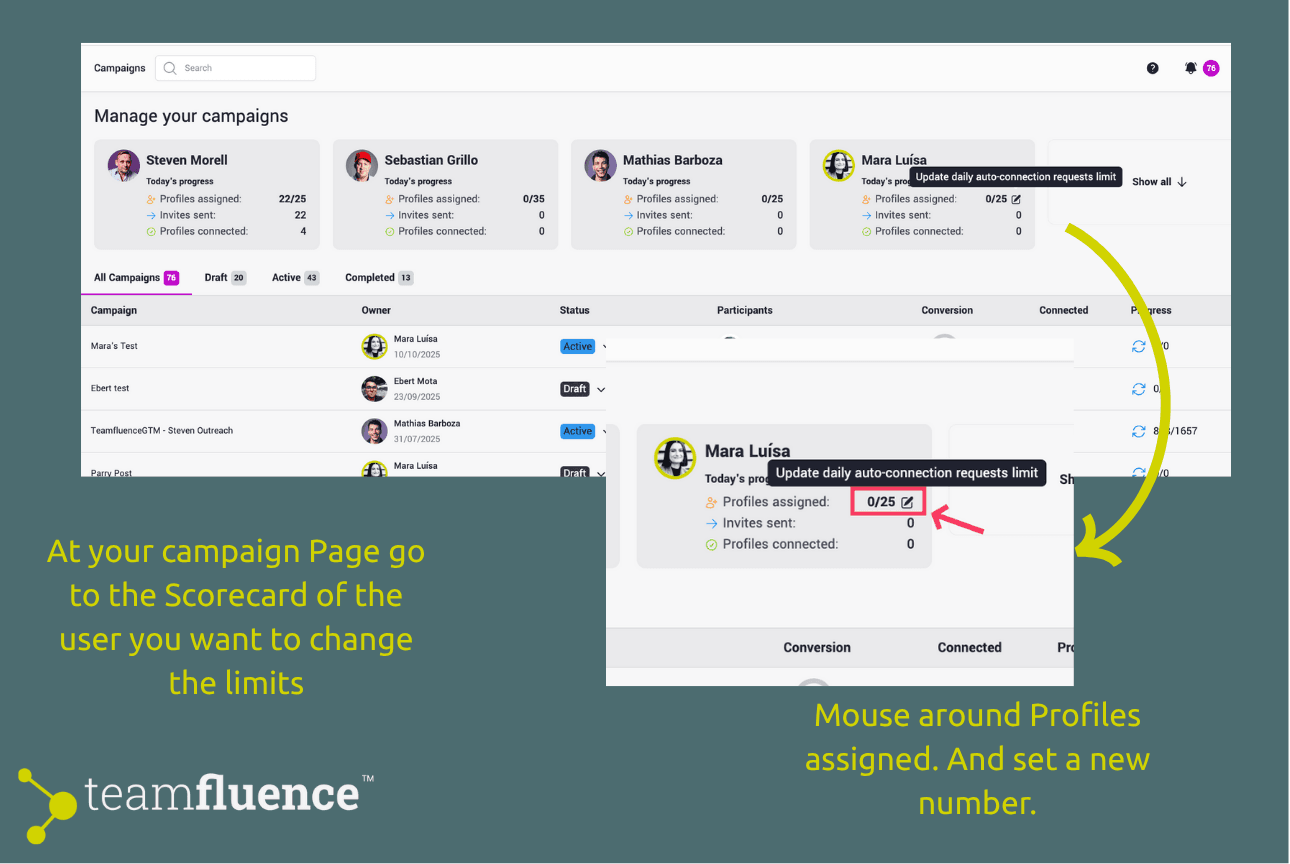
Or on your Networking Campaign Page (https://my.teamfluence.app/campaigns)
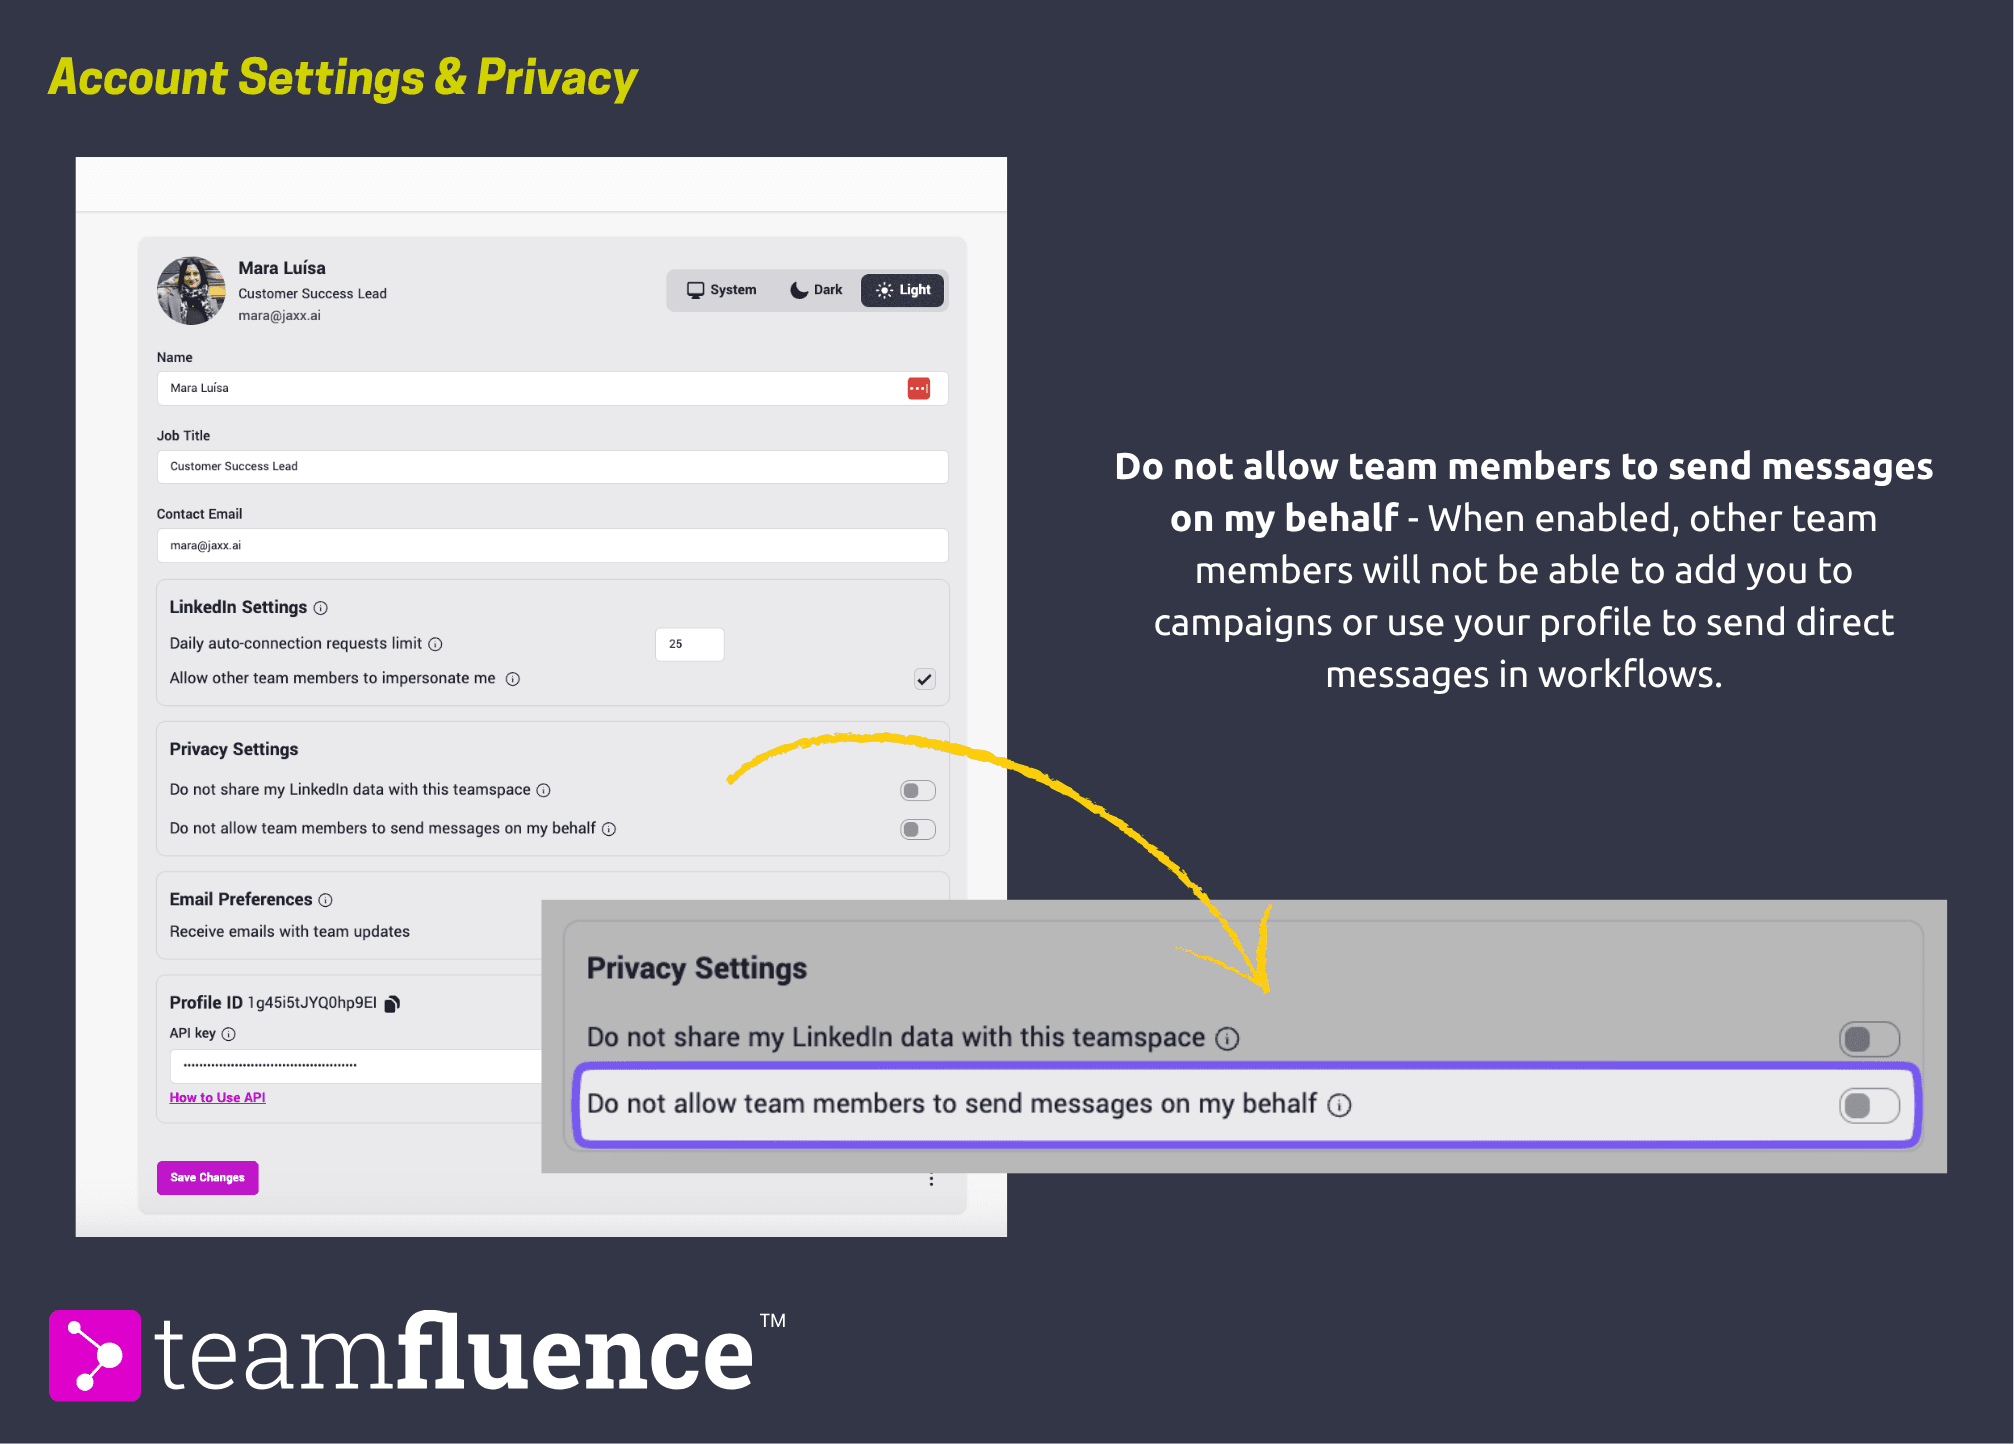
- Not allow team members to add you to campaigns – By default, other Teamfluence users in your workspace can add you to campaigns and use your profile to send direct messages through workflows. If you want to control this yourself go to you Account Settings (https://my.teamfluence.app/profile)
Happy networking! 🎉