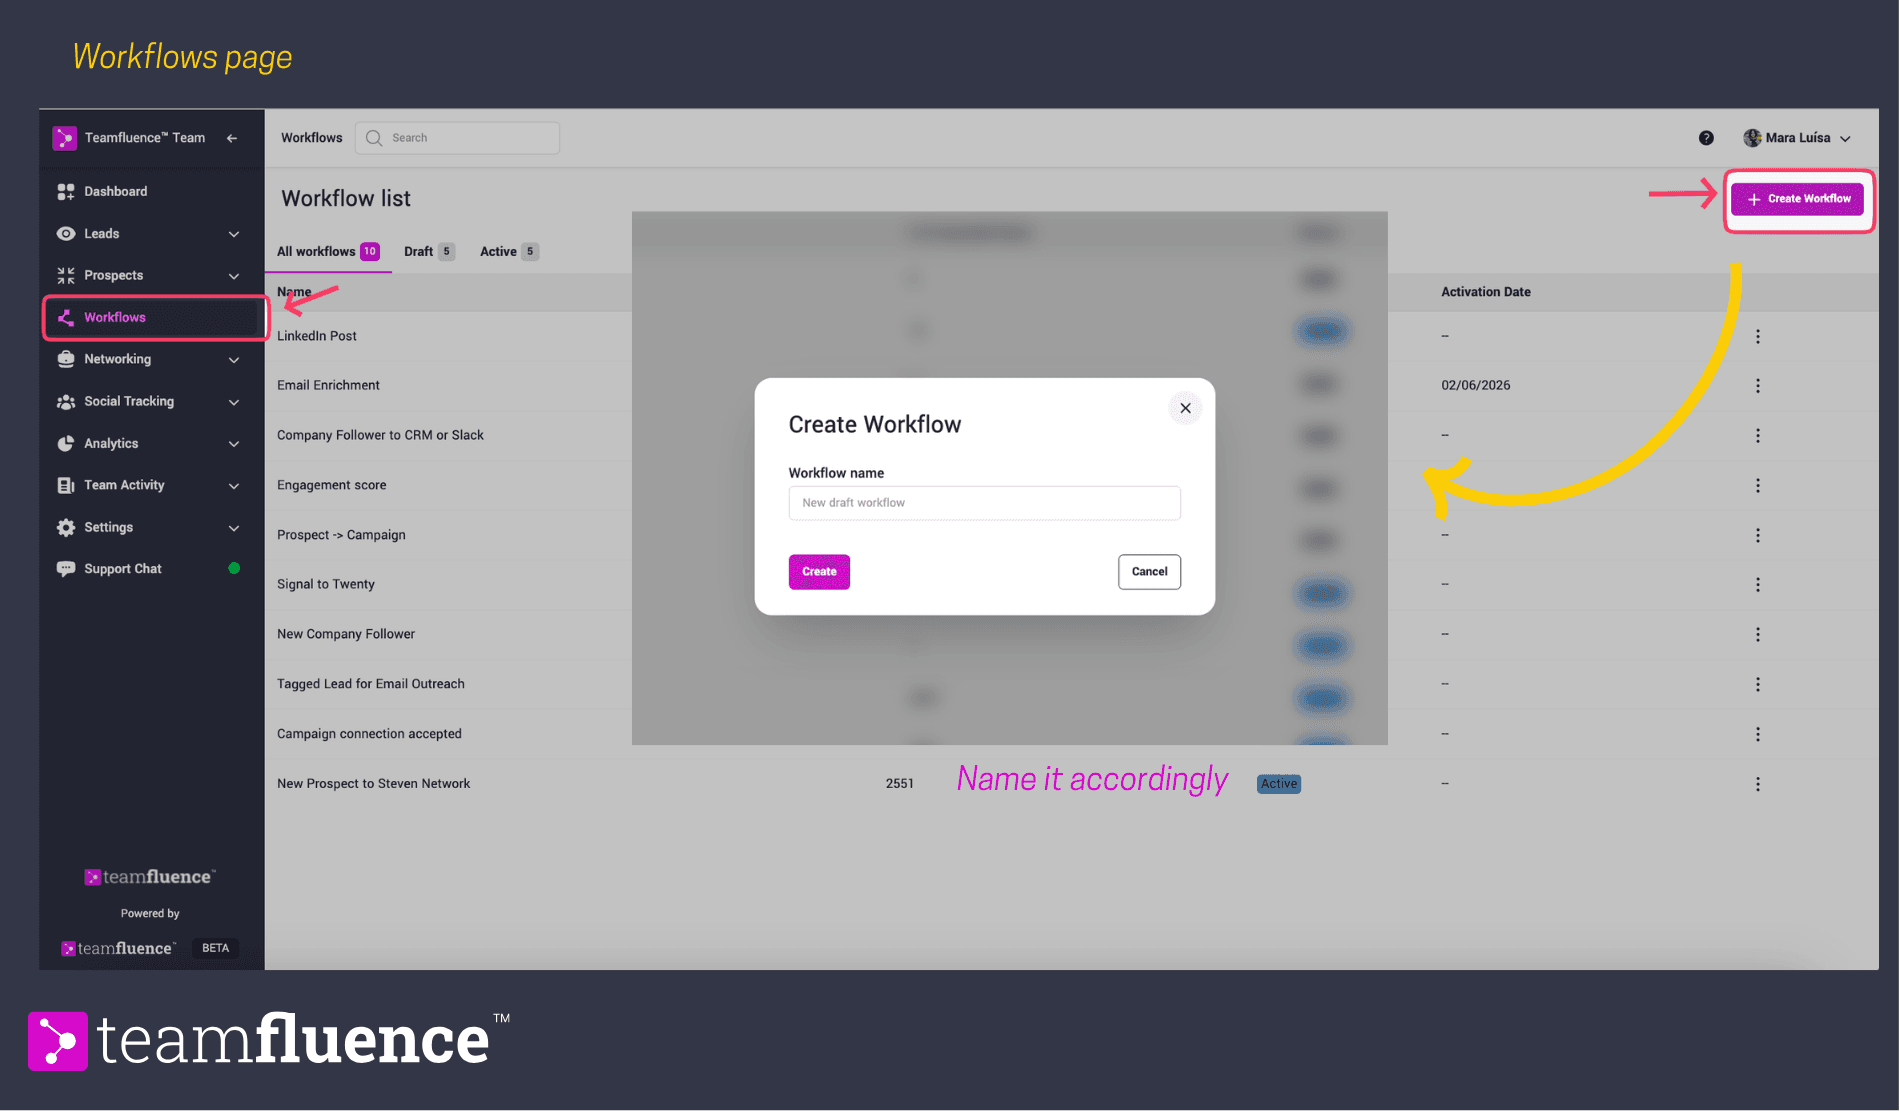
Step 1: Navigate to Workflows
- Open your Teamfluence workspace
- Click Workflows in the left sidebar
- Click Create Workflow in the top right
You'll see a blank canvas with a prompt to select a trigger. This is where every workflow begins.
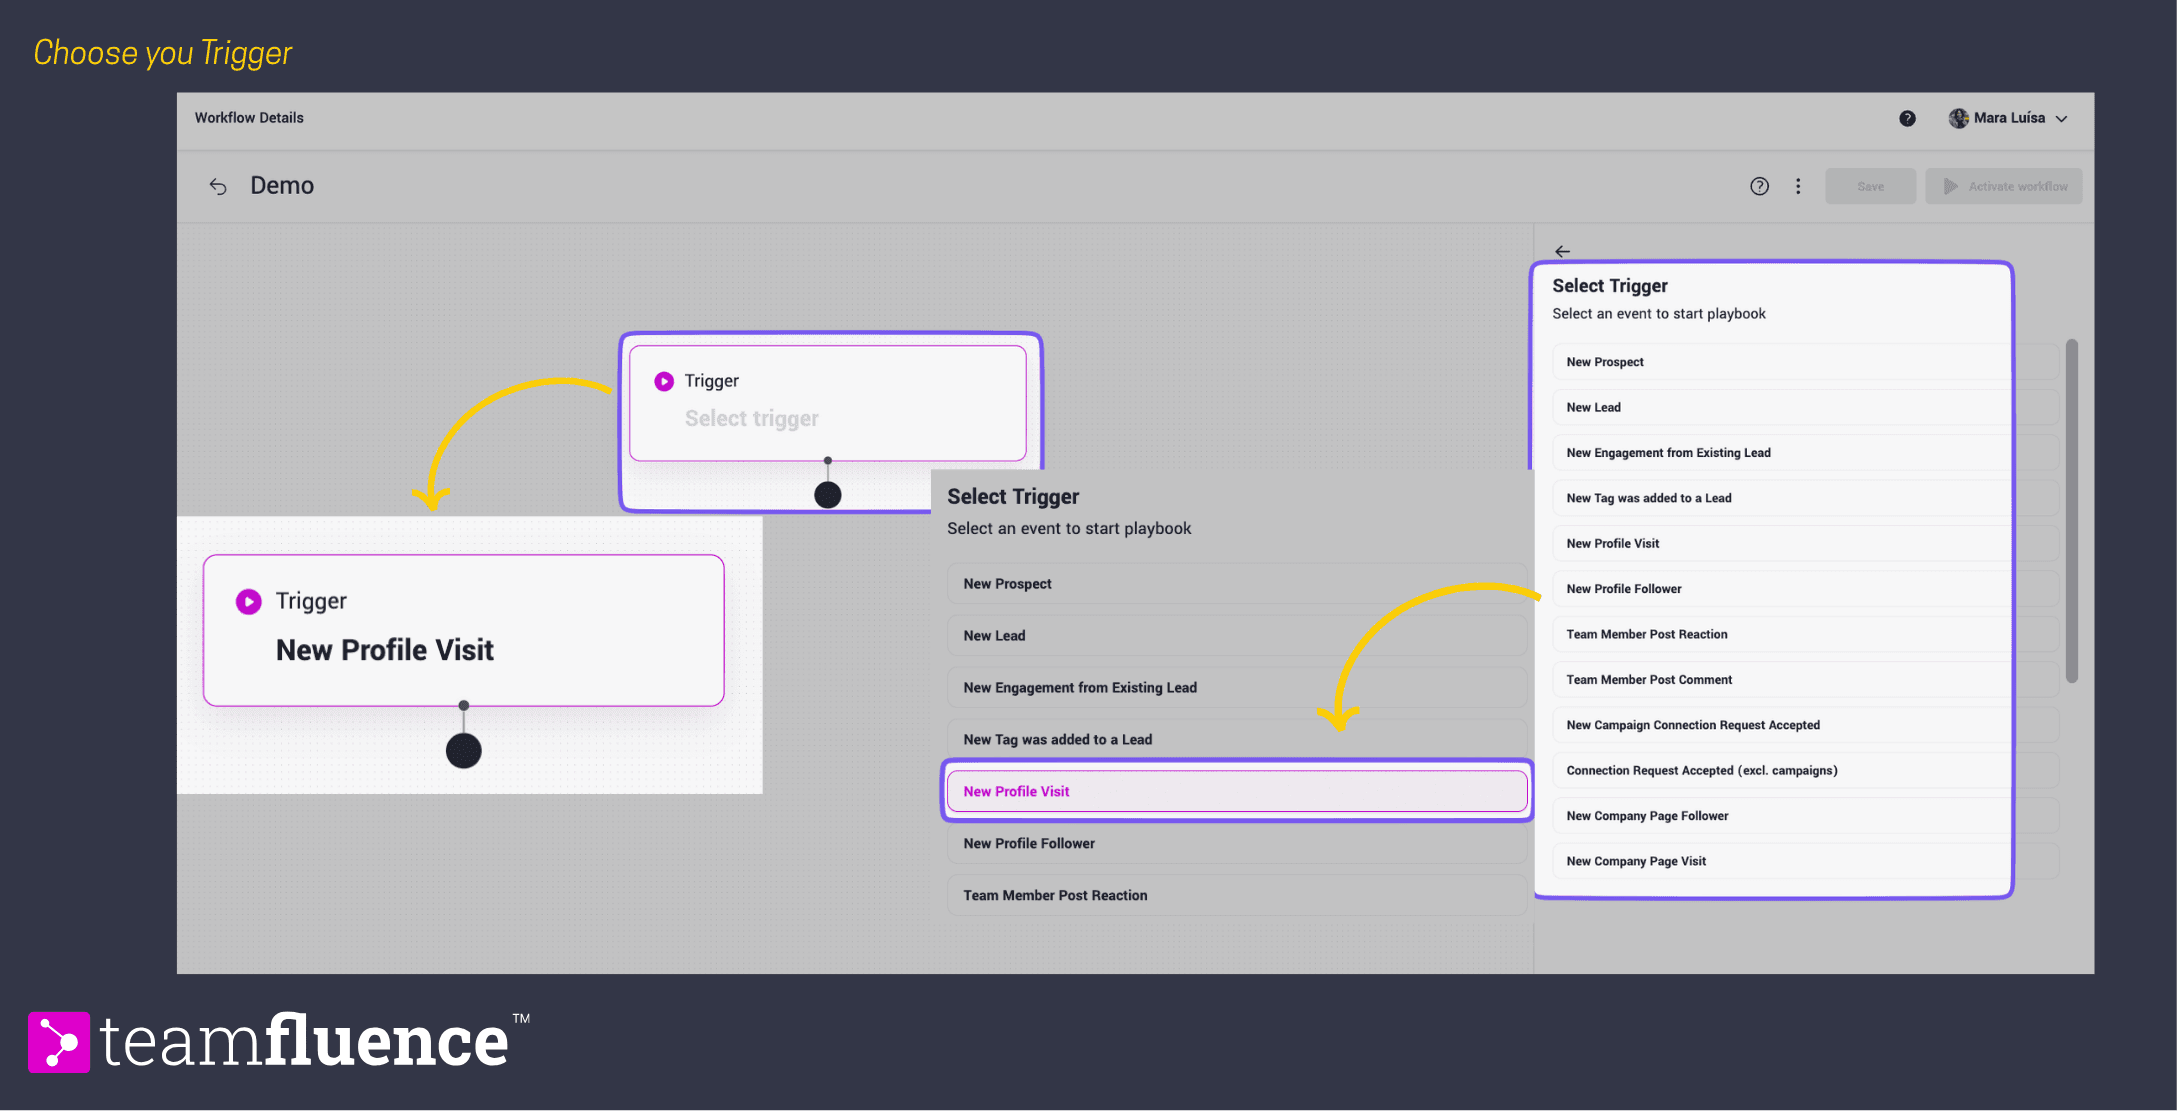
Step 2: Choose your trigger
Triggers are the "when" of your workflow—they define what event kicks everything off.
- Click Select trigger
- Choose New Profile Visit
- Click Next step
Why this trigger? Profile visits are high-intent signals. Someone took the time to look at a LinkedIn profile—that's worth acting on.
Available triggers include:
- New Lead (any engagement type)
- New Prospect (qualified leads)
- Team Member Post Reaction
- Team Member Post Comment
- Profile Visit
- New Connection
- Company Page Follow
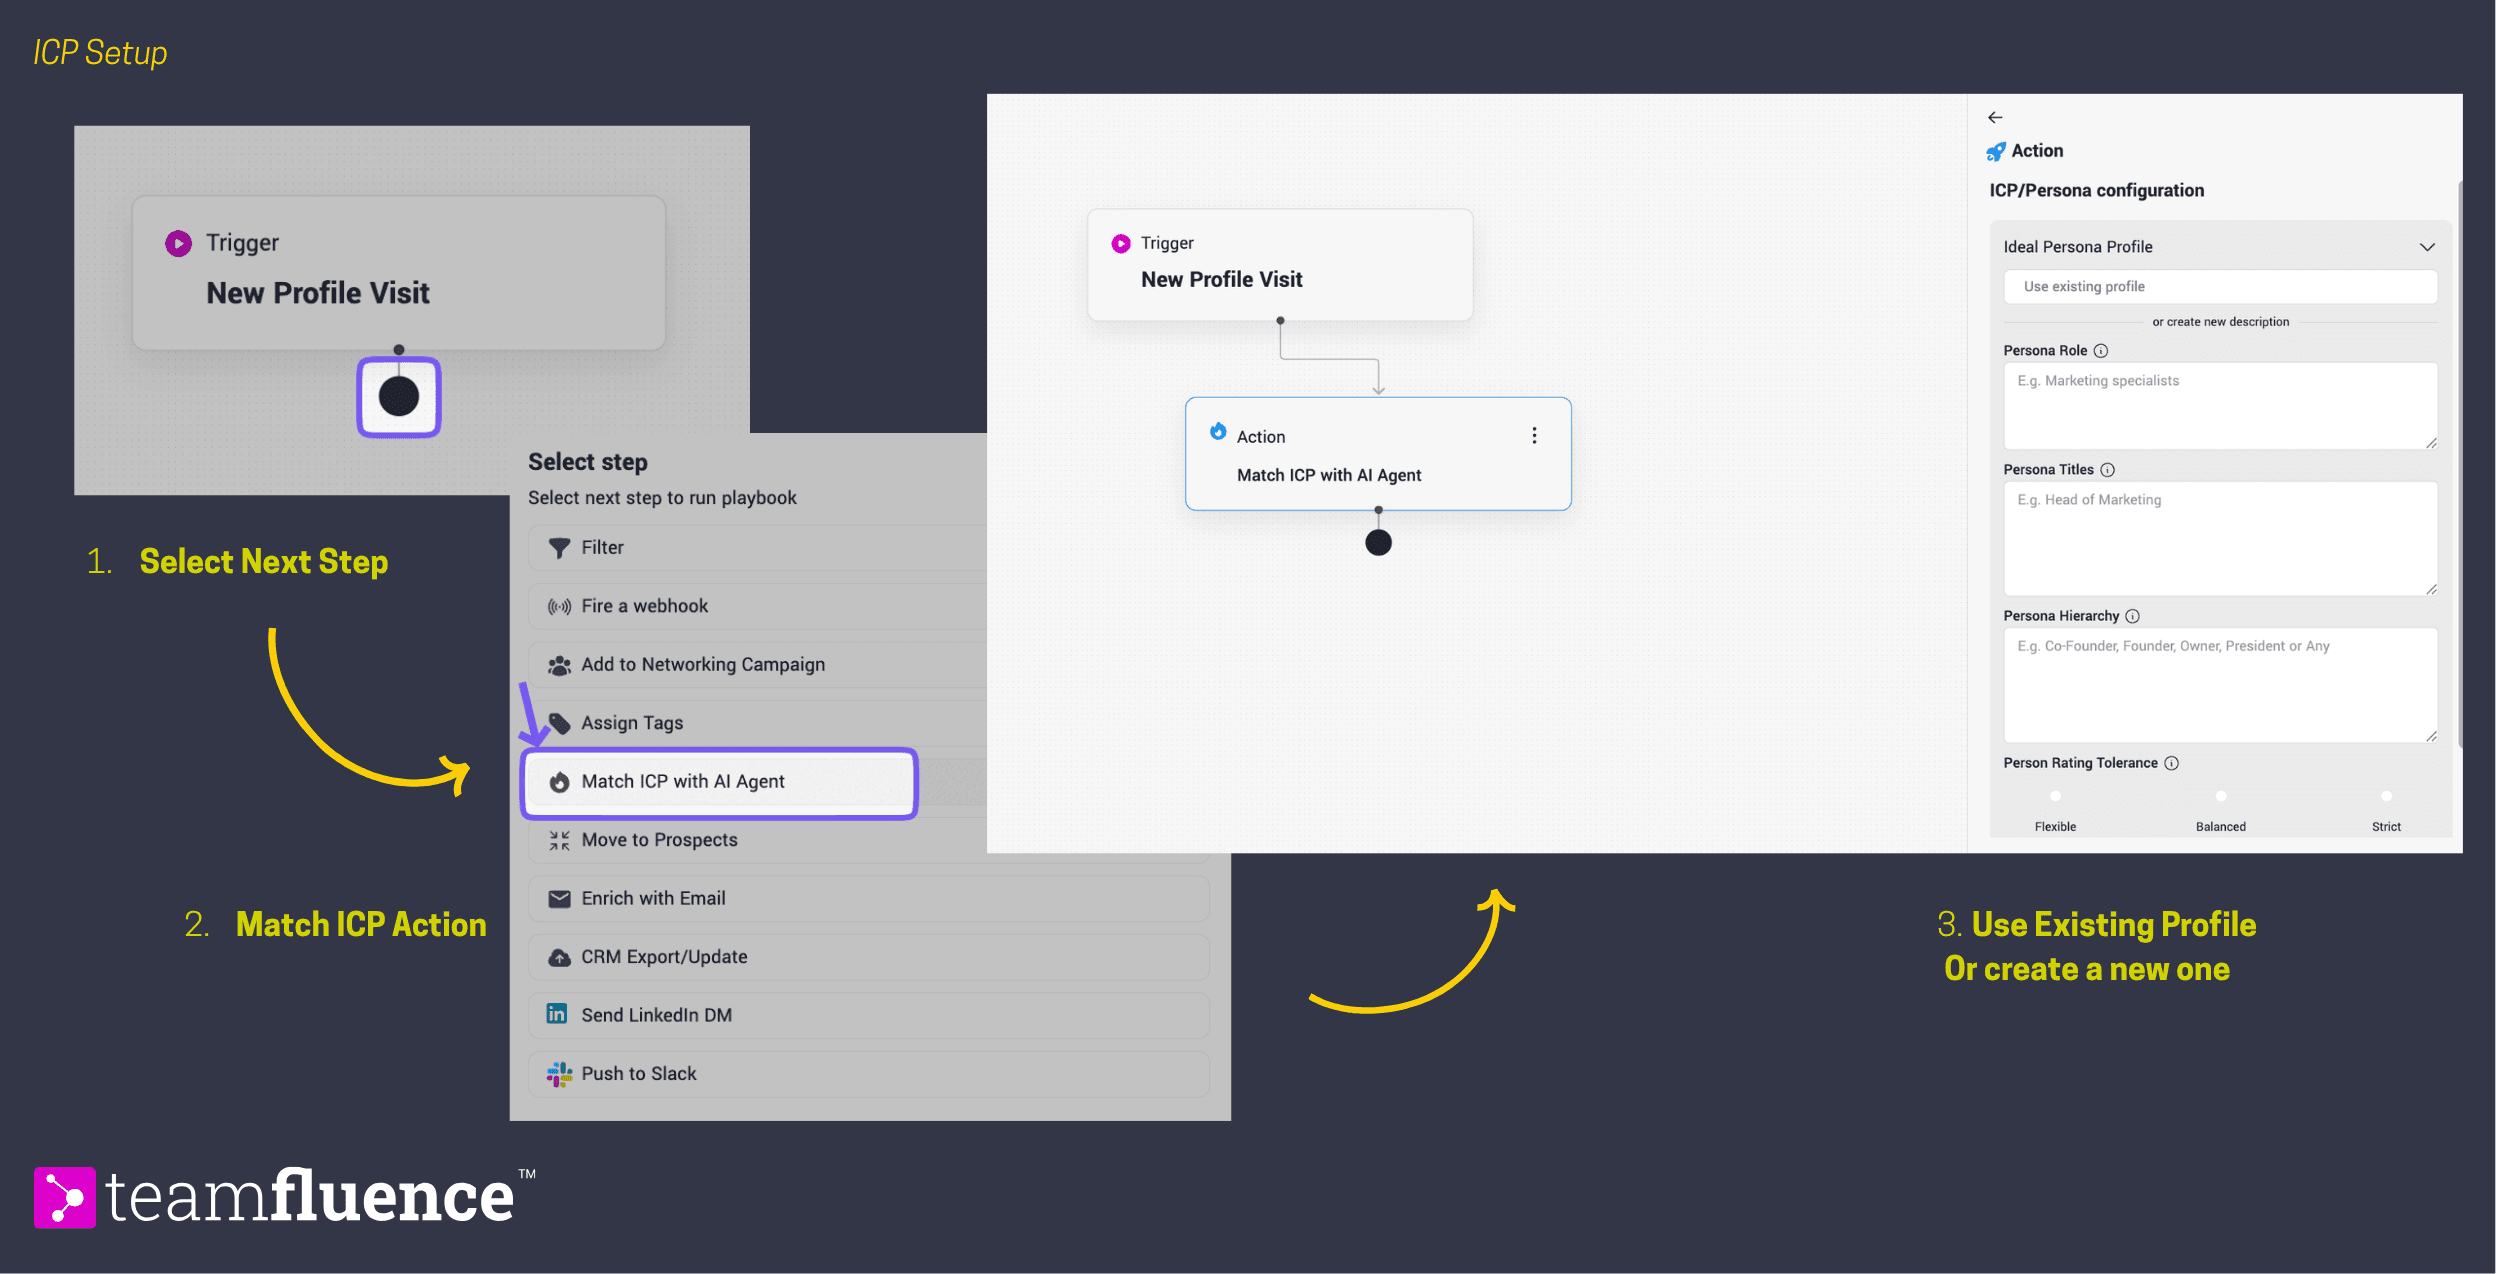
Step 3: Add your first filter action - ICP Match
Now we'll add a filter to sort high-quality leads from noise. Filters are the "if" statements of workflows.
- Click Next step under your trigger
- Select Match ICP with AI Agent
- Choose either the existent ICP for the workspace or create a new profile.
- Select True (we only want matches)
What happens here: Only profile visits from people who match your ICP criteria will continue through the workflow. Non-matches are automatically filtered out.
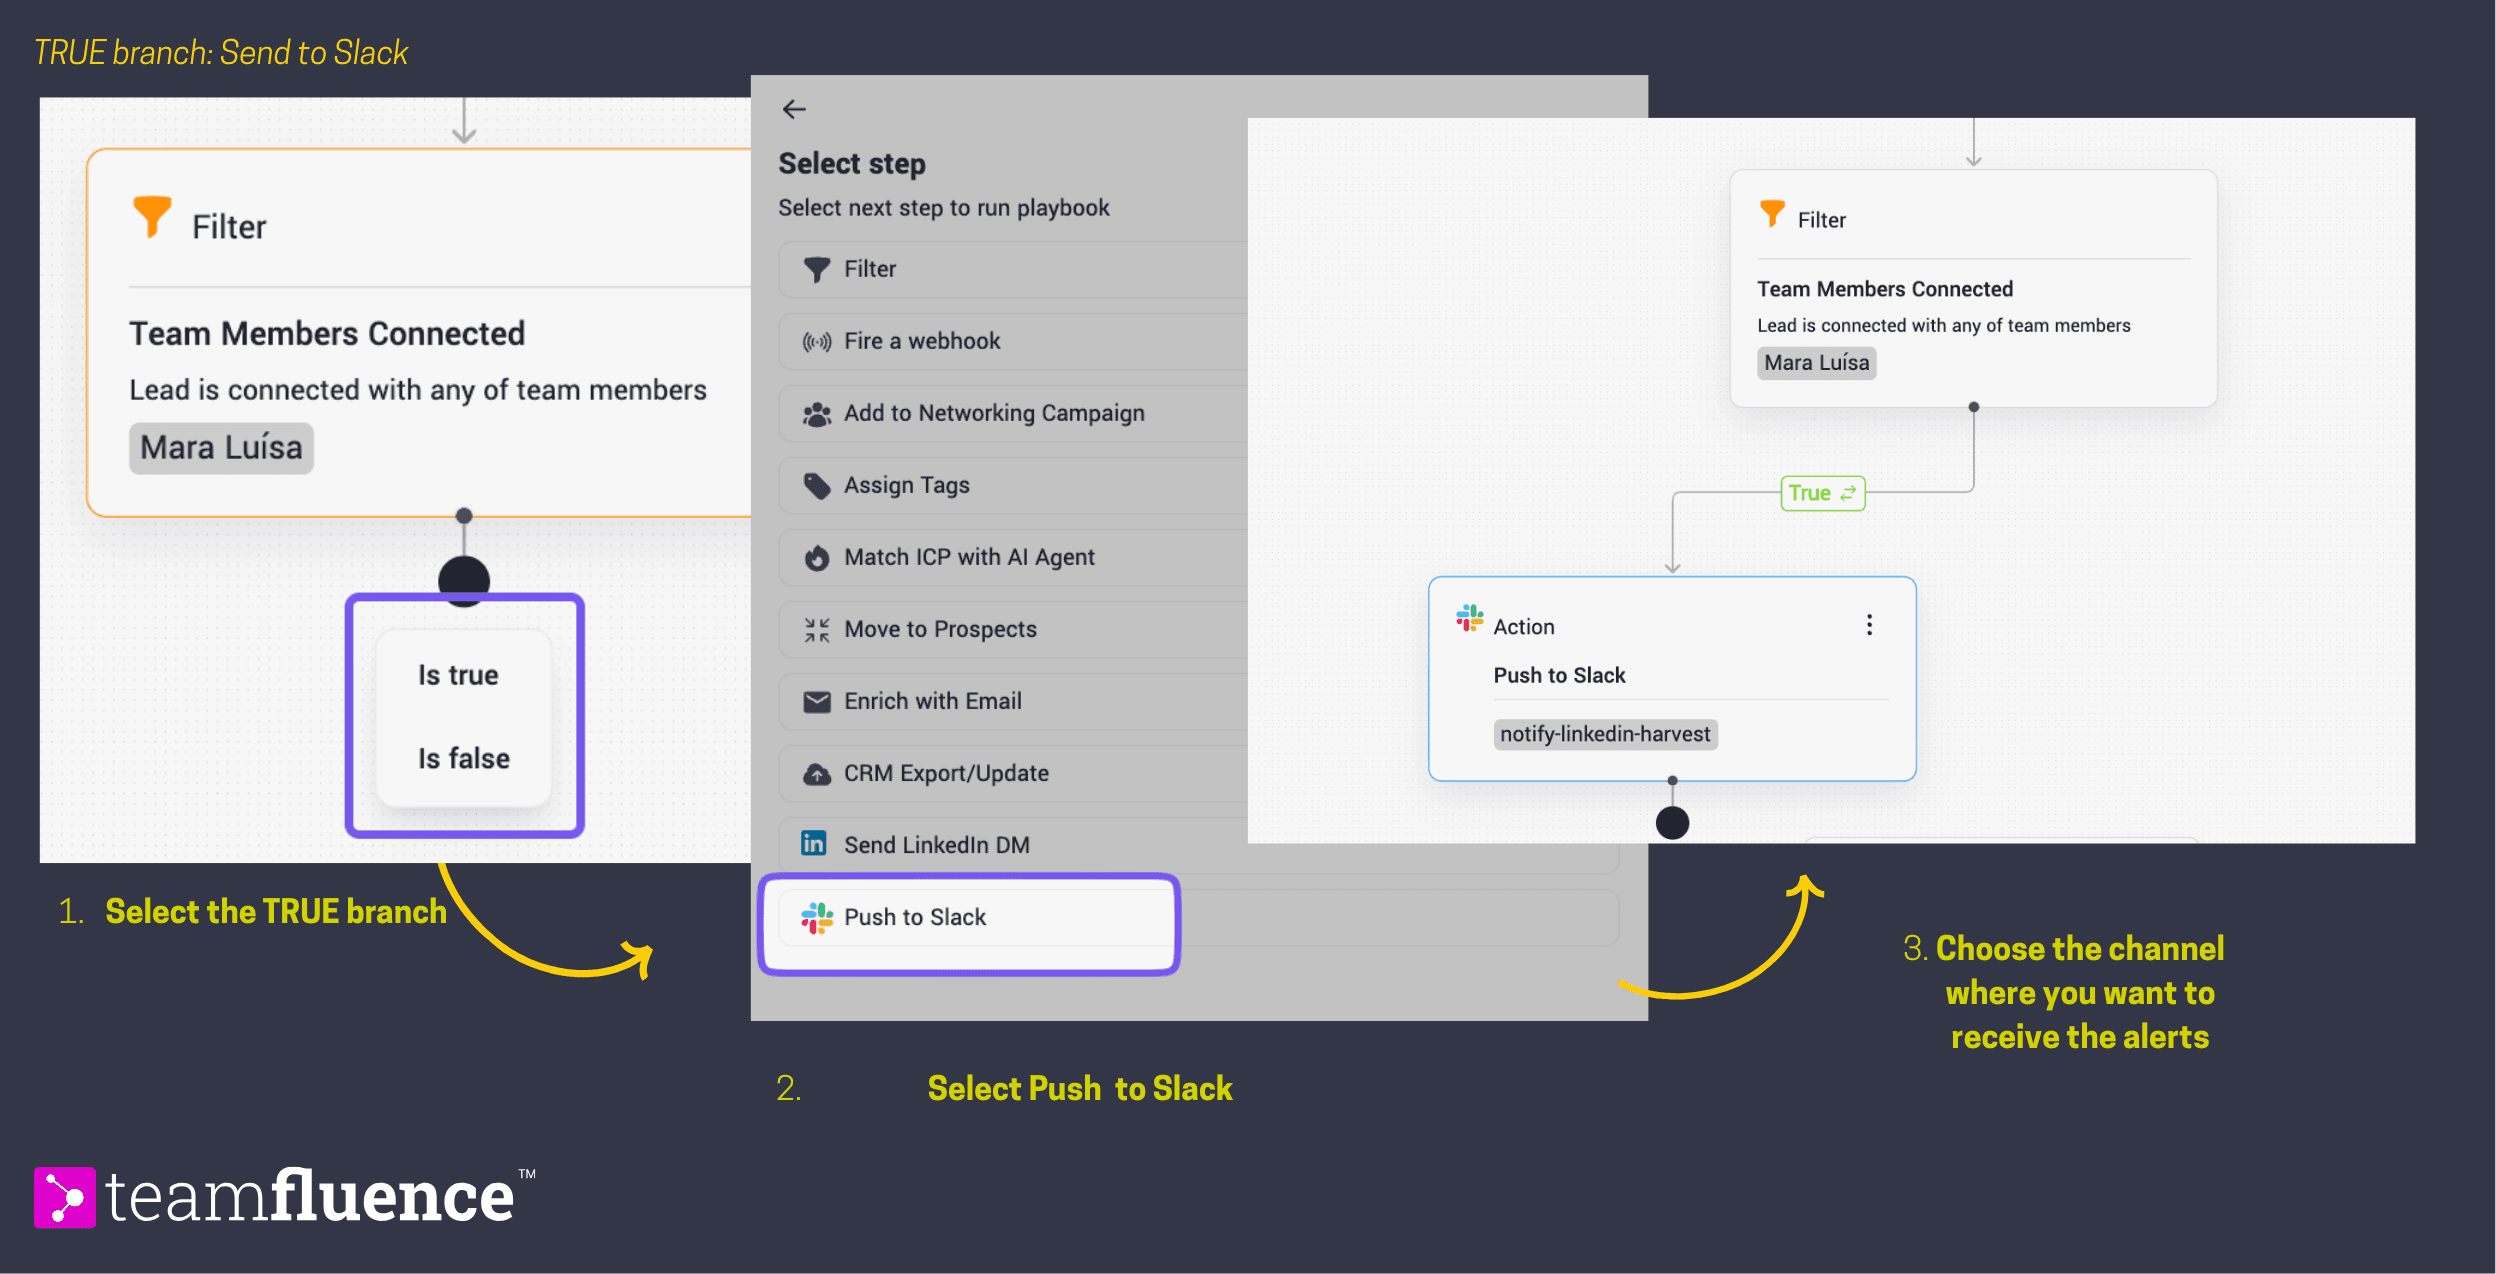
Step 4: Add a second filter - Connection status
Let's split the workflow based on whether you're already connected with the lead.
- Click Next step below the ICP Match filter
- Select Filter
- Choose Team Member Connected
- Select the profile from the dropdown
- This creates two branches: True and False
Why this matters: Connected leads can be messaged directly on LinkedIn. Unconnected leads need connection requests first. Different connection statuses require different actions.

Step 5: Configure the "True" branch - Send to Slack
For leads you're already connected with, send an immediate notification to Slack.
On the True branch:
- Click Next step
- Select the TRUE branch
- Choose Push to Slack
- Select your Slack channel (e.g., "#teamfluence-alerts")
- Check "Allow Slack users to qualify leads" if you want team members to promote leads to prospects directly from Slack
What this does: When there’s an ICP-matched profile visitor who's already connected, your team gets an instant Slack alert with their details.
💡 Pro tip: Create a dedicated Slack channel for workflow notifications to keep your main channels clean.
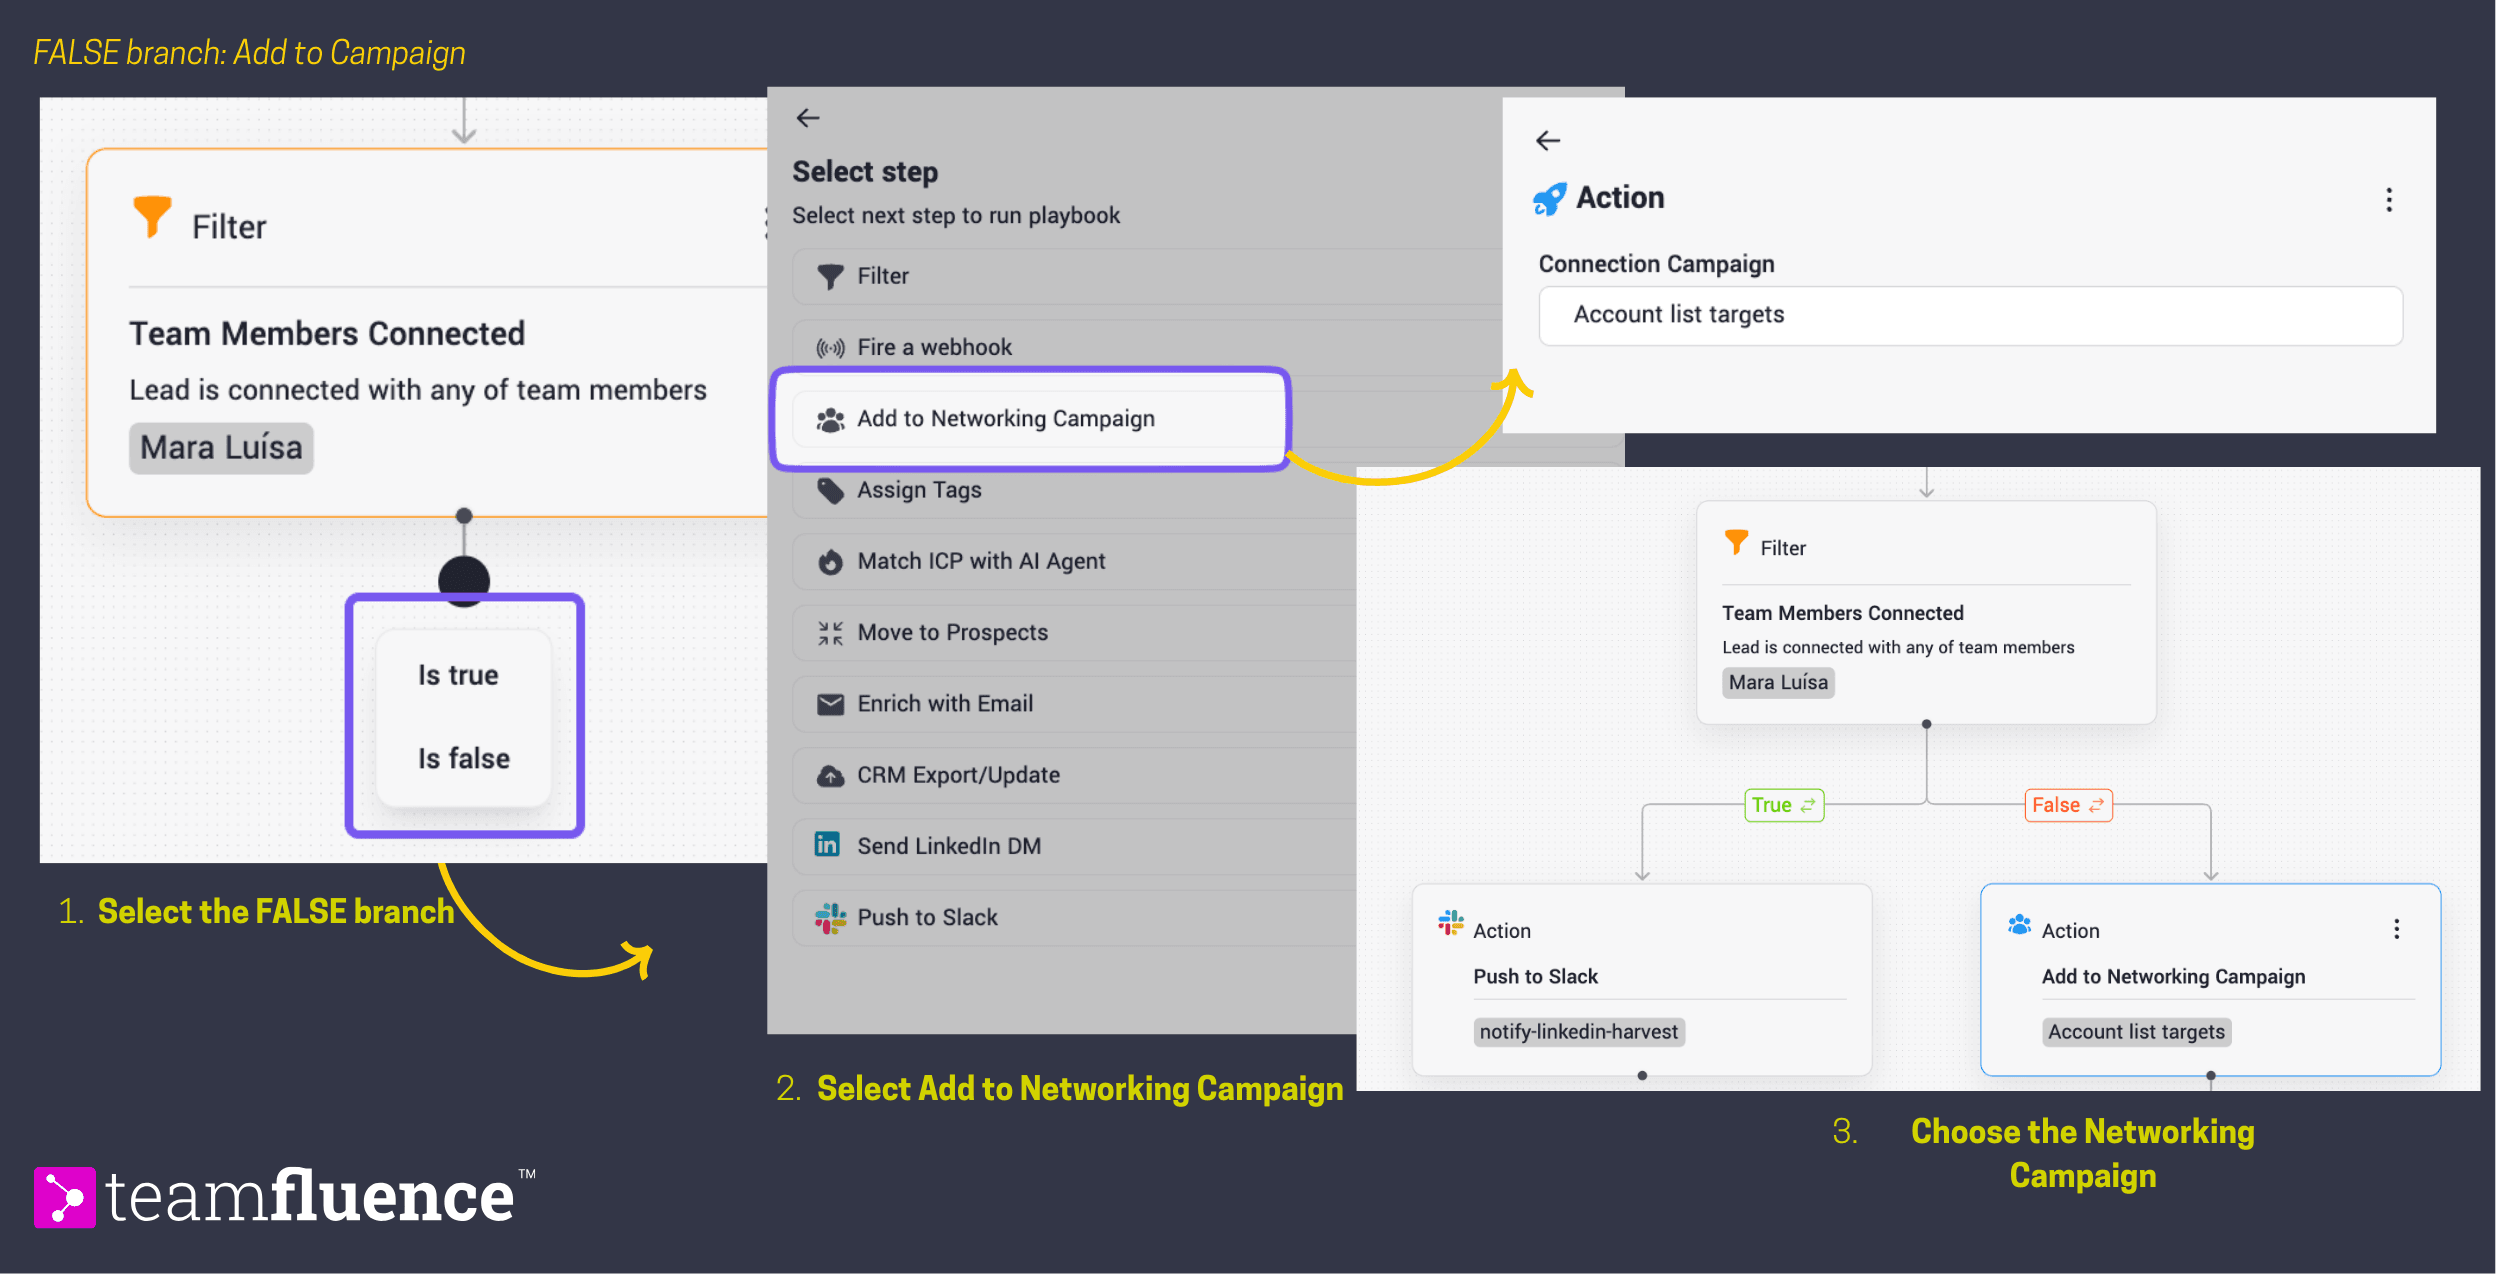
Step 6: Configure the "False" branch - Add to Campaign
For unconnected ICP matches, let's automatically add them to a networking campaign.
On the False branch:
- Click Next step
- Select the FALSE branch
- Choose Add to Networking Campaign
- Select an existing campaign from the dropdown
What this does: Unconnected leads who match your ICP are automatically added to a campaign that will send connection requests over time.
⚠️ Important: Before selecting a campaign, we recommend creating a dedicated campaign specifically for workflow-routed leads. This allows you to:
- Track conversion rates for this specific audience
- Customize messaging for profile visitors vs. other lead sources
- Adjust sending rates independently from other campaigns
Step 7: Name and activate your workflow
- Click the workflow title at the top (default: "Untitled Workflow")
- Rename it to something descriptive: "Profile Visits → ICP → Route by Connection"
- Toggle the switch to Active
Naming tips: Use descriptive names that explain the trigger → filter → action flow. You'll thank yourself when you have multiple workflows running.
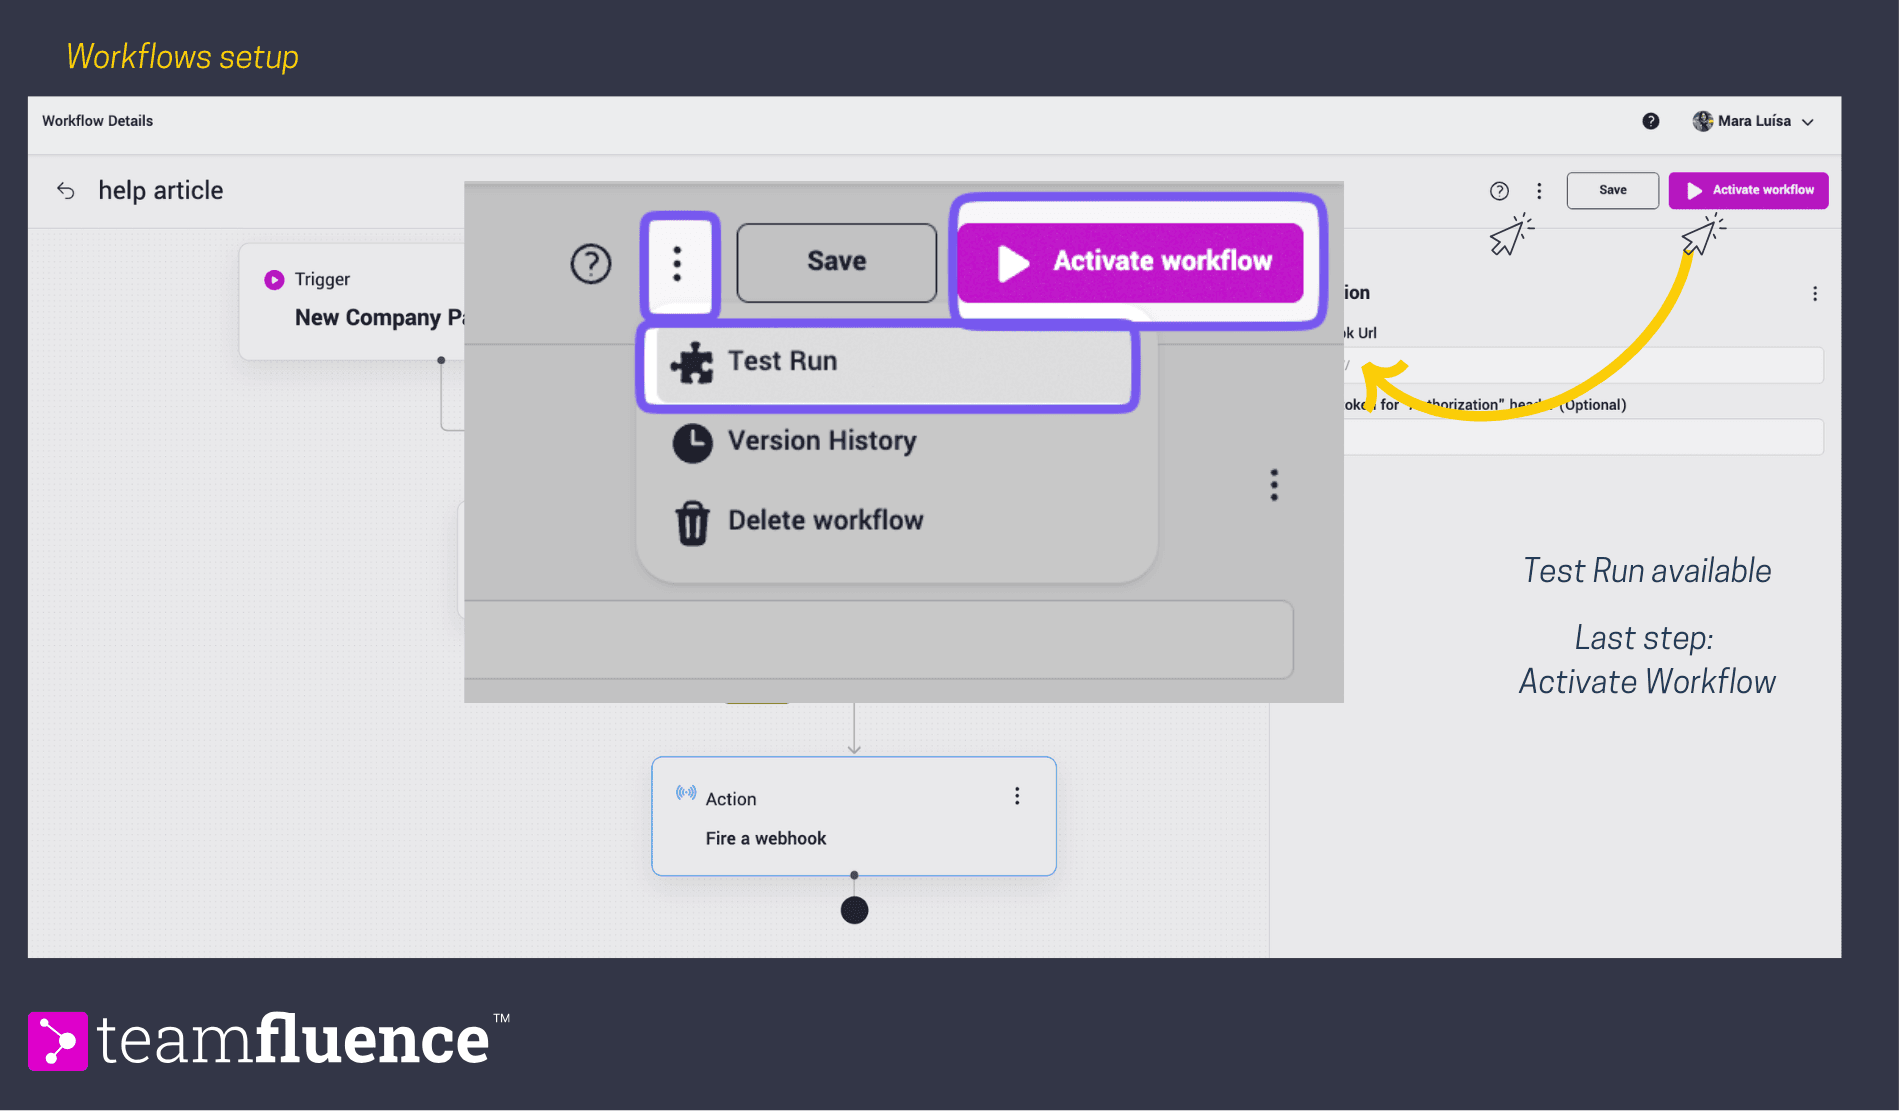
Step 8: Test your workflow
Before relying on your workflow, test it with real data.
- Click the three-dot menu (⋮) on any step
- Select Test run
- Review the test results to confirm the workflow behaves as expected
What to check:
- Are leads being filtered correctly?
- Do Slack notifications appear in the right channel?
- Are leads being added to the correct campaign?
You did it!
Your first workflow is now live and automating lead qualification and routing. As profile visits come in, your workflow will:
✅ Identify ICP matches automatically
✅ Send immediate Slack alerts for connected leads
✅ Queue networking campaigns for unconnected leads
What happens next: Your workflow runs automatically in the background. Check back in 24-48 hours to see leads flowing through the system.
Next steps
Save time on your next workflow: Download pre-built template and customize them for your workspace in minutes. The template is ready to import - just update your ICP criteria, select your channels and team member, and activate.